


CH4RL13, my robot pet
This is my first robot project. I have experience with programming but all of the electronics and engineering stuff is new to me. My prototype gets around pretty well when the sensors work properly, but I'm getting some voltage spikes that make it tricky. Eventually this robot will have a few more lights, a PIR sensor, a servo, a small speaker, and a simple control panel for setting operating modes. Plus a sleek acrylic chassis.
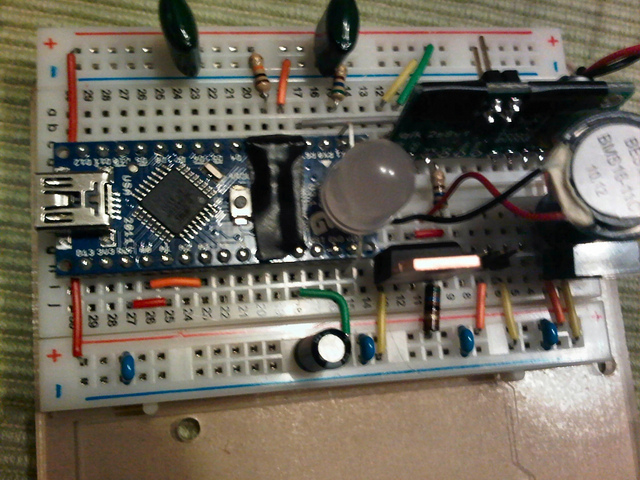
I decided to go with an Arduino Nano instead of my Uno. In addition to the 2 power wires connected at the top-right, there will be 26 wires connected to this circuit: 4 for the motors, 3 for the top-mounted motion sensor, 7 for the control panel (a button, a knob, and a multi-color LED), 9 for the front proximity sensors, and 3 for a small servo motor. It will be a jumble of wires, for sure, but I tried to design it so that all the wires going to/from a particular area of the robot all connect in the same part of the board. The large LED in the middle will bathe the interior of my robot in cool blue. The round component at the right of the image is the tone generator.
Right now it rolls, and mostly doesn't hit things.
- Actuators / output devices: 2 * 50:1 Micro Metal Gearmotor HP from pololu together with Qik 2s9v1
- Control method: autonomous
- CPU: Arduino Uno R3
- Power source: 7.4V Li-Ion rechargeable pack
- Programming language: Arduino
- Sensors / input devices: 3 Sharp IR sensors, forward and 45s
- Target environment: indoor