


Bot4Julia, a Start Here CD robot, Arduino clone
This is a Start Here robot style I built for my daughter Julia, so she can have something to play with, because she keeps bugging me wanting to play with my MiniEric robot. (I allow her to remote control it some times, but she still grabs his arms and breaks the servo gears.)
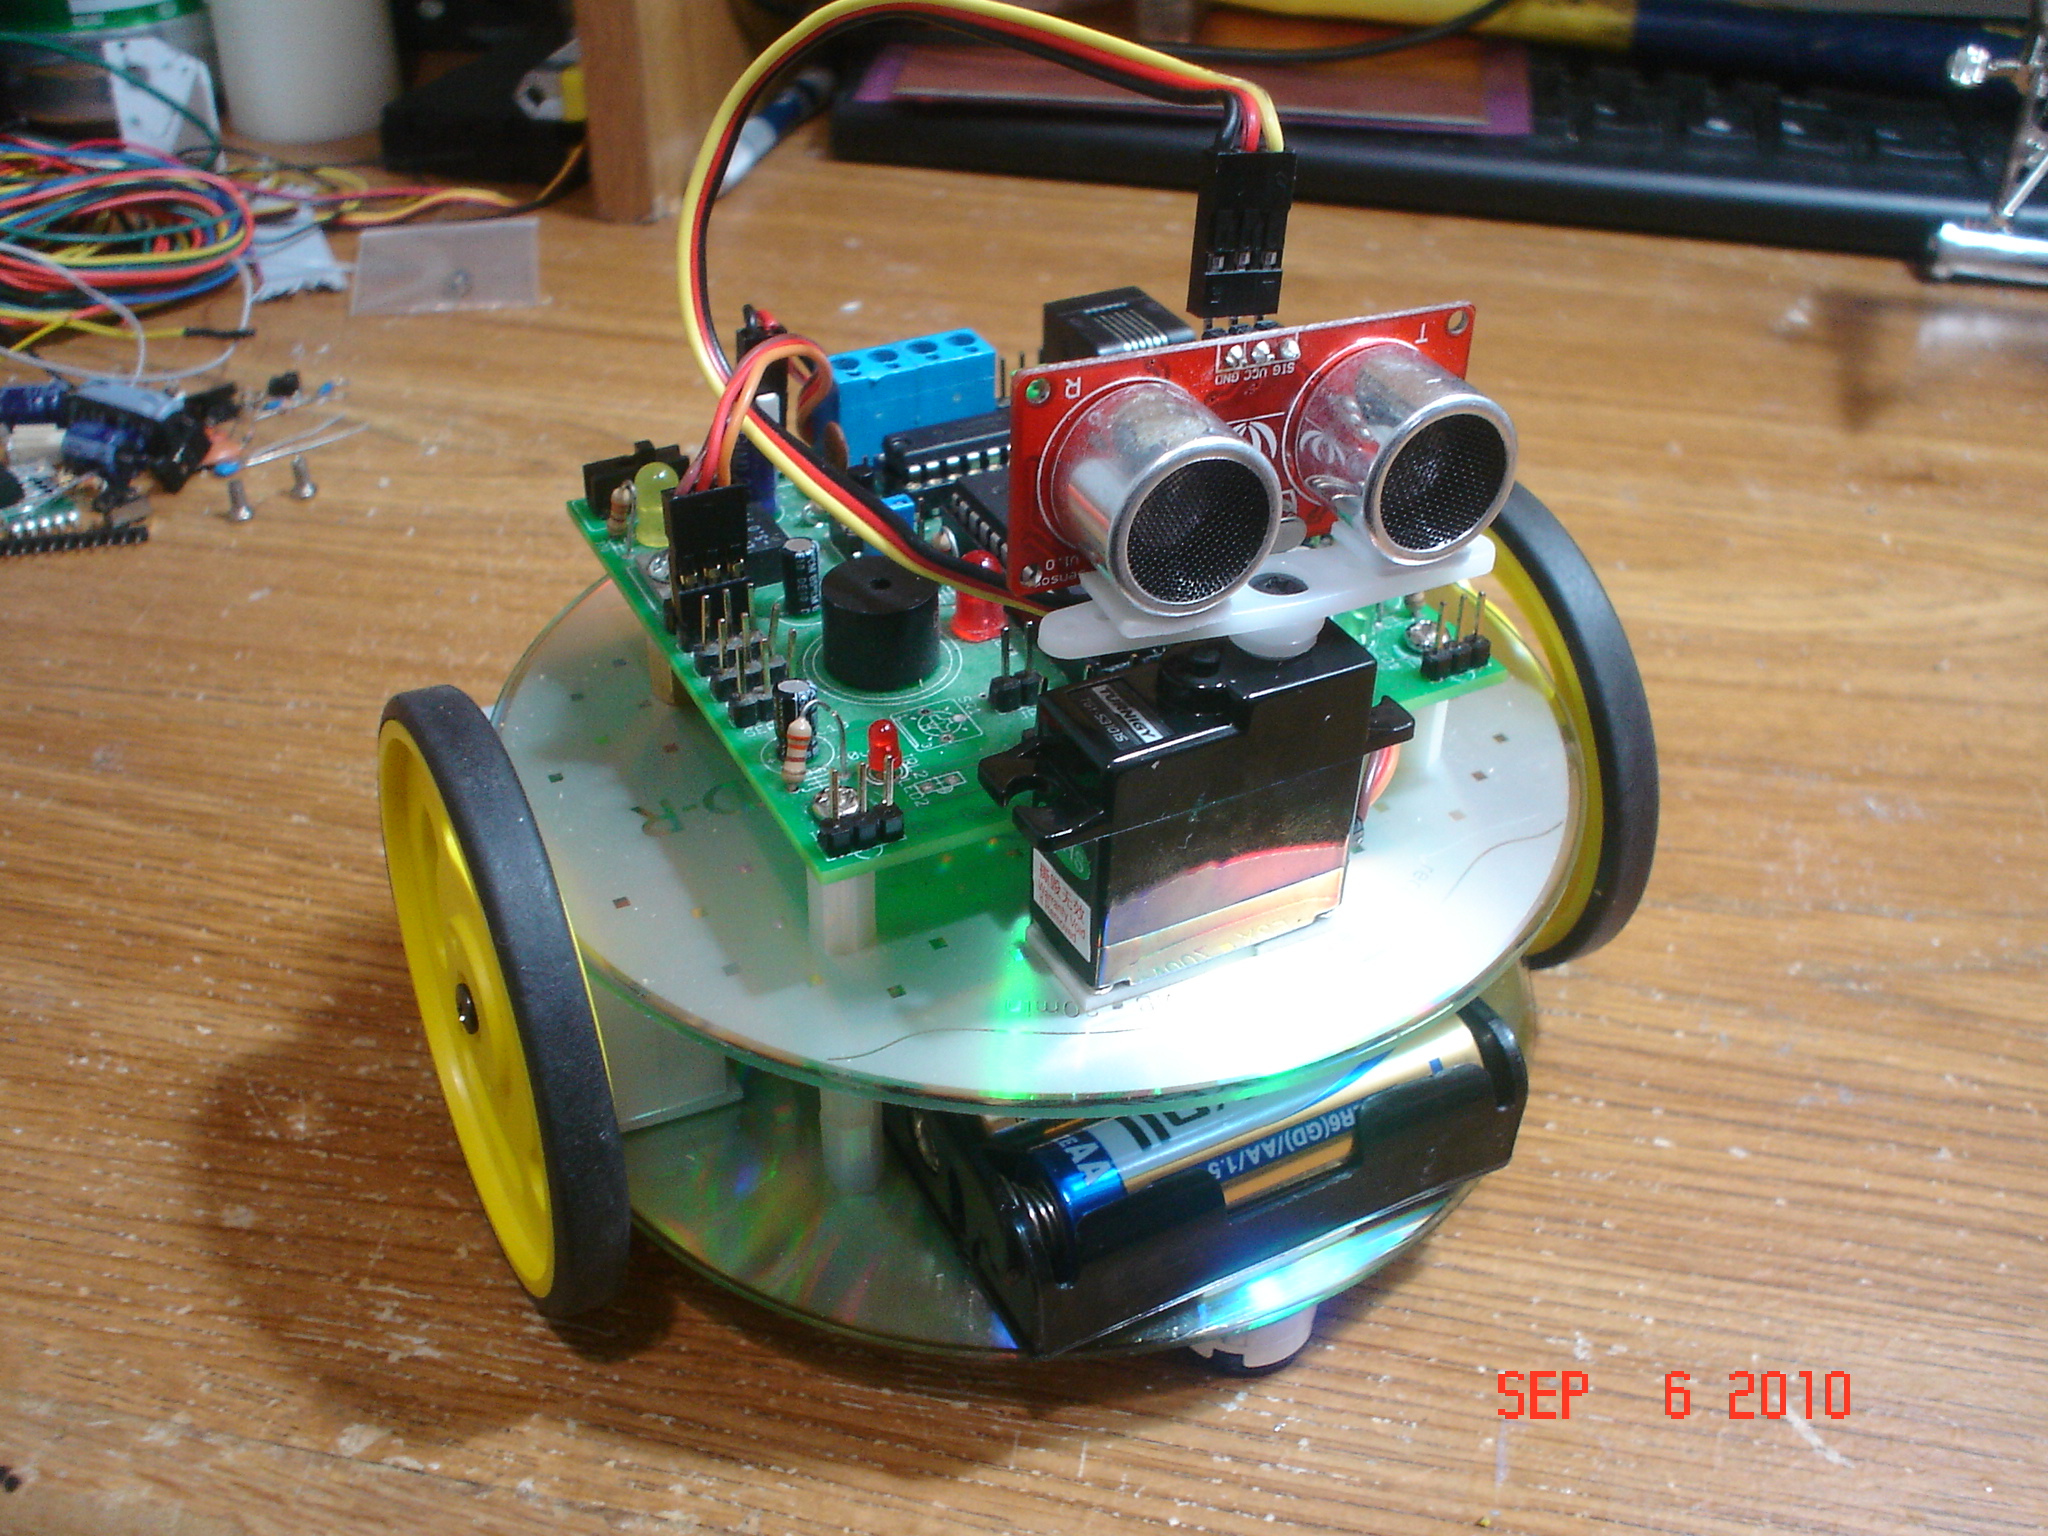
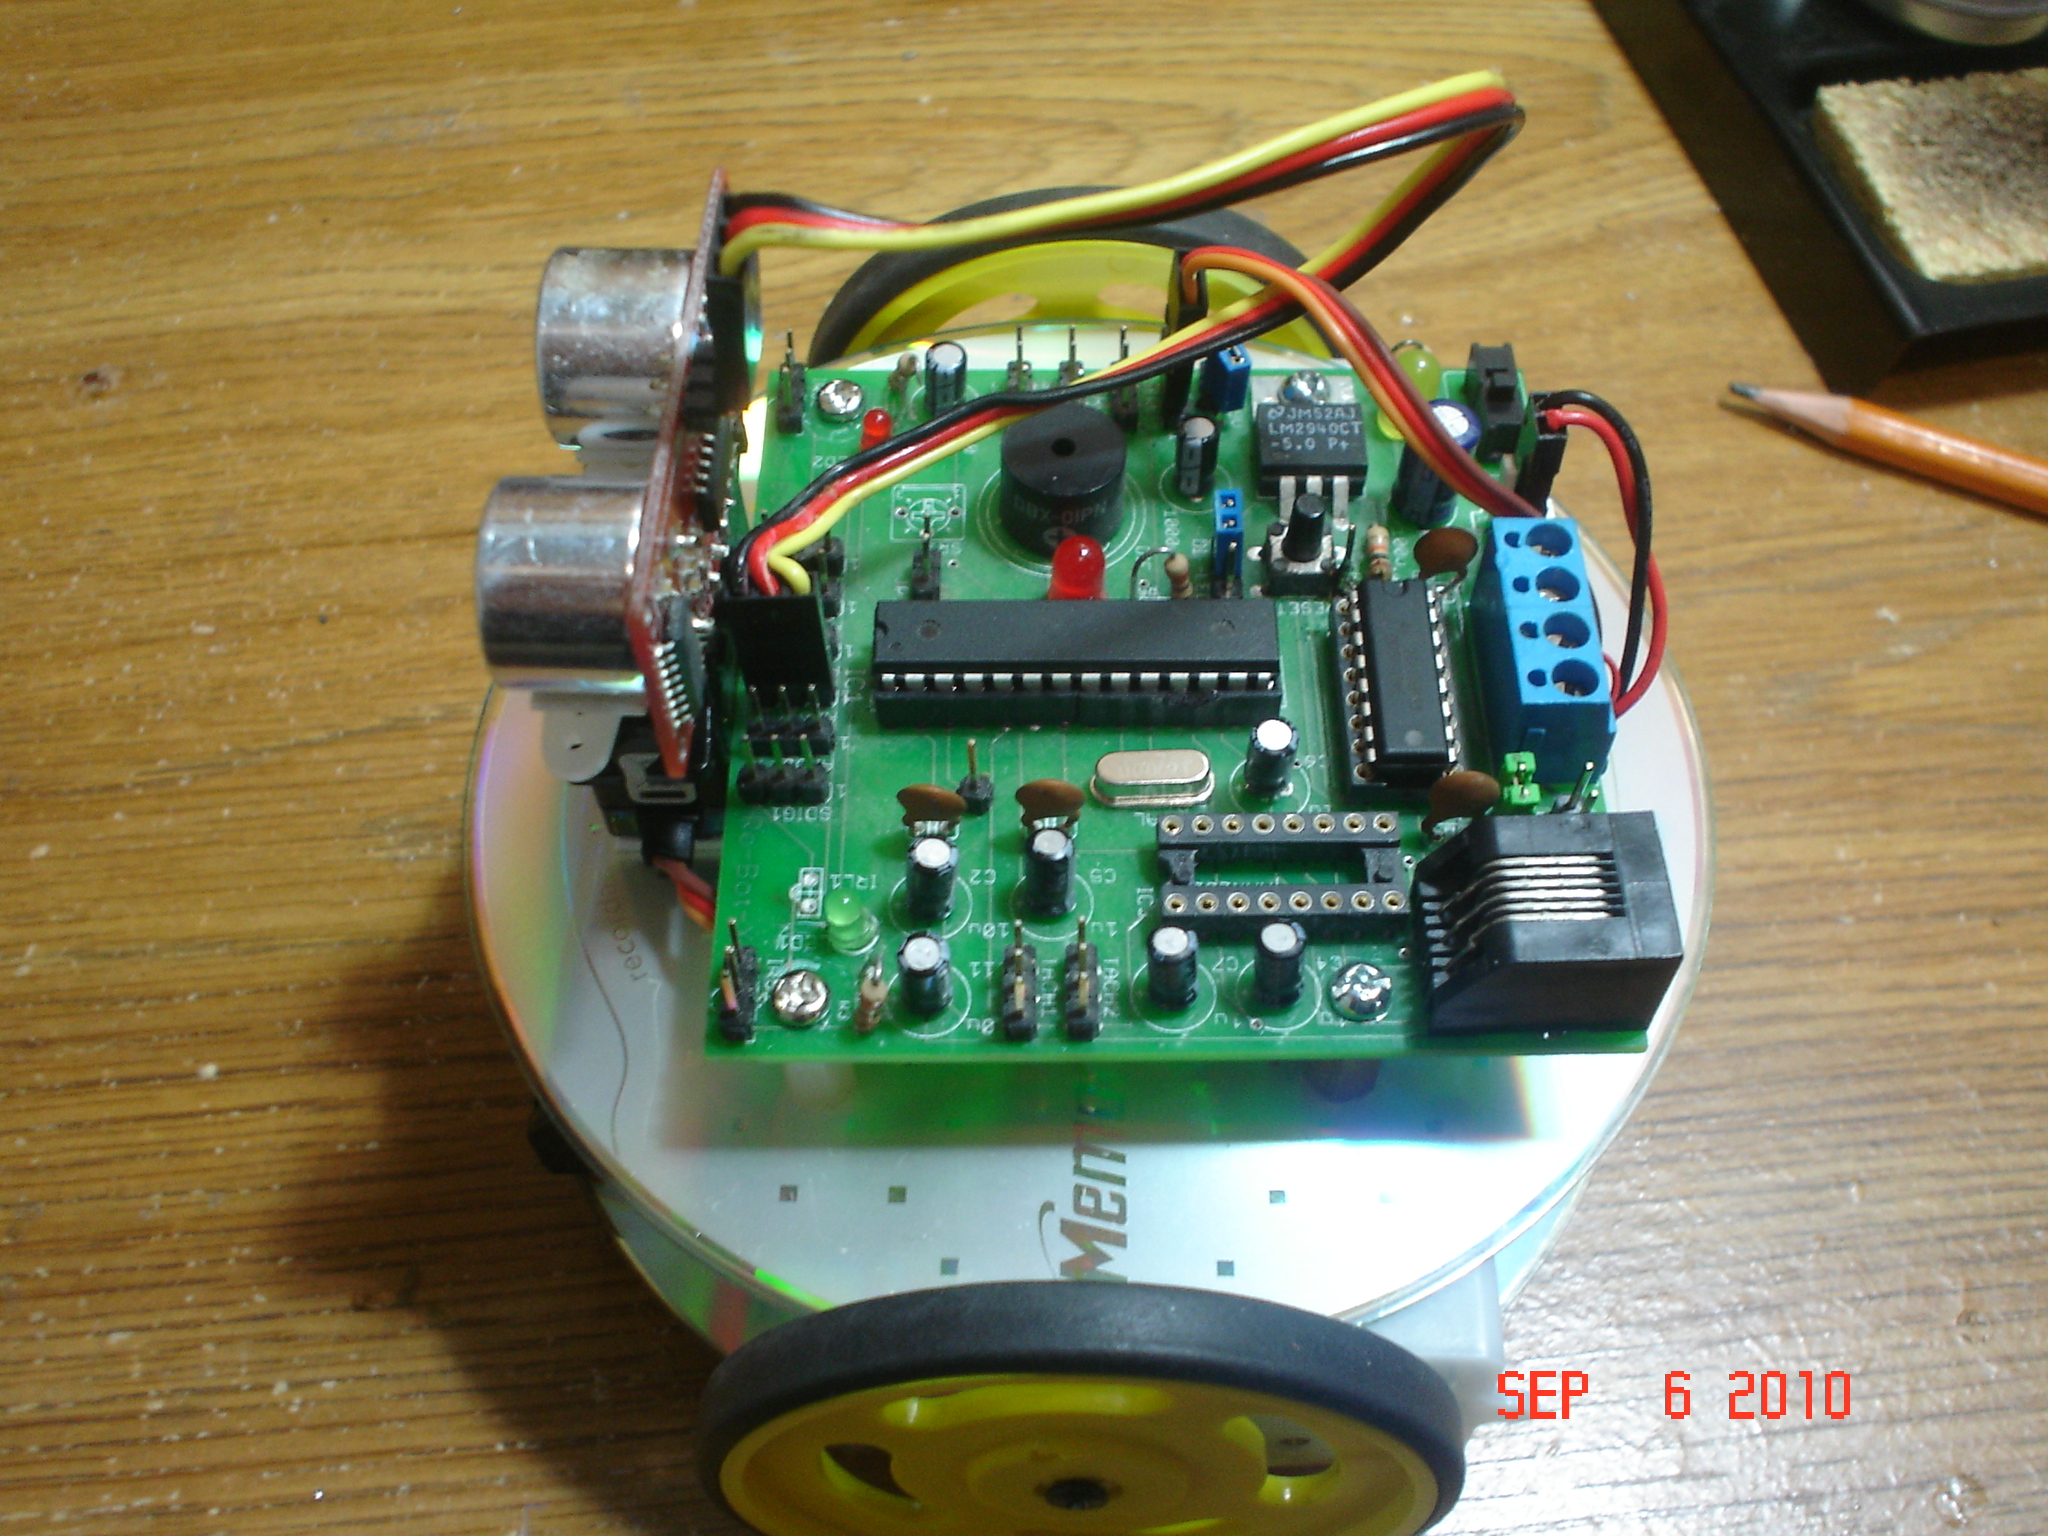
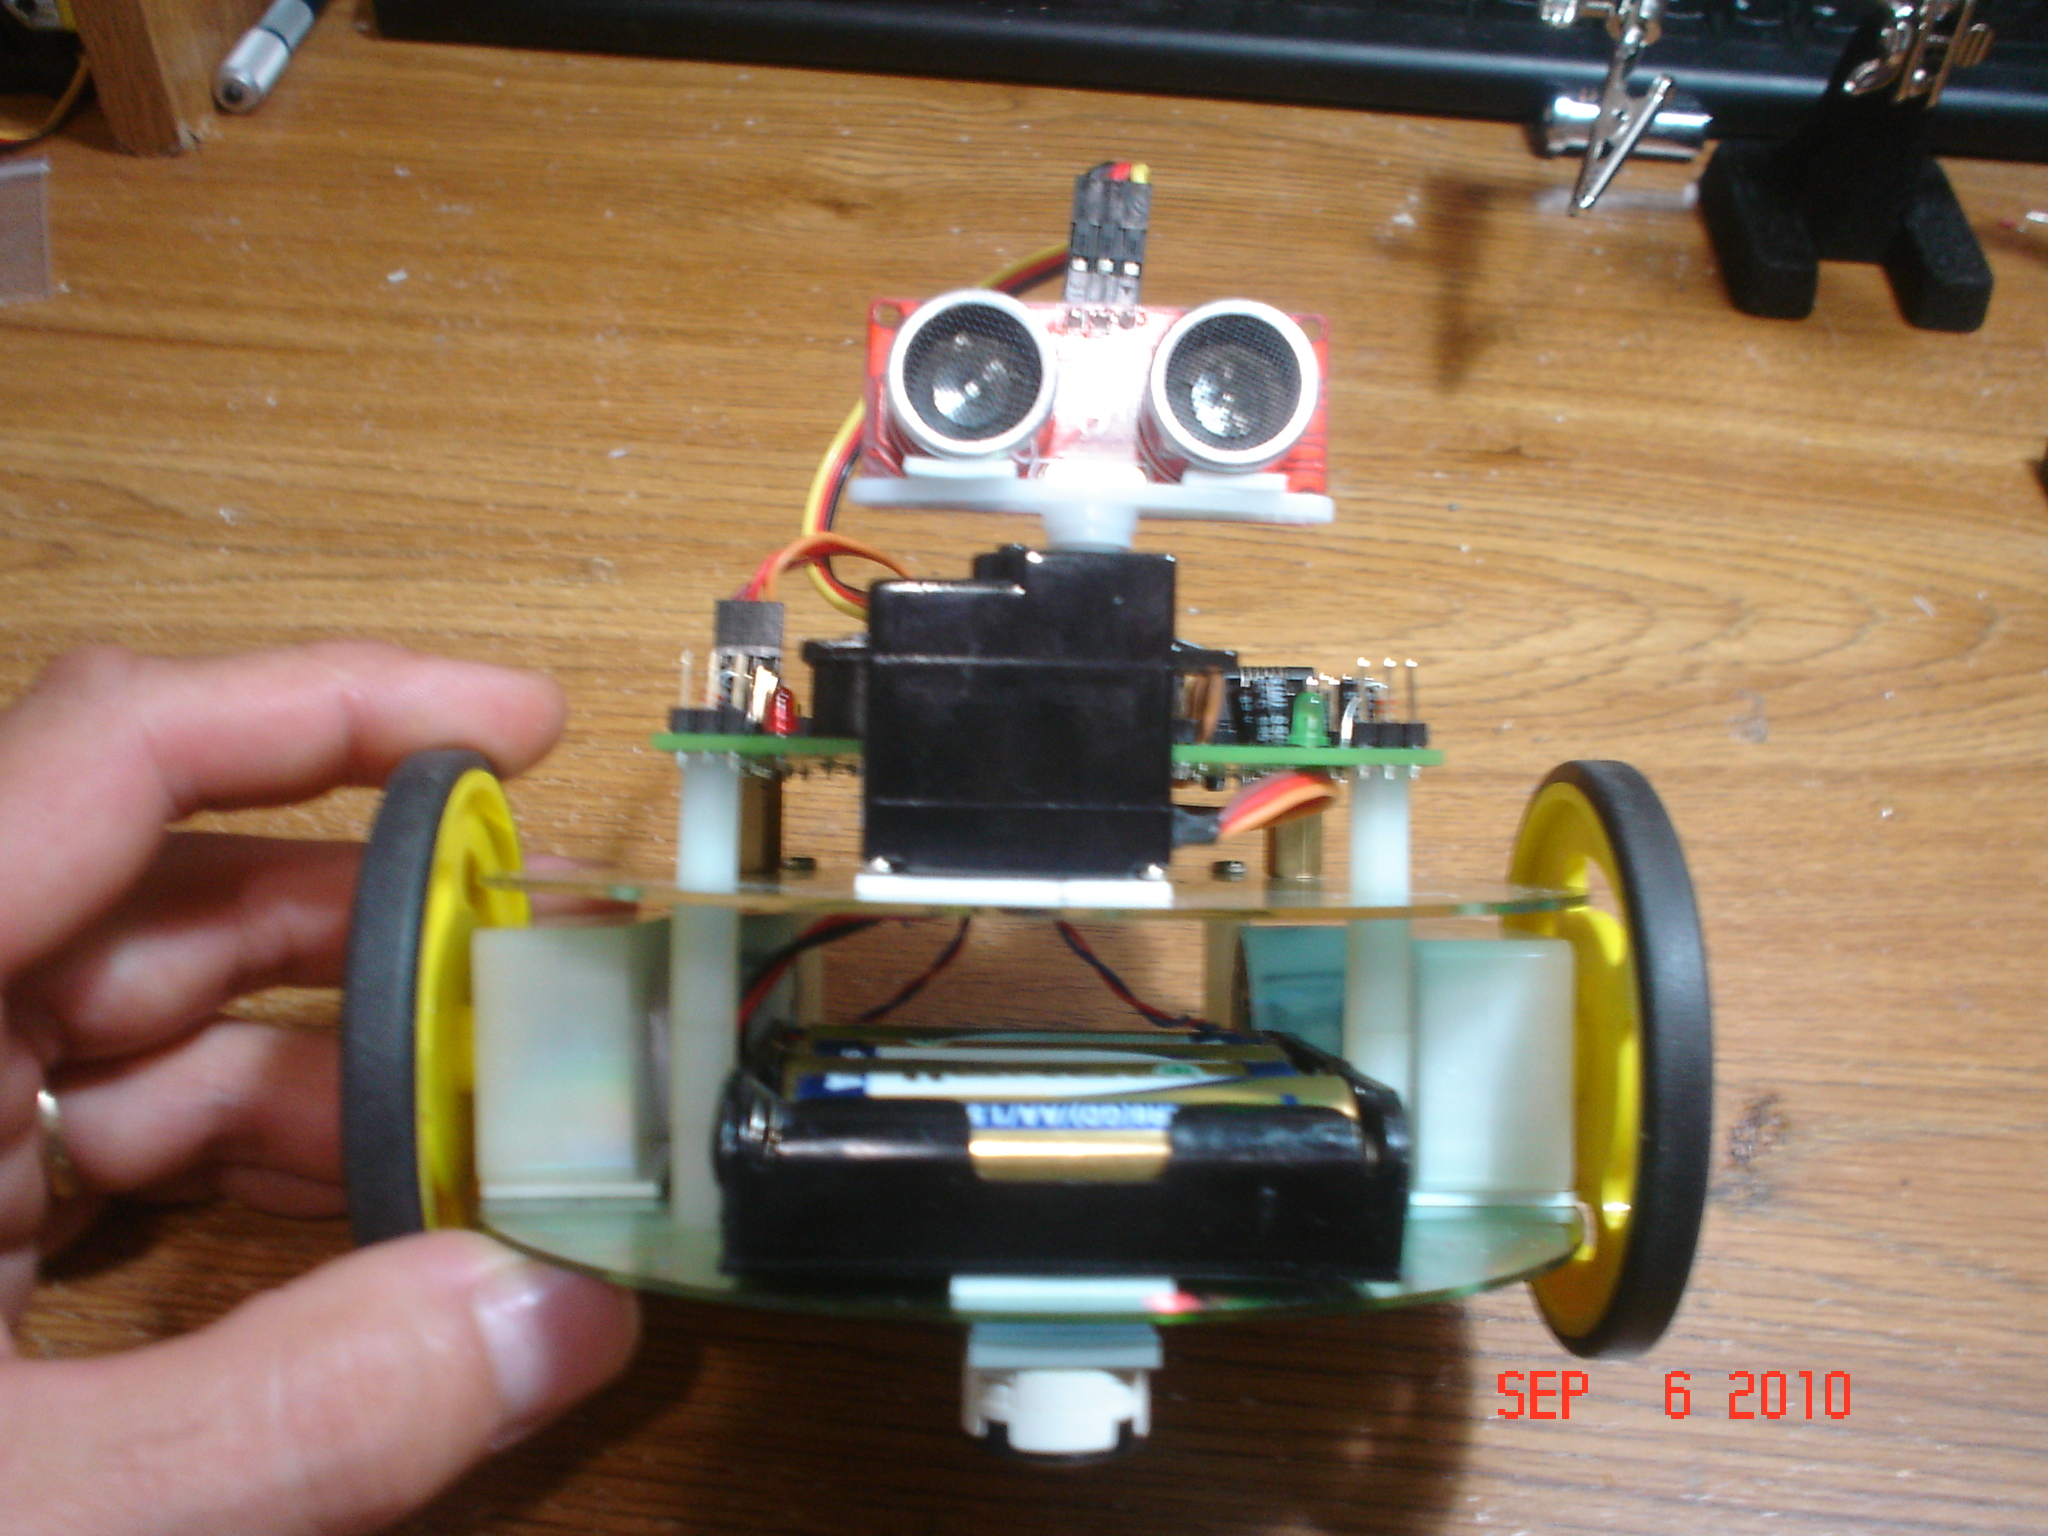
Here is Bot4Julia. To build one, the recipe is simple. Get 2 CDs, drill holes for standoffs, attach 2 geared motors (I used GM17 just because I had them) with double side foam tape, a battery box, then mount the second CD on the standoffs, feed the wires through the second CD center hole, add some more standoffs for the PCB, plug the wires in the proper sockets, use some more double side tape to attach a small servo and a SeeedStudio US sensor (works like a Ping sensor, costs only $15) on the servo horn, plug them on the board and start programming. I used an old Ro-Bot-X board I designed years ago. This board had a MAX232 serial converter on board, but my laptop does not have a serial port anymore, so instead of making an adapter, I just unplugged the ATmega168 and plugged it in the Roboduino board for programming. This is OK for one time, but I had to repeat this operation about 20 times to be able to tweak out parts of the code. This board will soon be replaced by a uBotino board that will allow easy programming has everything needed for this robot. I did not intended this robot to be a tutorial, so I did not take pictures at the time of construction. Here are the pictures after the robot was built:
The code is simple, but I had to overcome some hardware problems. First, the motors do not have encoders, and one is spinning faster than the other. So I had to find a good PWM value to keep them running at the same speed. Then I had to find out the turning time so the robot turns 90 degrees good enough. So I made a Square function, that drives Forward for 2 seconds, turns Right 90 degrees and so on 4 times to make a square. Once this was done, I wrote some simple avoiding routine that needs improving, but for now it's good enough to have fun with the robot. I will add remote control and let the robot avoid objects when necessary. This way my daughter can tel the robot where to go, but there will still be some autonomous routines in there. She also wants me to add arms to the robot, I'll have to work on something...
Oh, I had to use the SoftwareServo library, because the motors use the Timer1 for PWM (uBotino avoids this using Timer0) so they were fighting for the same Timer.
Here is the code so far:
// Bot4Julia, a simple Start Here style robot, made with 2 CDs,
// 2 GM17 motors and wheels, one servo, one SeeedStudio US sensor,
// one battery box, one Ro-Bot-X board (will be replaced by a uBotino)
//
// Ro-Bot-X board pinout:
//
// Ext RBX Funct Arduino ATmega168 Arduino Funct RBX External
// +-----\/----+
// Reset 1| PC6 PC5 |28 D19 A5 SCL
// Rx D0 2| PD0 PC4 |27 D18 A4 SDA
// Tx D1 3| PD1 PC3 |26 D17 A3
// Int0 D2 4| PD2 PC2 |25 D16 A2
// Int1 D3 5| PD3 PC1 |24 D15 A1 Ping
// S1 D4 6| PD4 PC0 |23 D14 A0
// 7| VCC GND |22
// 8| GND AREF |21
// Xtal 9| PB6 AVCC |20
// Xtal 10| PB7 PB5 |19 D13 SCK
// S2 OC0B D5 11| PD5 PB4 |18 D12 MISO M1B
// OC0A D6 12| PD6 PB3 |17 D11 OC2A MOSI
// Pan D7 13| PD7 PB2 |16 D10 OC1B M2A
// M2B (S3) D8 14| PB0 PB1 |15 D 9 OC1A (S4) M1A
// +-----------+
//
#include <SoftwareServo.h>
#include <Speaker.h>
//Inputs/outputs
//#define Encoder_1_ChA 2 // digital pin 2 // Right Encoder
//#define Encoder_1_ChB 6 // digital pin 6
//#define Encoder_2_ChA 3 // digital pin 3 // Left Encoder
//#define Encoder_2_ChB 14 // digital pin 14
#define Motor_1_PWM 9 // digital pin 9 // Right Motor
#define Motor_1_Dir 12 // digital pin 12
#define Motor_2_PWM 10 // digital pin 10 // Left Motor
#define Motor_2_Dir 8 // digital pin 8
//#define SleftPin 1 // analog pin 1
//#define SrightPin 2 // analog pin 2
#define PingPin 15 // digital pin 15
#define PanPin 4 // digital pin 4
#define SpeakerPin 13
#define center 90
//Variables
byte dir=0;
byte speed1=225;
byte speed2=255;
int turn90=500;
int turn45=250;
int stopTime=200;
int USdistance=0;
int treshold=20; //20cm min distance
SoftwareServo Pan;
Speaker speaker = Speaker(SpeakerPin);
//-----------------------------------------------------------------------------
void setup() {
// set motor pins as output and LOW so the motors are breaked
pinMode(Motor_1_PWM, OUTPUT);
pinMode(Motor_1_Dir, OUTPUT);
pinMode(Motor_2_PWM, OUTPUT);
pinMode(Motor_2_Dir, OUTPUT);
Stop();
pinMode(PingPin, OUTPUT);
digitalWrite(PingPin, LOW);
Pan.attach(PanPin);
Pan.write(center); //90
StepDelay();
pinMode(SpeakerPin, OUTPUT);
speaker.Beep();
//Serial.begin (9600);
//Serial.println("start");
Forward();
}
void loop(){
Drive();
//square();
}
void square(){
Forward();
delay(2000);
Stop();
delay(stopTime);
Right();
delay(turn90);
Stop();
delay(stopTime);
Forward();
delay(2000);
Stop();
delay(stopTime);
Right();
delay(turn90);
Stop();
delay(stopTime);
Forward();
delay(2000);
Stop();
delay(stopTime);
Right();
delay(turn90);
Stop();
delay(stopTime);
Forward();
delay(2000);
Stop();
delay(stopTime);
Right();
delay(turn90);
Stop();
delay(stopTime);
}
void Drive(){
USdistance=Read_Ping_Sensor();
if (USdistance<5){
Stop();
speaker.Beep();
StepDelay();
TurnAround();
}
if (USdistance<treshold){
Stop();
speaker.Beep();
StepDelay();
Avoid();
Forward();
}
delay(50);
}
void TurnAround(){
Reverse();
Pan.write(center);
StepDelay();
Stop();
Left();
delay(turn90);
delay(turn90);
Stop();
StepDelay();
Forward();
}
void Avoid(){
int prev=0;
for (byte i=0; i<5; i++){
Pan.write(i*45);
StepDelay();
StepDelay();
USdistance=Read_Ping_Sensor();
if (USdistance>prev){
dir=i;
prev=USdistance;
}
}
Pan.write(center);
StepDelay();
switch (dir){
case 0:
Right();
delay(turn90);
Stop();
speaker.Beep();
StepDelay();
break;
case 1:
Right();
delay(turn90); //turn45
Stop();
speaker.Beep();
StepDelay();
break;
case 2:
Forward();
break;
case 3:
Left();
delay(turn90); //turn45
Stop();
speaker.Beep();
StepDelay();
break;
case 4:
Left();
delay(turn90);
Stop();
speaker.Beep();
StepDelay();
break;
}
delay(500);
}
// Read Sensors
int Read_Ping_Sensor(){
int cm=0;
//trigger the sensor
unsigned long value = 0;
pinMode(PingPin, OUTPUT);
digitalWrite(PingPin, LOW);
delayMicroseconds(2);
digitalWrite(PingPin, HIGH);
delayMicroseconds(10);
digitalWrite(PingPin, LOW);
//receive the echo
pinMode(PingPin, INPUT);
digitalWrite(PingPin, HIGH); // turn on pull up resistor
value = pulseIn(PingPin, HIGH);
value=value/58;
cm=int(value);
return cm;
}
void StepDelay() {
for (byte t=0; t<10; t++){
SoftwareServo::refresh();
delay(20);
}
}
//++++++++++++++++++++++++++++++++++++++++++++++++++++++++++++++++++++++++++++++++
void Forward(){
digitalWrite(Motor_1_Dir, LOW); // forward
digitalWrite(Motor_2_Dir, LOW); // forward
analogWrite(Motor_1_PWM, speed1); //
analogWrite(Motor_2_PWM, speed2); //
}
void Reverse(){
digitalWrite(Motor_1_Dir, HIGH); // reverse
digitalWrite(Motor_2_Dir, HIGH); // reverse
analogWrite(Motor_1_PWM, 255-speed1); //
analogWrite(Motor_2_PWM, 255-speed2); //
}
void Right(){
digitalWrite(Motor_1_Dir, HIGH); // reverse
digitalWrite(Motor_2_Dir, LOW); // forward
analogWrite(Motor_1_PWM, 255-speed1); //
analogWrite(Motor_2_PWM, speed2); //
}
void Left(){
digitalWrite(Motor_1_Dir, LOW); // forward
digitalWrite(Motor_2_Dir, HIGH); // reverse
analogWrite(Motor_1_PWM, speed1); //
analogWrite(Motor_2_PWM, 255-speed2); //
}
void Stop()
{
digitalWrite(Motor_1_PWM, LOW);
digitalWrite(Motor_1_Dir, LOW);
digitalWrite(Motor_2_PWM, LOW);
digitalWrite(Motor_2_Dir, LOW);
}
I made this robot in about 4 hours, it was fun and rewarding to see my daughter so happy playing with it. You should all try that!
Wanders around avoiding obstacles
- Actuators / output devices: 1 Servo, 2 GM17 motors
- Control method: autonomous, IR remote
- CPU: Arduino
- Operating system: ?
- Power source: 4 AA batteries
- Programming language: Arduino
- Sensors / input devices: SeeedStudio US sensor
- Target environment: indoors