


Bøsewicht
This is the Bøsewicht. A ghost robot custom made together with my elder son.
This little monster ghost is what you find under your bed when you sleep. The only one that can handle this monster is the Monster Catcher*.
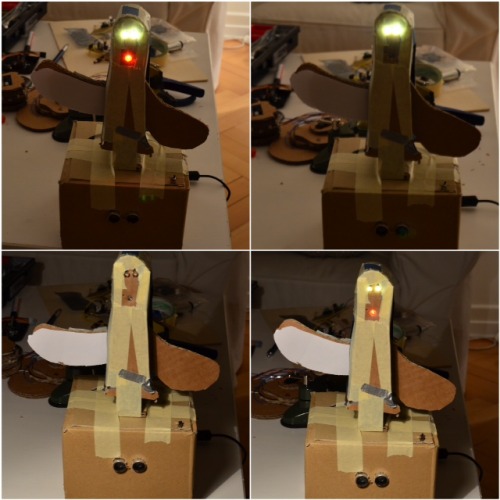
The Bøsewicht stays hidden. As soon as somebody approaches it the red mouth opens. If one continues to come closer the Bøsewicht opens it's eyes. Now all glows. If one approaches any closer the Bøsewicht starts to wave his wings and makes scary noise.

Ingredients
2 x 9g Micro Servo
2 x Arduino Uno R3
1 x Adafruit Wave Shield
1 x SD Card
5 x LED warm white
1 x LED red
1 x Speaker
1 x Ultrasonic Sensor
1 bag Glow in the Dark (blue)
Cardboard, Kleister, Tape
The Making-Of
Here some impressions of the making.
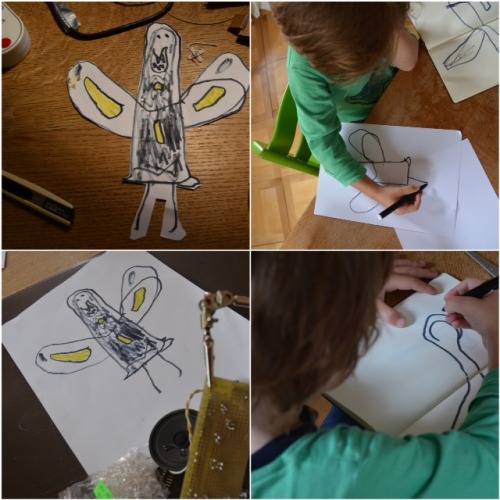
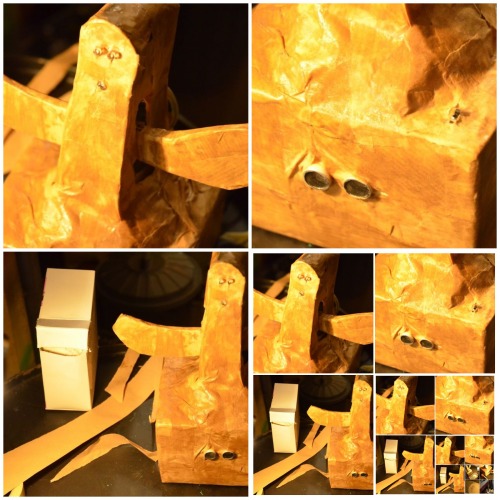
First the Bøsewicht was drawed. A couple draws where there but one selected for further work.
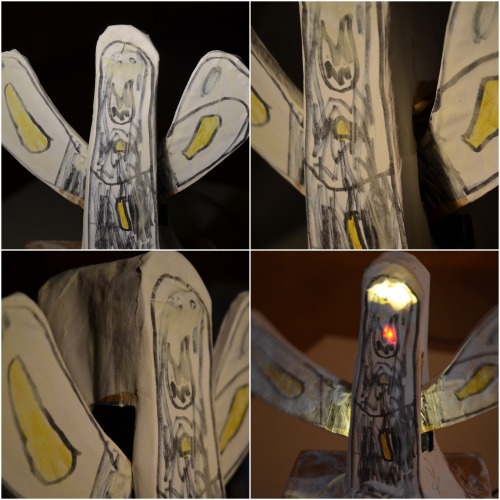
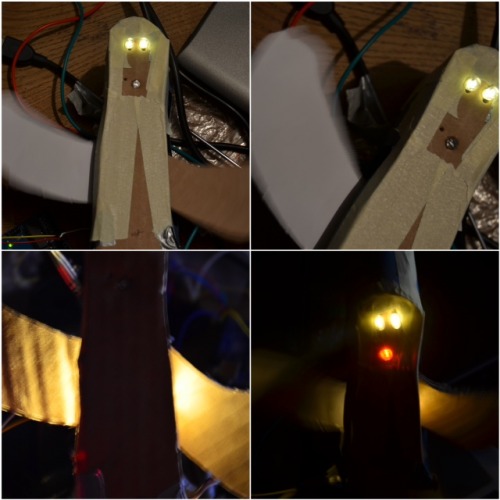
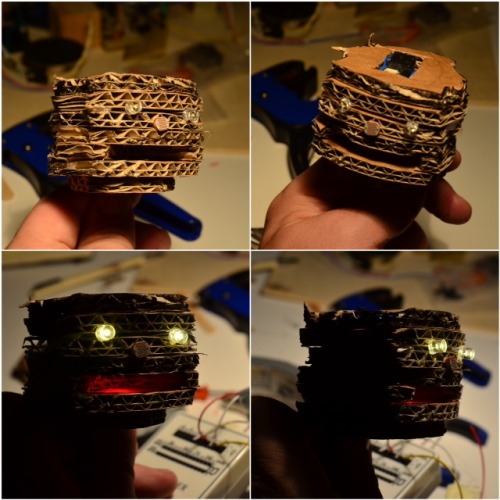
The eyes, mouth and wings got extended with LEDs. Warm white LEDs and one red LED.
To make it possible that the monster ghost robot can move the wings they got mounted each on one servo.
As an alternative I created this other stacked one.
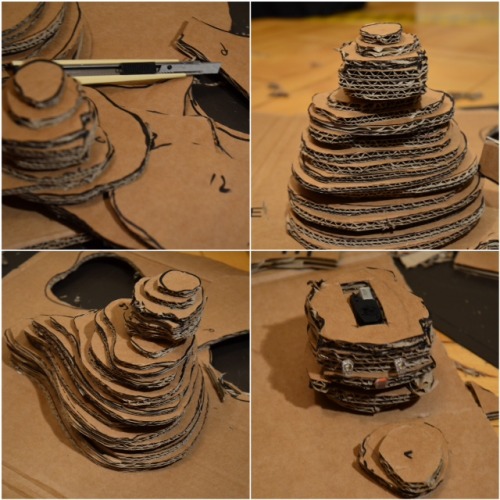
And added to the head two eyes, a mouth and a gear motor on top. An LDR sensor to
detect something that comes close to the robots face.
It turned out that my son was not into this new alternative design. He insisted to continue with his creation. Well then....
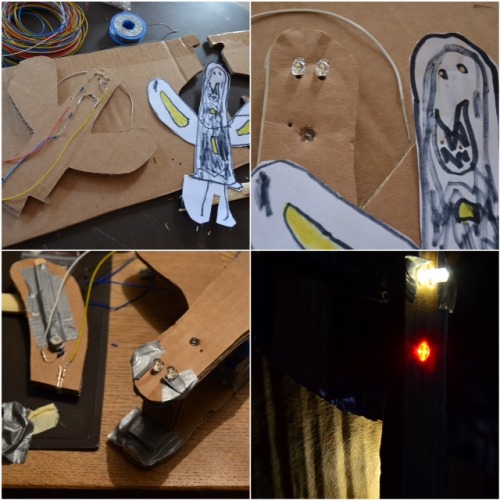
He brought me this little cardbord box as the base. I went on and desoldered an on/off switch from an old remote control.
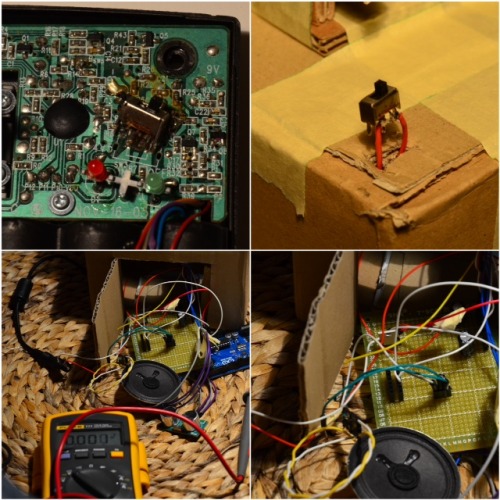
All electronics got soldered to one plate. Two plugs for two servos. One audio-speaker plug. A voltage regulator.Plug for the ultrasonic sensor and so forth..
For this smoketest all wires are connected and voltage is applied. All good.
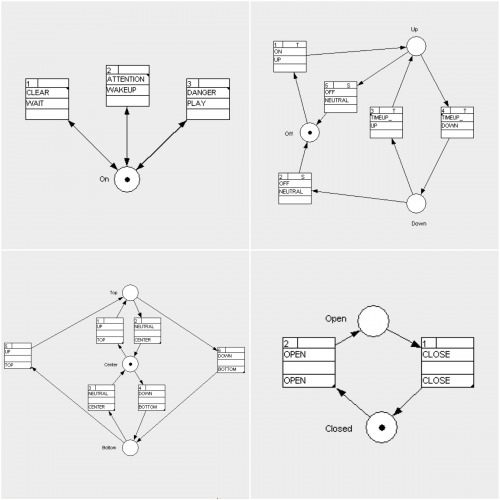
After a creative break I went on to write the software - real behaviors for this robot. Each behavior is modeled as a finite state machine that interacts with other behaviors. The Arduino C code can be found here.
Now the behaviors are implemented and tested.
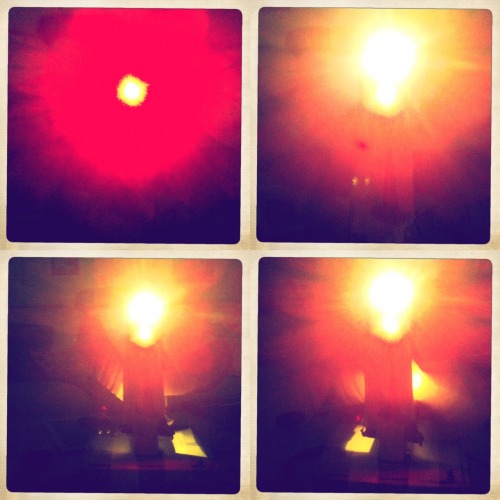
...and then somehow this ghost started to look like one. What a glow.
Using package paper and a material I know as Kleister the body got fixed to the base.
While sticking this paper to the I accidently pushed the ultrasonic sensor back into the box. What u bummer that I have'nt fixed the sensor strong enough from the inside.
With the hand through a small door in the back of the base through all wires and the two PCBs I managed it to correct this and put the sensor back in place.
Then out of curiosity I made a smoketest and... unfortunately - it failed. Just a little jitter from the servos when turning the on switch. But then nothing. Like off.
Maybe a shortcut. So I continued to glue this paper on...
Still the ghost noise is not solved yet. Best would be that it could play audio tracks. The same ghost noise as in the video could then be used on the robot.
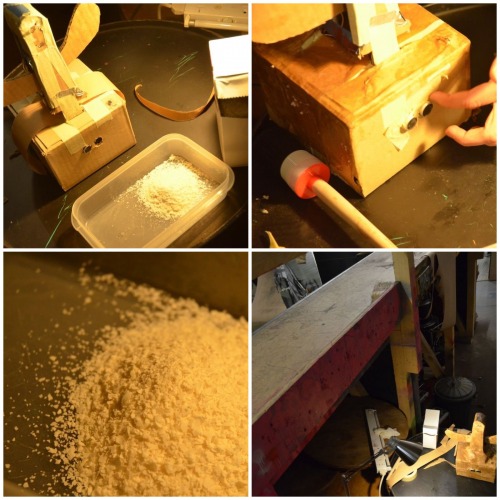
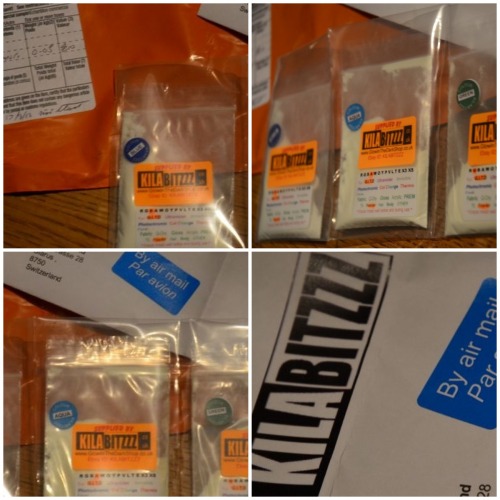
Then this package from England came in containing the powder that let the Bøsewicht glow.
Directed by Jason's and Gareth's comments this robot ghost looked even more like a ghost...
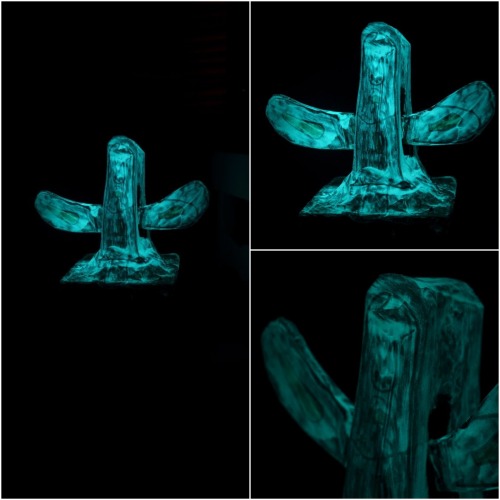
...and behaved like a ghost too.

Funny thing but Cobaltphoenix went on and started this Monster Robot Challenge.
The Bøsewicht got some credits. It got even spookier from then on.
After thinking about many different types of ghost sound generation I ended up using the exact same sounds that my son did choose in the very beginning of this robot project. The MP3 got converted into 16bit Mono WAV and placed on a SD card.
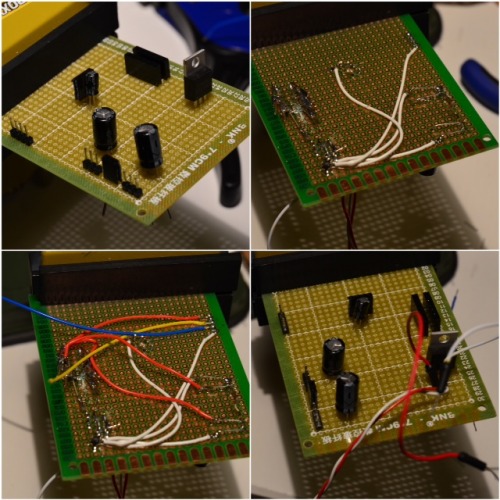
A second Arduino got mounted with a Wave Shield and connected to the other Arduino via VIN,GND and a digital pin for sound play.
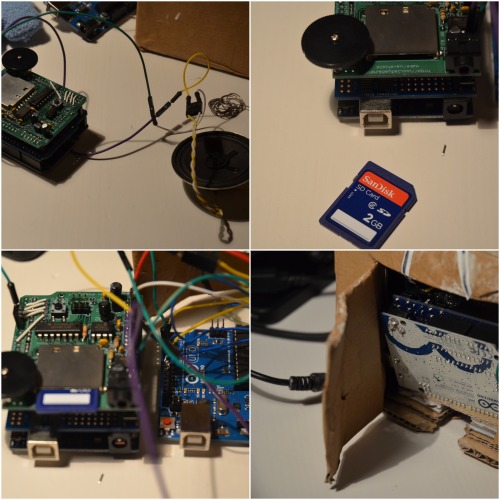
All the electronics, software and cables got squeezed into the base. In the light this robot looks like this:
So that is it. Finished. Robot complete.
Thank LMR and all the inspiration from the people that live here.
Special Thanks To
- Spaghuzz for the Kleister-Session assistance and the tip with the gloves.
- Jason for the idea with the glow.
- Gareth for the tip from where to get that glow.
- Antonio for the tip on how to connect the Arduinos.
- My wife and the two boys for sharing nerdum.
Further Readings
Ghost sounds
Some sounds to use.
Monster Catcher
Its purpose in life is to help children if they are afraid of monsters in the night. The Monster Catcher stays under the bed and makes noises to catch the monsters...
Spooky Sounds
Spooky Sounds With 555 Timer
Adafruit Wave Shield
Pins 13, 12 and 11 are used to talk to the SD card and cant be changed. The rest of the pins, however, are more flexible. Still, for all the examples on the site we'll be using this wiring, so it is suggested to just go with this.2 -> LCS3 -> CLK4 -> DI5 -> LAT10 -> CCS.
How to detect ghosts and spirits ect?
"Oh there is a high level over here now.."
Teach Your Robot a Movement
This tip shows you one of many ways to get a discreete movement profile from human interaction
* Actually it was Andrew that came up with the idea during the Robot Party where some LMRians broadcasted live from the Campus Party in Berlin. He said we shall make a robot that the Monster Catcher can catch...
Scares People
- Actuators / output devices: micro 9g servos
- Control method: autonomous
- CPU: Arduino Uno R3
- Operating system: Arduino
- Power source: Wall adaptor
- Programming language: C
- Sensors / input devices: SRF04, Ultrasound sensor
- Target environment: indoor