


Beverage Bot (Updated)
***** Updates on bottom*****
After building the "Start Here Project" I wanted to do a few things with my next project
- Use my own ideas DONE
- Use an SFR005 DONE (Kind of.... I have to work out a few problems. I also have a few problems with the servos. I will look into these and see if I can figure them out and if not I will ask LMR)
- Use a big chase so I can expand upon it ( a miny milk crate) DONE
- Have it be able to locate IR
- Use tracks DONE
Right now all I have is a sensor mount from Dagu, a picaxe board, a body, some LEDS, and a battery holder. All the rest of the parts I need (I think) are on the way from solarbotics, except an IR sensor which I will add after I get this thing navigating. I still need to put some research into which IR sensor I will use and how to make a H bridge which I might have to use also. I will add more once I get more parts and I'll post a video too.
***I forgot to mention it will have a solarpanel too.***
Sept. 1st
I just got my parts yesterday and have on one track but solarbotics gave me a wrong cog so I am now waiting for that in the mail. =( But while I am waiting I can do a lot more and will have an update soon.
***Update***
September 18
I have mounted everything to the body except for one of the tracks. I have gotten the other cog in the mail and will soon mount the other track when I get time. I will also upload a few more picture soon and a video once I get this thing debuged.
Now all I have left to do is debug it, work on a few little things, and mount the last track.
***Update***
October 11
I have mounted everything and the tracks work great. I just have problems with the servo and SFR005. Probally nothing big. I have to mess with that later. I might not use a solar panel know. Still have to make a top and work on some code. Will be getting more time soon and will put up more info here and work on BB (Beverage Bot) more.
Video is not to good.
***Update***
January 1, 2011
Okay now that I have some code (tons to tinker with) I will put up a new video after my camra charges. I have two main problems. One is if my robot sees something in front of it it only turns left as you will see in the new video. Also my servo only twitches and does not turn to the right place but first to solve is my coding problem. Here is my code if anyone wants a look:
Symbol dangerlevel = 65 ' how far away should thing be, before we react?
symbol turn = 1500 ' this sets how much should be turned
symbol trig = 4 ‘ Define output pin for Trigger pulse
symbol echo = 6 ‘ Define input pin for Echo pulse
symbol range = w1 ‘ 16 bit word variable for range
symbol lrange = w2 ‘ 16 bit word variable for range
symbol rrange = w3 ‘ 16 bit word variable for range
main: ' the main loop
pulsout trig,2 ‘ produce 20uS trigger pulse (must be minimum of 10uS)
pulsin echo,1,range ‘ measures the range in 10uS steps
pause 10 ‘ recharge period after ranging completes
debug range
if b2 > dangerlevel then
gosub nodanger ' if nothing ahead, drive forward
else
gosub whichway ' if obstacle ahead then decide which way is better
end if
pause 500
goto main ' this ends the loop, the rest are only sub-routines
nodanger:' this should be your combination to make the robot drive forward, these you most likely need to adjust to fit the way you have wired your robots motors
high 5 : high 7 : low 4 : low 6
return
whichway:
gosub totalhalt ' first stop!
'Look one way:
gosub lturn ' look to one side
gosub totalhalt
pulsout trig,2 ‘ produce 20uS trigger pulse (must be minimum of 10uS)
pulsin echo,1,lrange ‘ measures the range in 10uS steps
pause 10 ‘ recharge period after ranging completes
debug lrange
'Look the other way:
gosub rturn ' look to another side
gosub rturn ' look to another side
gosub totalhalt
pulsout trig,2 ‘ produce 20uS trigger pulse (must be minimum of 10uS)
pulsin echo,1,rrange ‘ measures the range in 10uS steps
pause 10 ‘ recharge period after ranging completes
debug rrange
goto lturn
pause 500
' Decide which is the better way:
if b4 > b6 then
gosub body_lturn
else
gosub body_rturn
end if
return
body_lturn:
high 6 : low 4 : low 7 : high 5 ' this should be your combination that turns the robot one way
pause turn : gosub totalhalt
return
body_rturn:
high 5 : low 6 : low 4 : high 7 ' this should be your combination that turns the robot the other way
pause turn : gosub totalhalt
return
rturn:
high 5 : low 6 : low 4 : high 7 ' this should be your combination that turns the robot the other way
pause turn
return
lturn:
high 6 : low 4 : low 7 : high 5 ' this should be your combination that turns the robot one way
pause turn
return
totalhalt:
low 4 : low 5 : low 6 : low 7 ' low on all 4 halts the robot!
wait 1 ' freeze all for one second
return
It is based on the Start here code.
Thanks for looking
***Update***
January 9, 2011
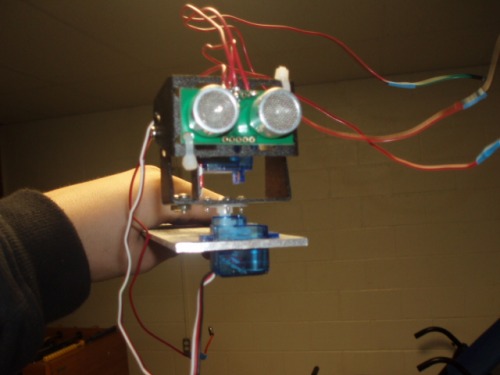
Beverage bot is doing better. I got his code going and then thought he looked sloppy so before a video I started remaking him I am 80% done with only a servo mount, a little soldering, and to put him back together left. I already redid his tracks and whole body to be stonger, better looking, sturdier, and shinier. I am also adding IR sensors. Here are some pictures:
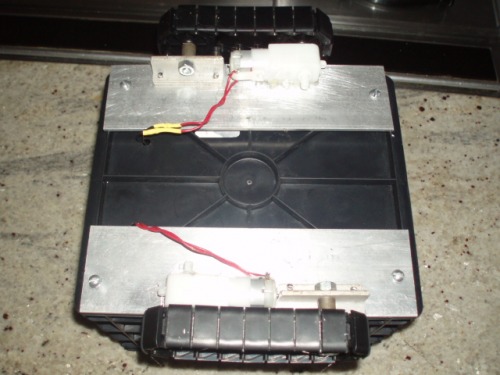
Bottom with new track build.
Still have to solder jumpers.

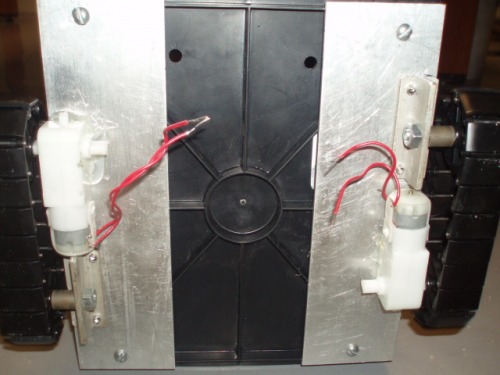
Upclose
I will bend the metal on the bottom to make a bracket.
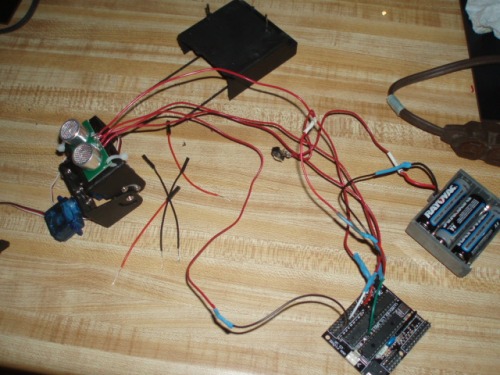
Brains, batteries, and guts
Thanks for looking.
***Update***
January 10, 2011
My rebuild is mostly done. I uploaded a video. All I have to do is code, add my IR sensors, make a top, code again, and find something to hold my board on.
Navigates around delivering drinks and finding IR LEDS.
- Actuators / output devices: 2 GM2s
- Control method: autonomous
- CPU: Pixaxe 28X1
- Power source: 3 AA
- Programming language: Basic
- Sensors / input devices: SRF005, ir detector
- Target environment: indoor, Lawn