


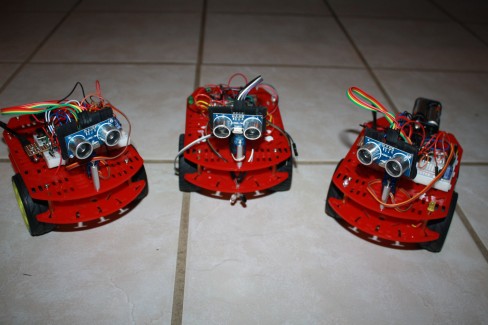
Basic Robots for my Kids
Some time ago my two boy (ages 10 and 9) really wanted to build a robot. I obliged but I wanted them to learn a lot of basics along the way. I also didn't want to assemble a kit with pre-made circuit boards. I thought they would get a kick out of wiring up the parts themselves and claim that they really did build it themselves. My goal was to have A) something simple enough for them to grasp the principles, B) something big enough that it felt substantial, was easy to assemble and also had room to add stuff if we wanted, C) cheap enough to make 3 robots (my teacher version and one for each kid, 4).
What I ended up planning for them included:
1- Magician Chassis ($15 at Sparkfun)
1- 400 Point Breadboard (~$3)
1- Picaxe 18M2(~$4)
1- L293 Motor Driver (~$1)
1- Small Servo (~$4)
1- SR02 Ultrasonic Range Sensor (~$2)
2- LEDs and 2 Resistors ($.40)
2 - 4 AA Battery pack (1 for motors and 1 for everything else) (~$3)
1 - bundle of jumper wires (~$3)
1- Switch, Breadboard compatible. (~$1)
1 - SR04 Bracket (cut from old plastic container, free)
Total (not including batteries) : ~$37 USD
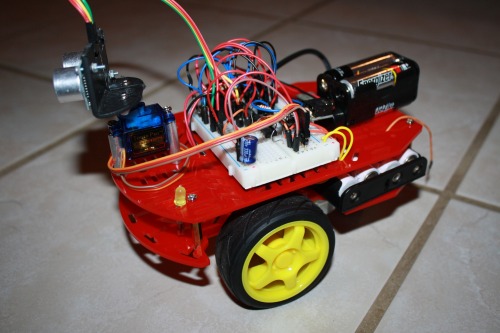
The first time I wired one up and programmed it I had a real problem getting it to work which was frustrating with such a simple design. At that time I had only one 4 AA battery pack on the robot. I eventually decided that the motor drew so much from the batteries that the Picaxe was getting starved so I added the second Pack.
This is the main part of the robot design I would like to improve on. The magician chassis has very limited room for two packs and I didn't want to complicate the design with a voltage regulator so it now has two 4 AA packs. One of which is put inside the two decks of the chassis which is a bit difficult to remove for recharging.
The second area I would like to improve on is the servo mount. I managed to squeeze it onto two standoffs it's not very elegant with the servo mounting screws being tight to install and the servo wire being crushed between one of the standoffs and housing of the servo, but it works.
Once I had the 'design' figured out I built a powerpoint 'class' that I used to walk the boys through the various subsystems of robot (chassis, motors, power, sensors, brains, servers, etc). We kept adding things to the breadboard until it was ready to become part of a robot. We tested he motor driver with some small hobby motors I had around. THEN we put together the Magician Chassis and installed the breadboard and servo.
I have yet to fully finish the code. I am endeavoring to make it as simple as possible and well commented that kids can understand it.
My circuit diagram building skills are lacking but I've attached it for reference. In this schematic I've added the option for an infrared edge sensor on the front end of the bot. I also drew this version where I used alkaline batteries in the motor pack and rechargeables in the second pack, which explains the different voltages. All of this was built on to a breadboard so it really doesn't qualify as a standalone circuit diagram, but it served my purposes.
Moves around and avoids obsacles (novel idea, I know)
- Actuators / output devices: 1 Servo
- Control method: autonomous
- CPU: Picaxe 18M2
- Operating system: Basic
- Power source: 2 4-AA Battery packs
- Programming language: Basic
- Sensors / input devices: SR04, potential to add infrared edge sensor