


Autonomous Underwater Vehicle
The aim of the project was to design and build an underwater vehicle with an emphasis on stability such that it may possible to perform light well intervention. This evolved into a project with a (relatively) streamlined shape and a control system capable of maintaining a stable position, such that, upon rotating due to external force, the craft is capable of actuating back to it's original orientation. Some of the initial concepts can be seen here. CFD anaylsis was carried out to determine the drag coefficients of the various concepts.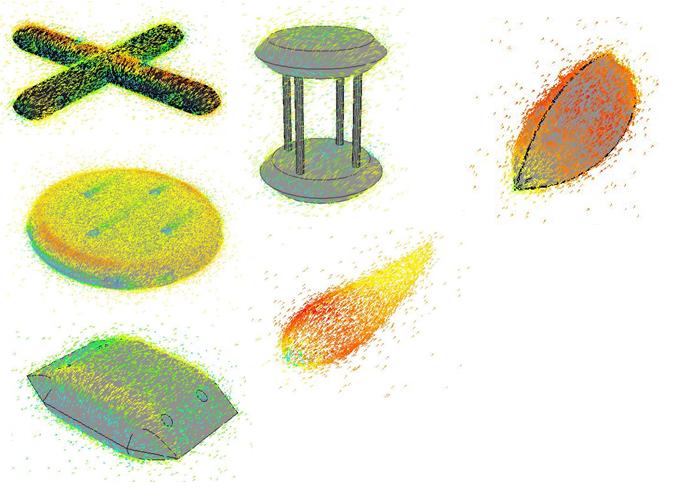
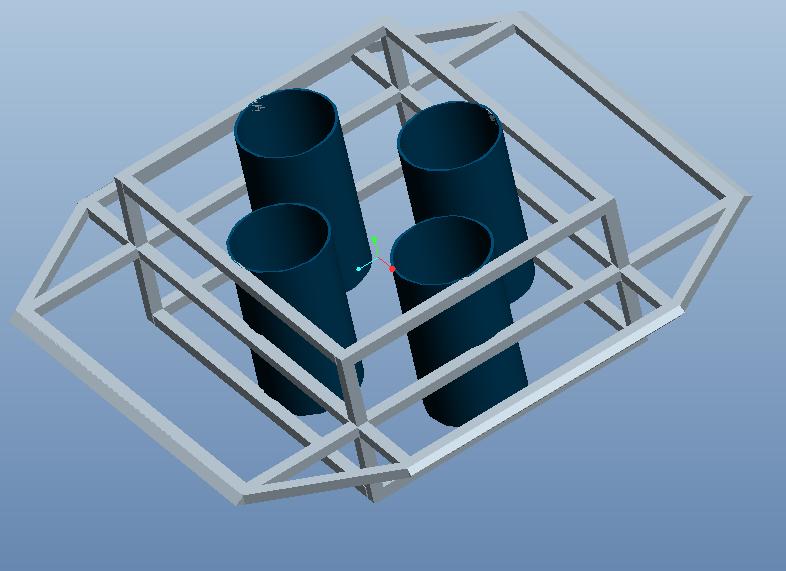
The concept on the bottom left was chosen for further development. The craft's frame is made from 12mm mild steel bar, model shown below.
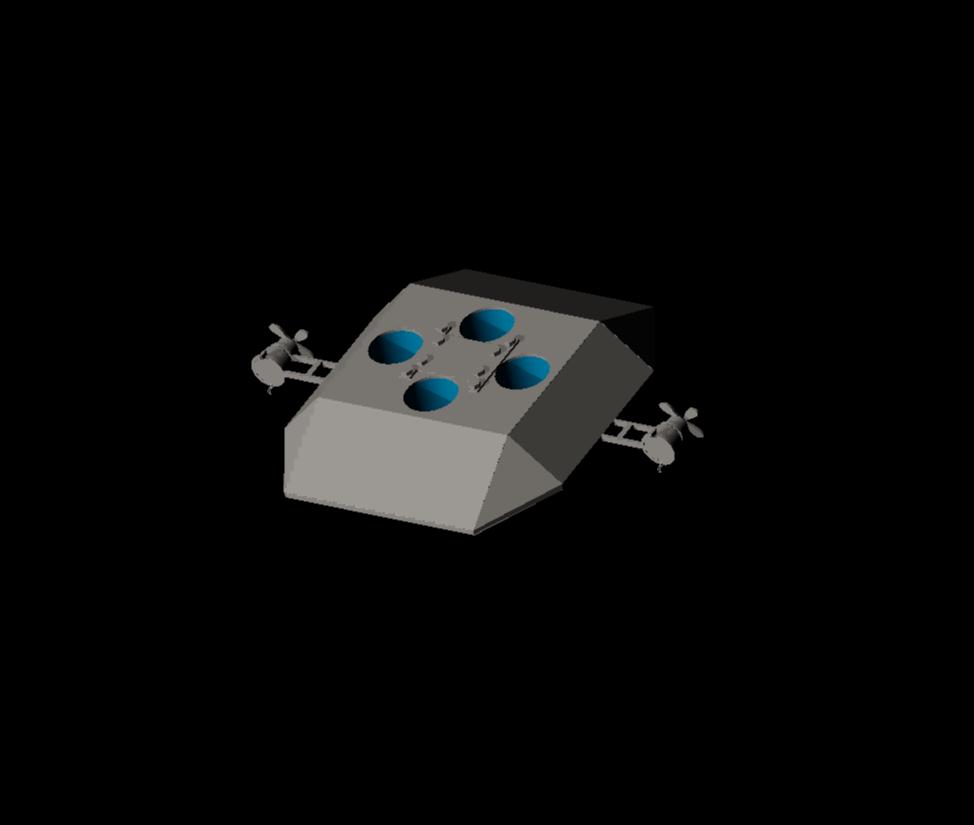
The skin of the craft is 2mm mild steel sheeting. The final concept can be seen below.
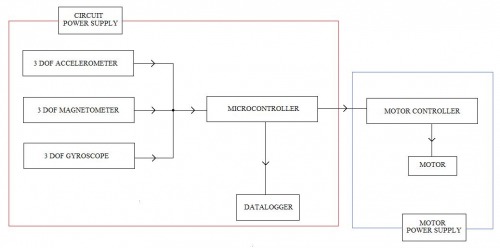
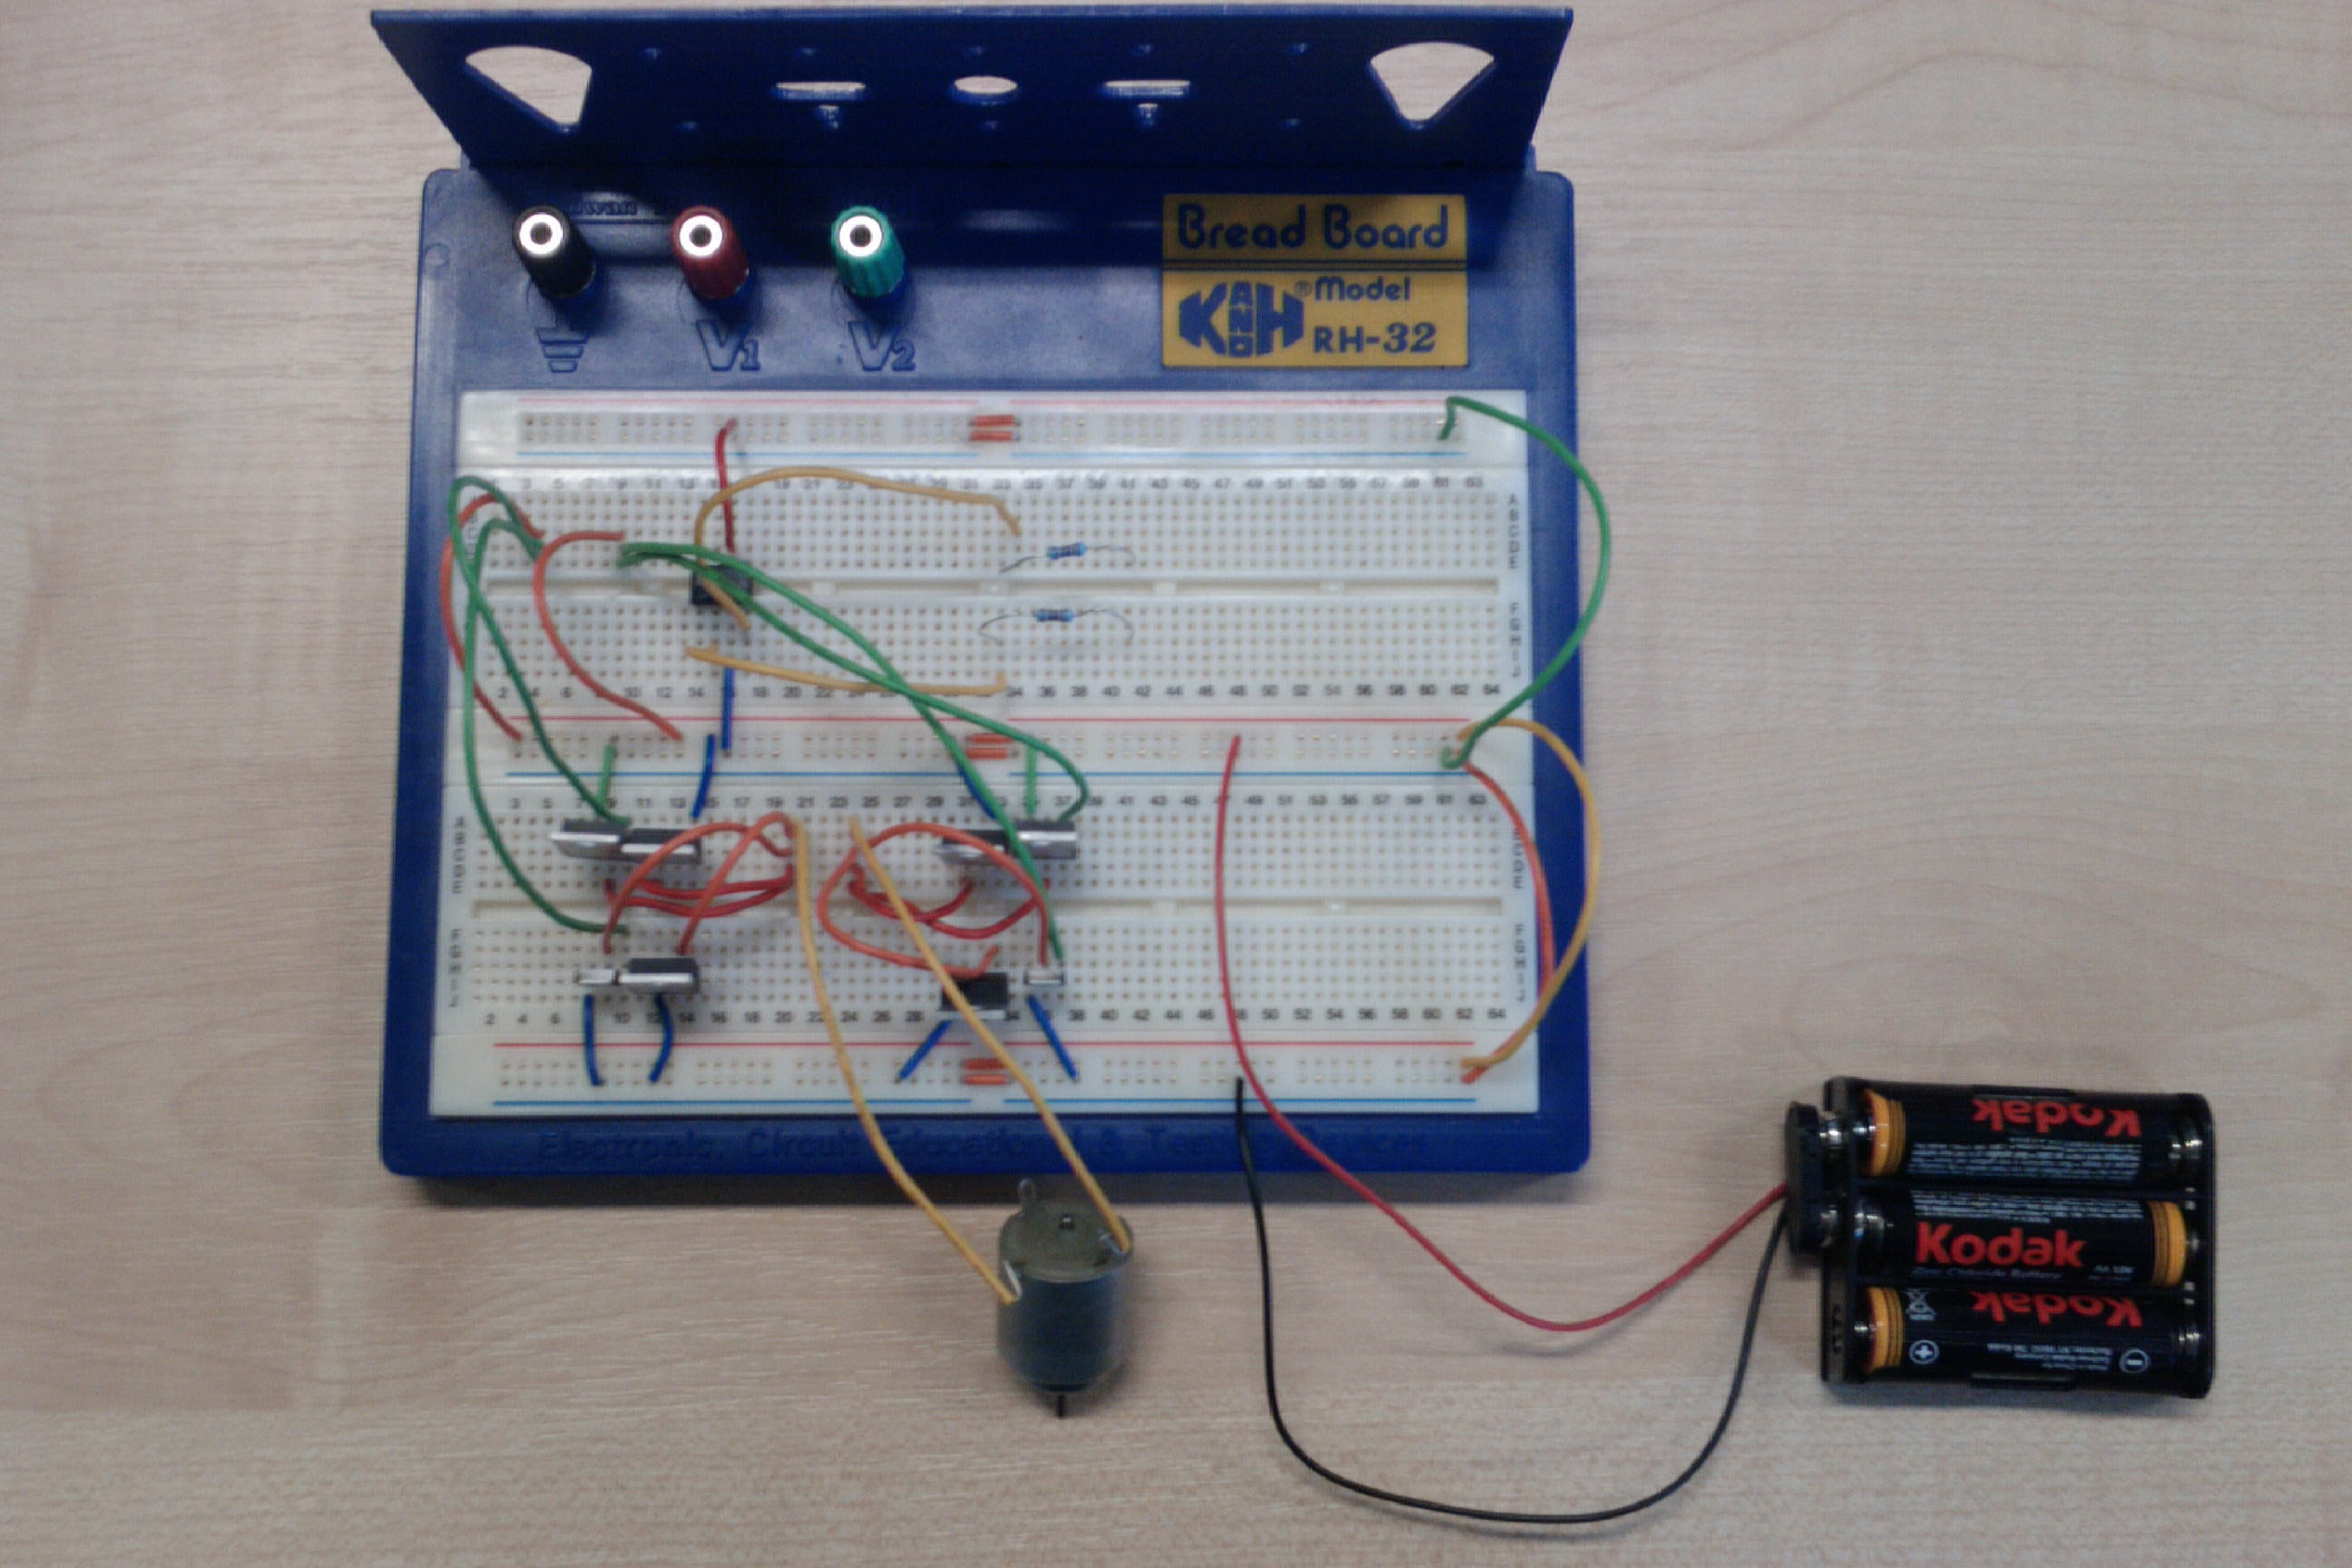
The sensor array of the project is sparkfun's 9DOF razor IMU, which has a 3DOF accelerometer, 3DOF gyroscope and a 3DOF magnetometer. This feeds into an arduino mega 2560, which has control of six 12v DC motors which were cannibalised from a Rule 750GPH Bilge Pump. They are water proof, and have 50mm model boat propellers attached to them. They draw about 5.5~6.5A. They are controlled via. six motor controllers. These are custom made high current H bridges. They're currently a work in progress. The craft also has a data logger capable of logging any changes in orientation in pitch, yaw and roll. The basic idea of the electronics can be seen below.
The project is entering the final construction stage and hopefully will be finished in the next fortnight.
H-Bridge
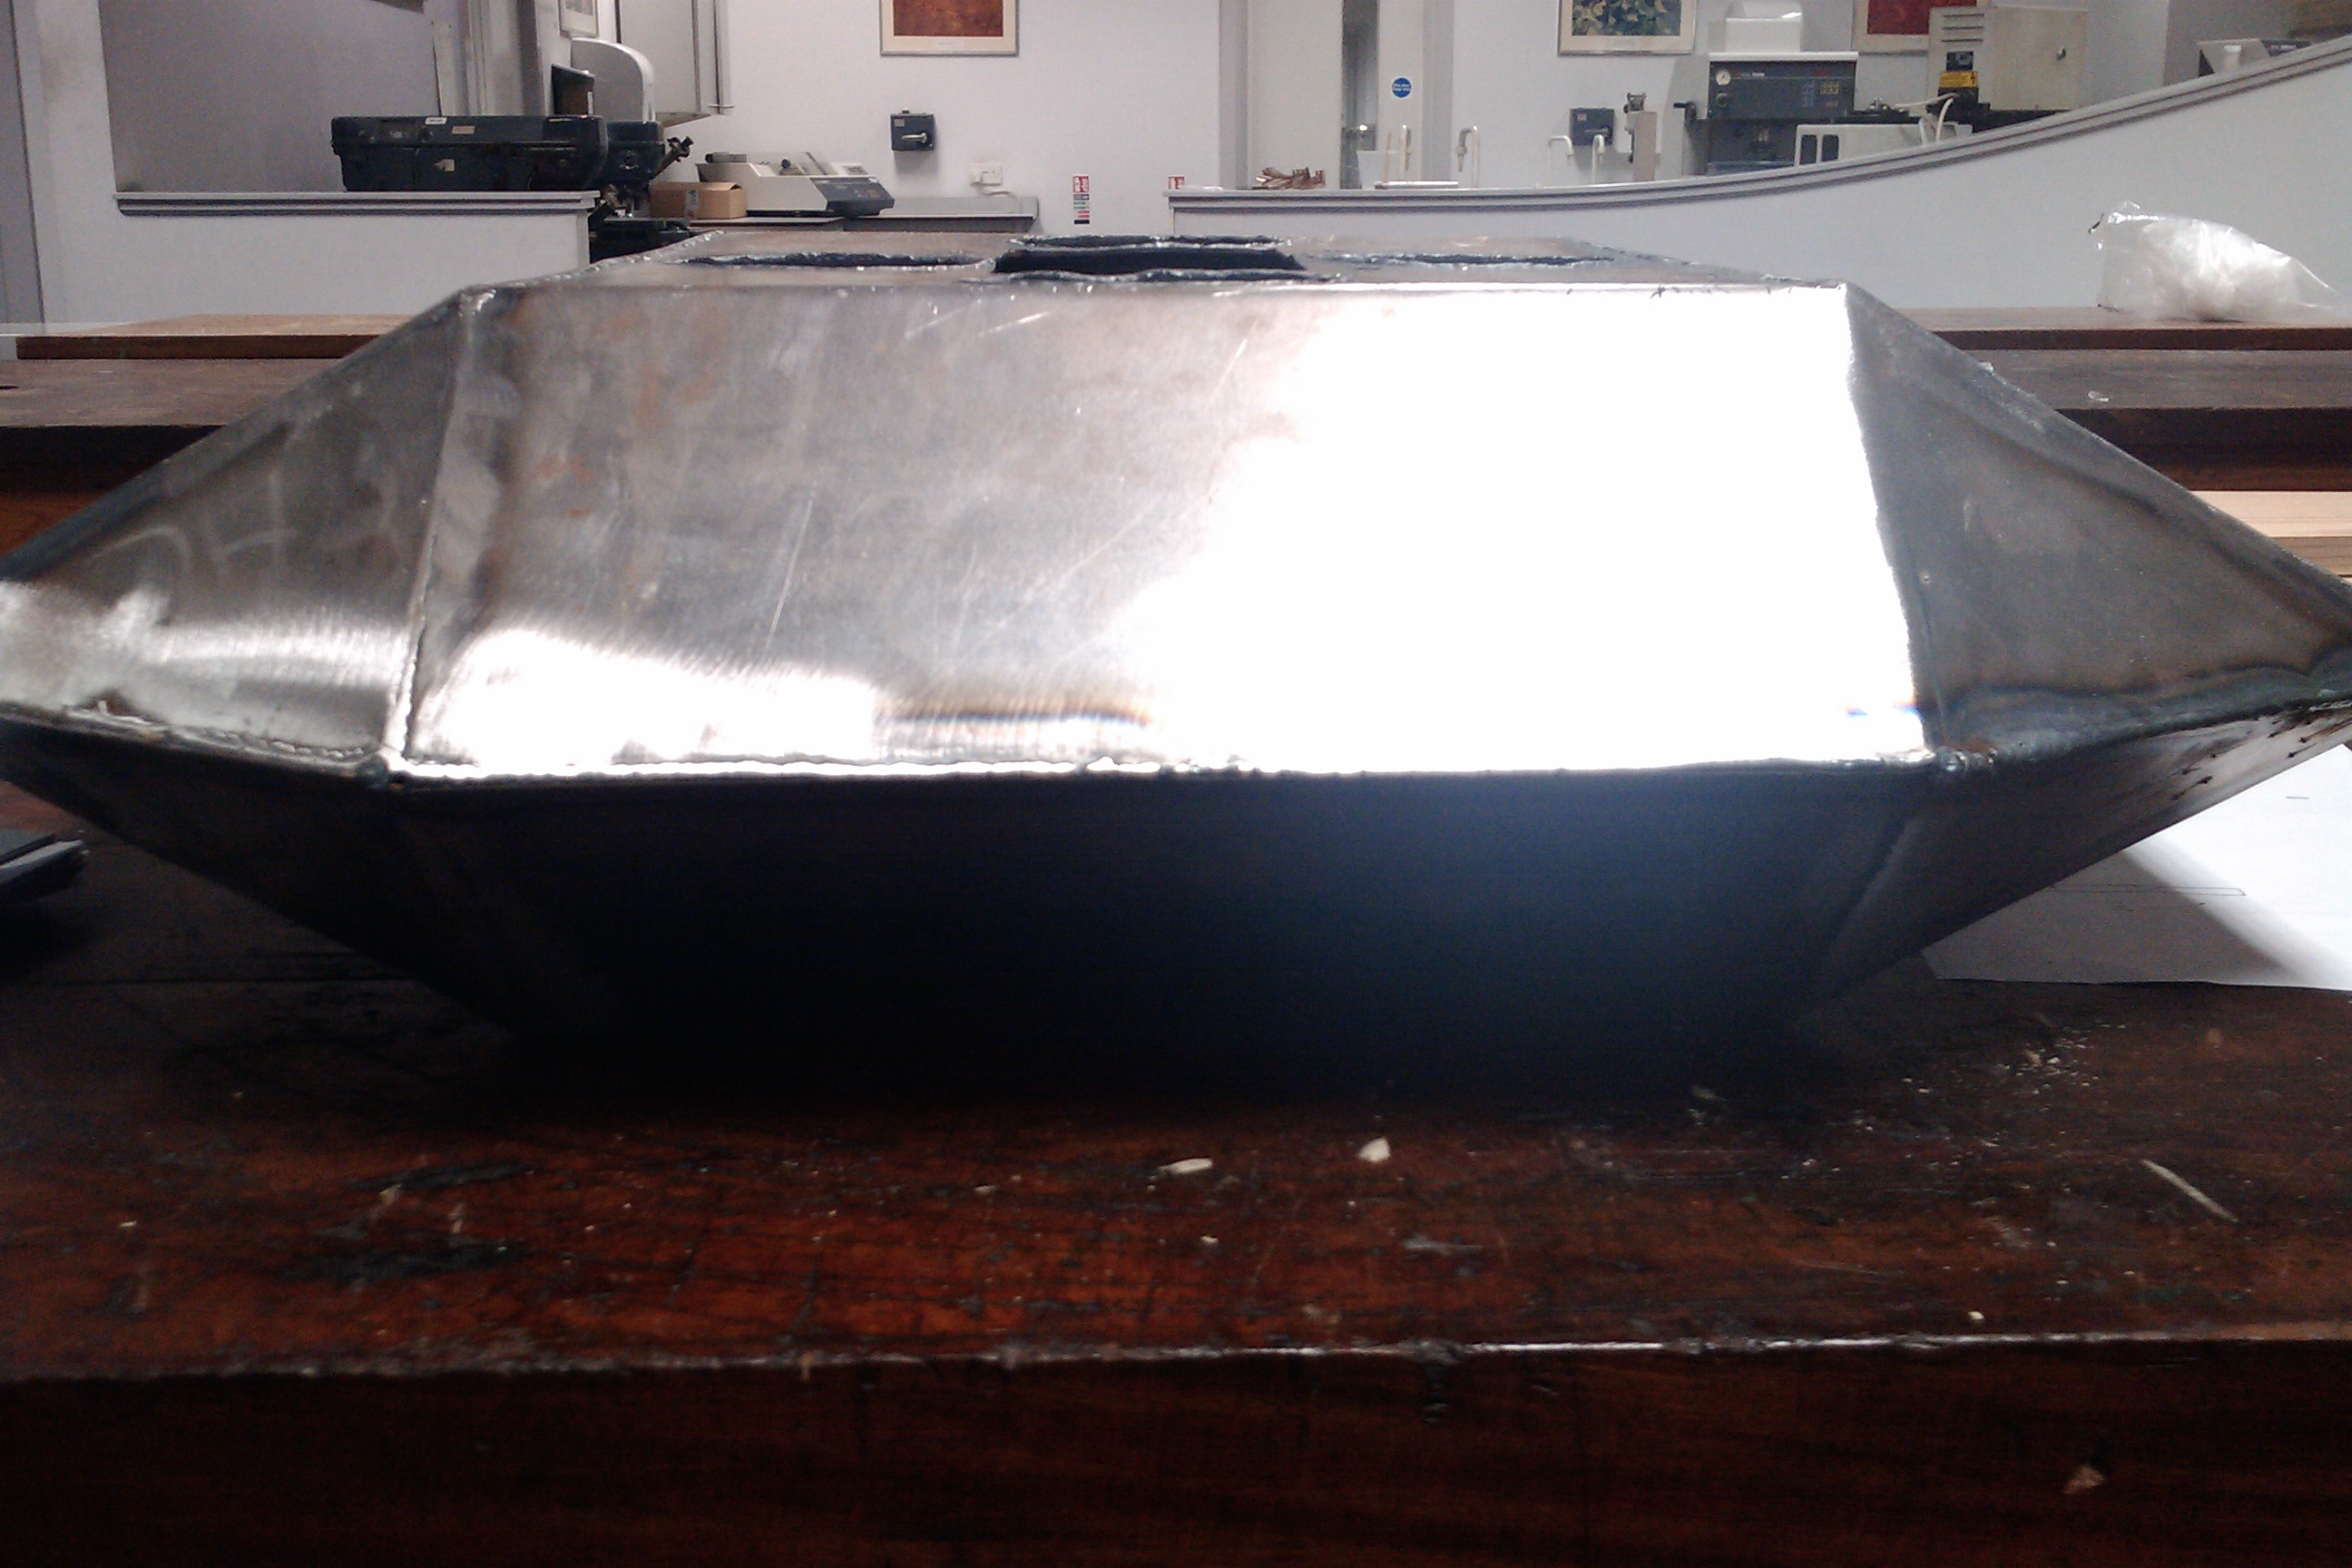
Current State, Profile
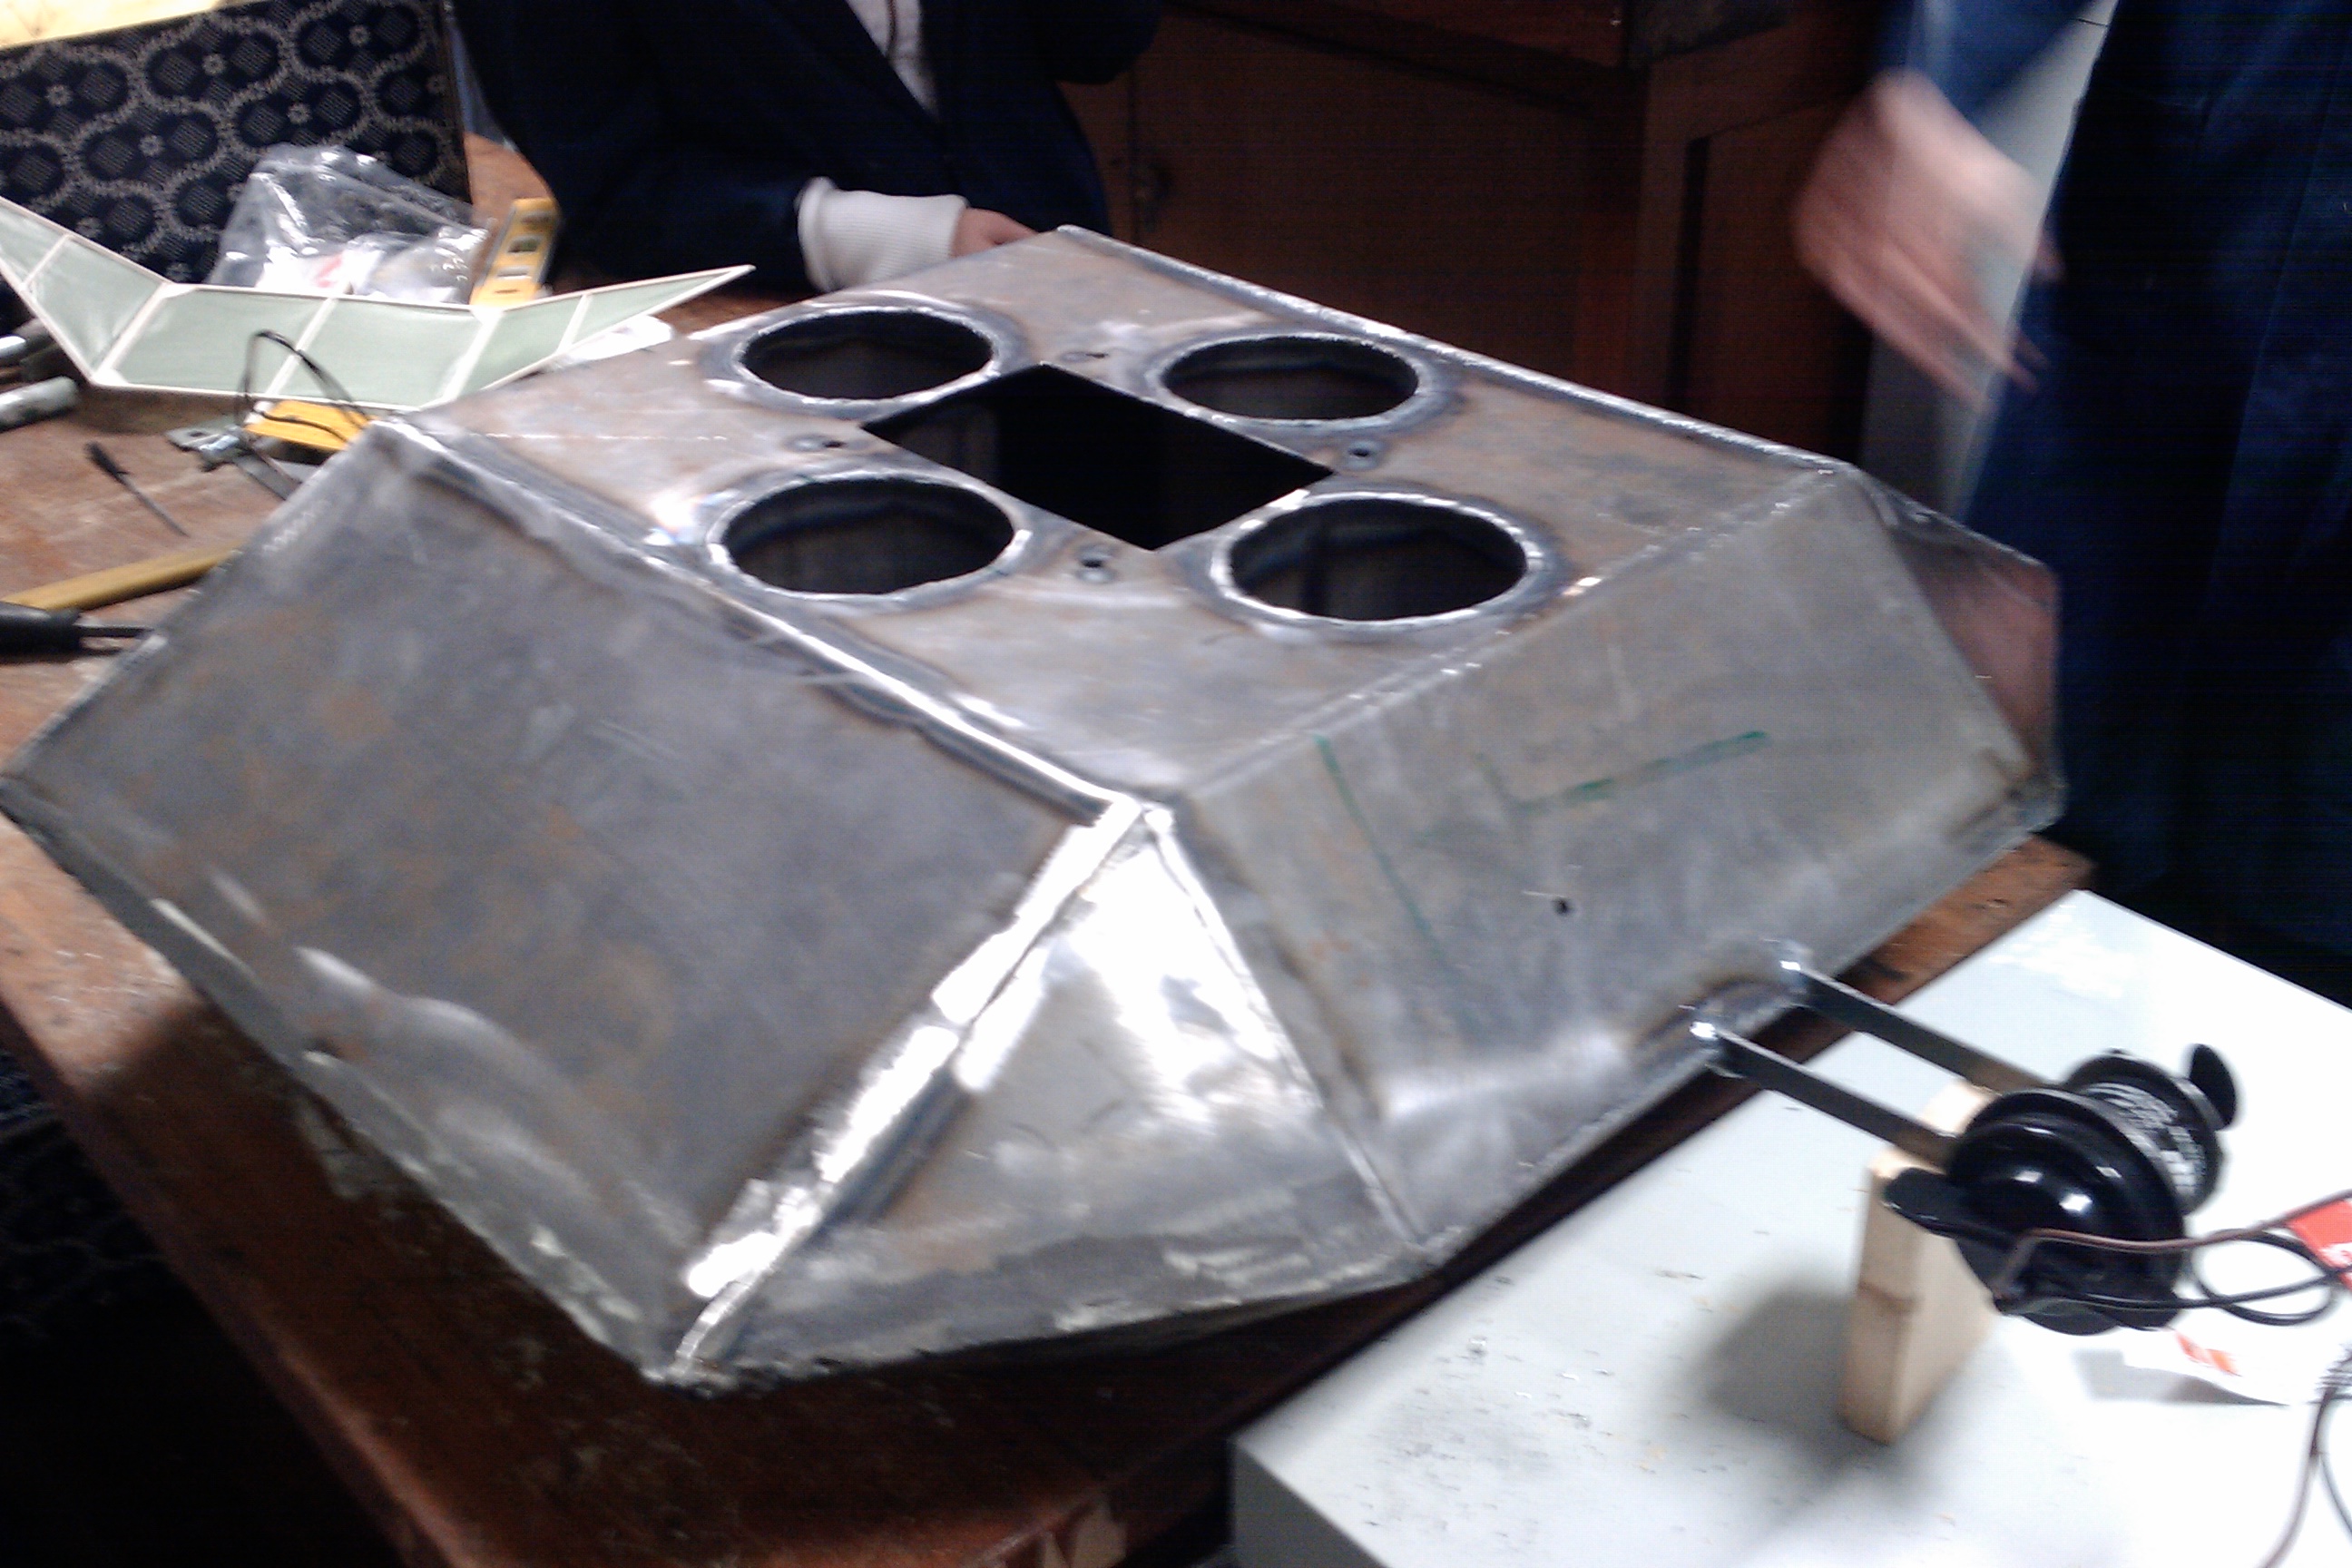
Current State, showing external mounts.
Update 04/04/11:
A flotation test was carried out in a water tank. As you can see the craft floated with roughly 55% submerged. 0.5, 1 and 2 kg bags of sand were made up and used to appropriately weight the craft, to make the AUV as close to neutrally buoyant as possible.
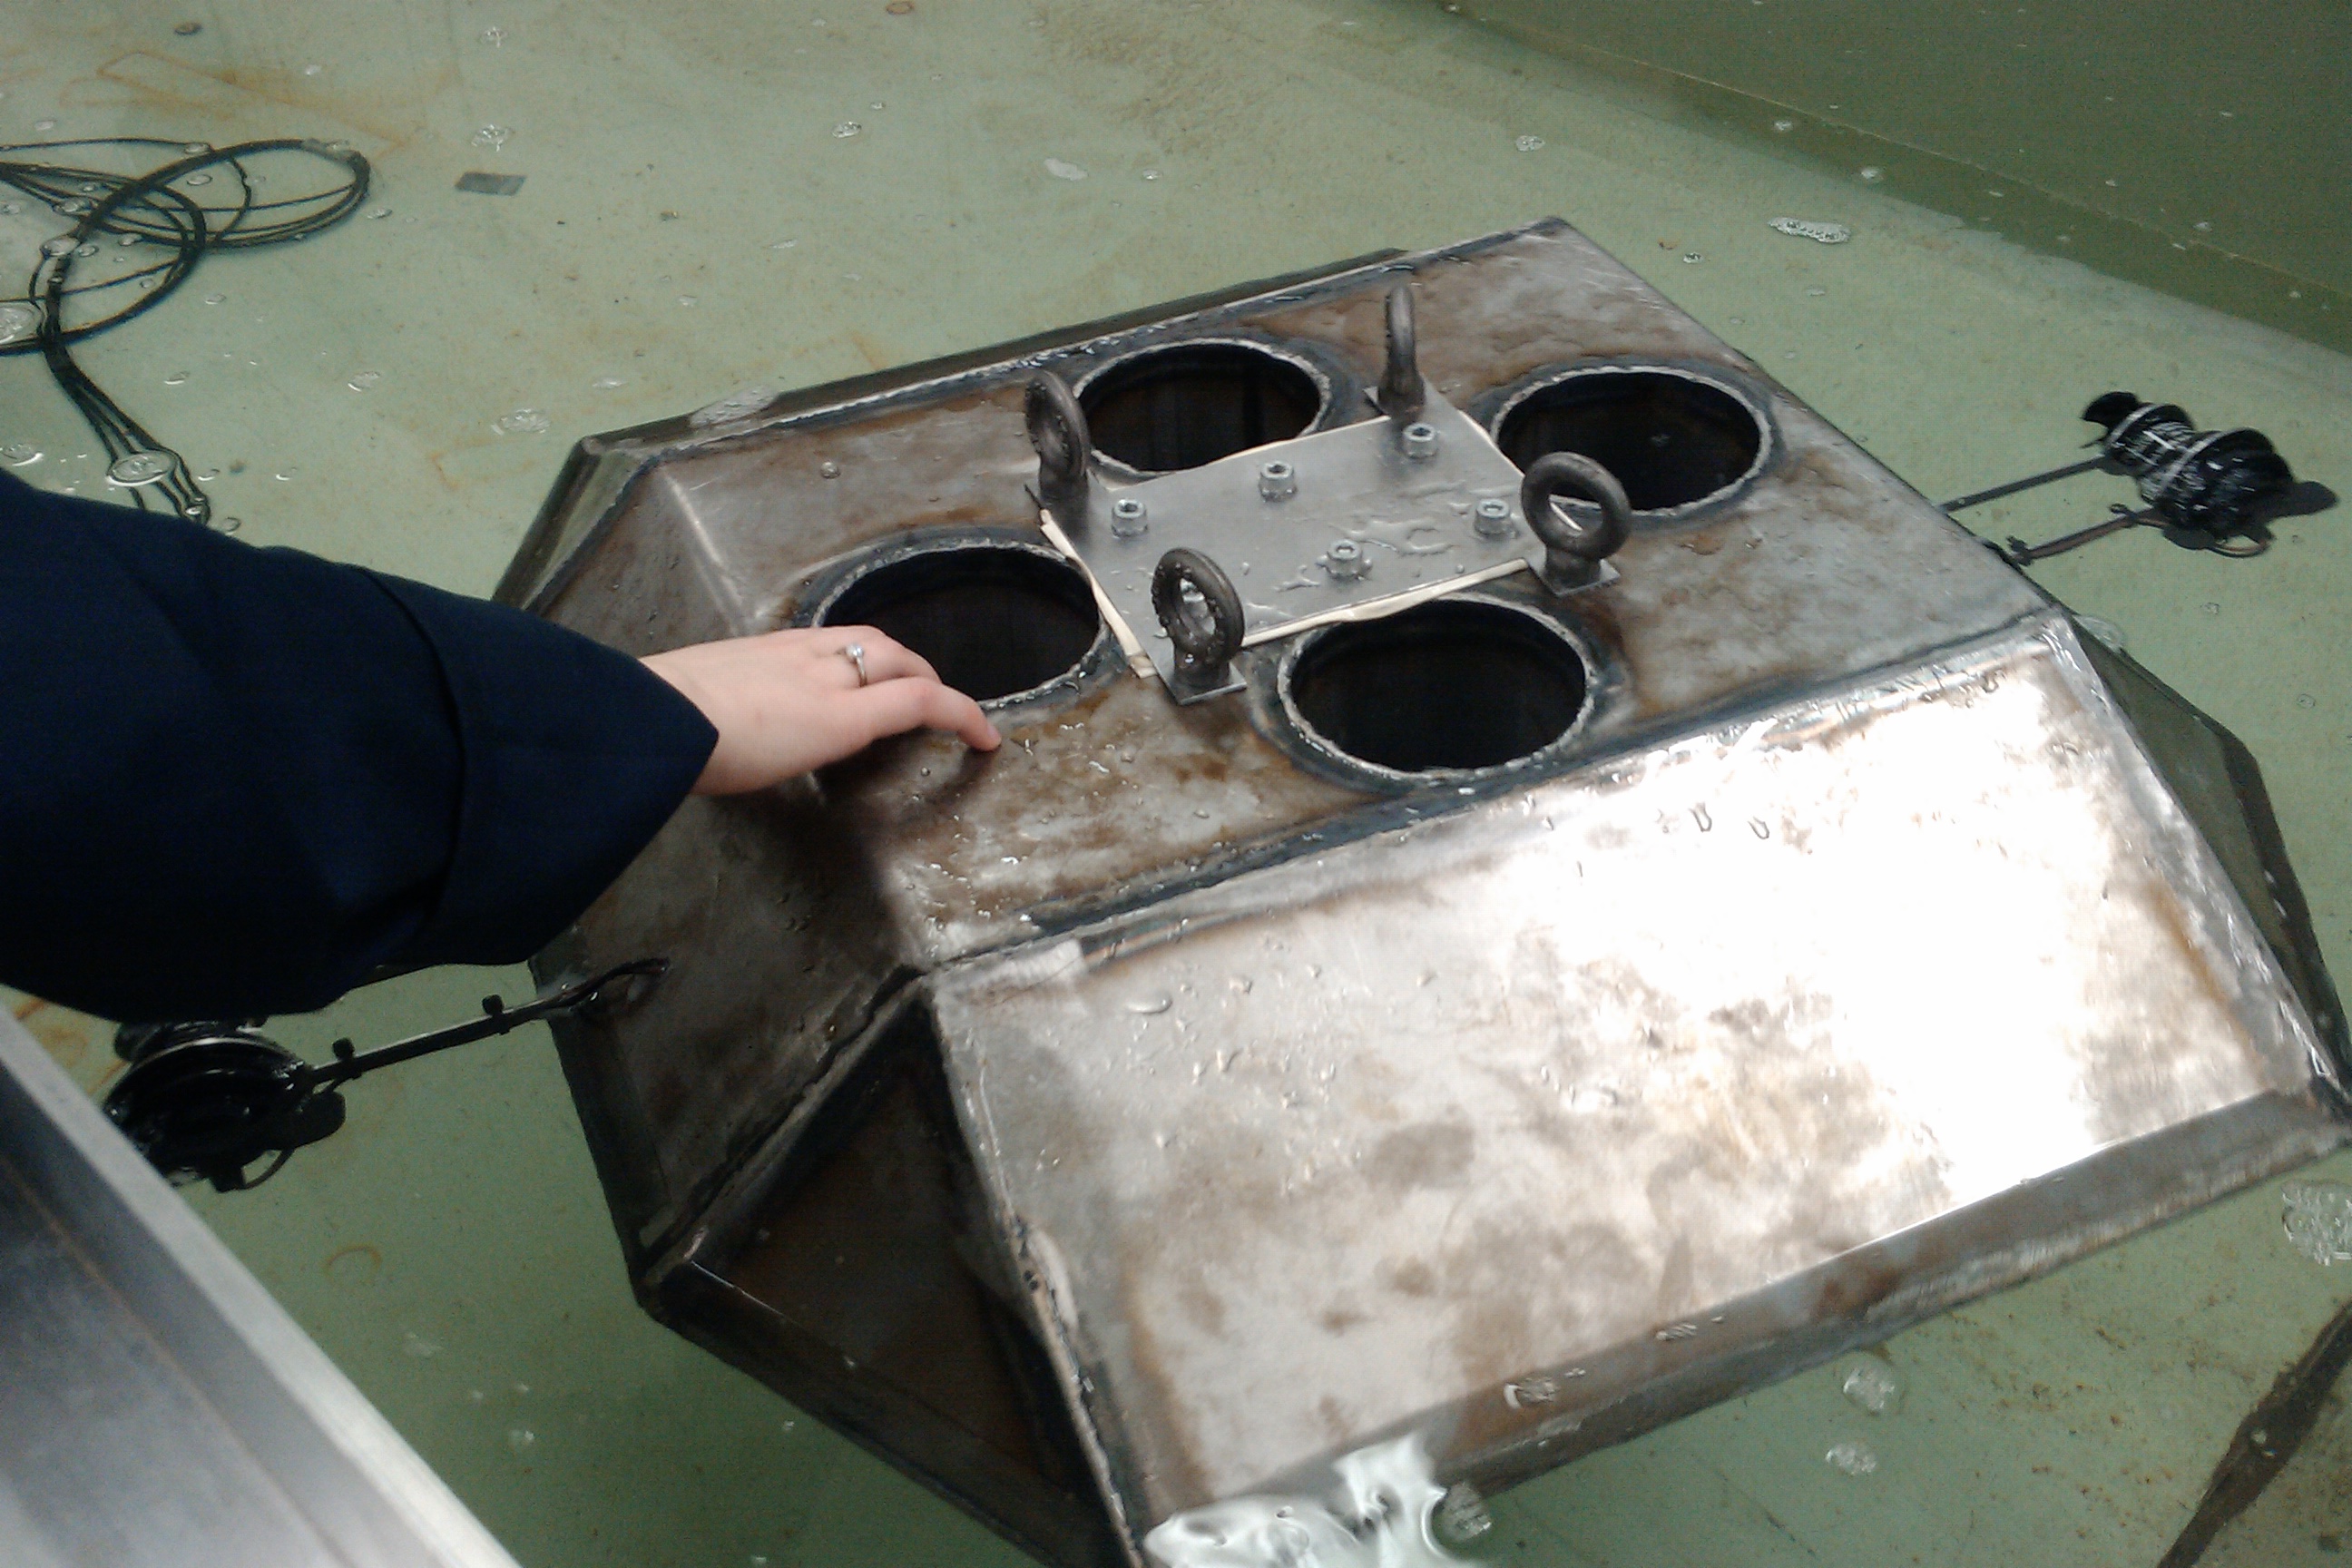
Notice the M8 lifting eyes used to aid lifting the AUV in and out of the water. Upon submerging it was discovered water was entering the inside of the craft. The threads of all the bolts were vaselined, and rubber washers were used to guarantee a seal. The holes where the motor wires entered the craft were epoxied again, and siliconed. Subsequent testing confirmed the craft was water tight.
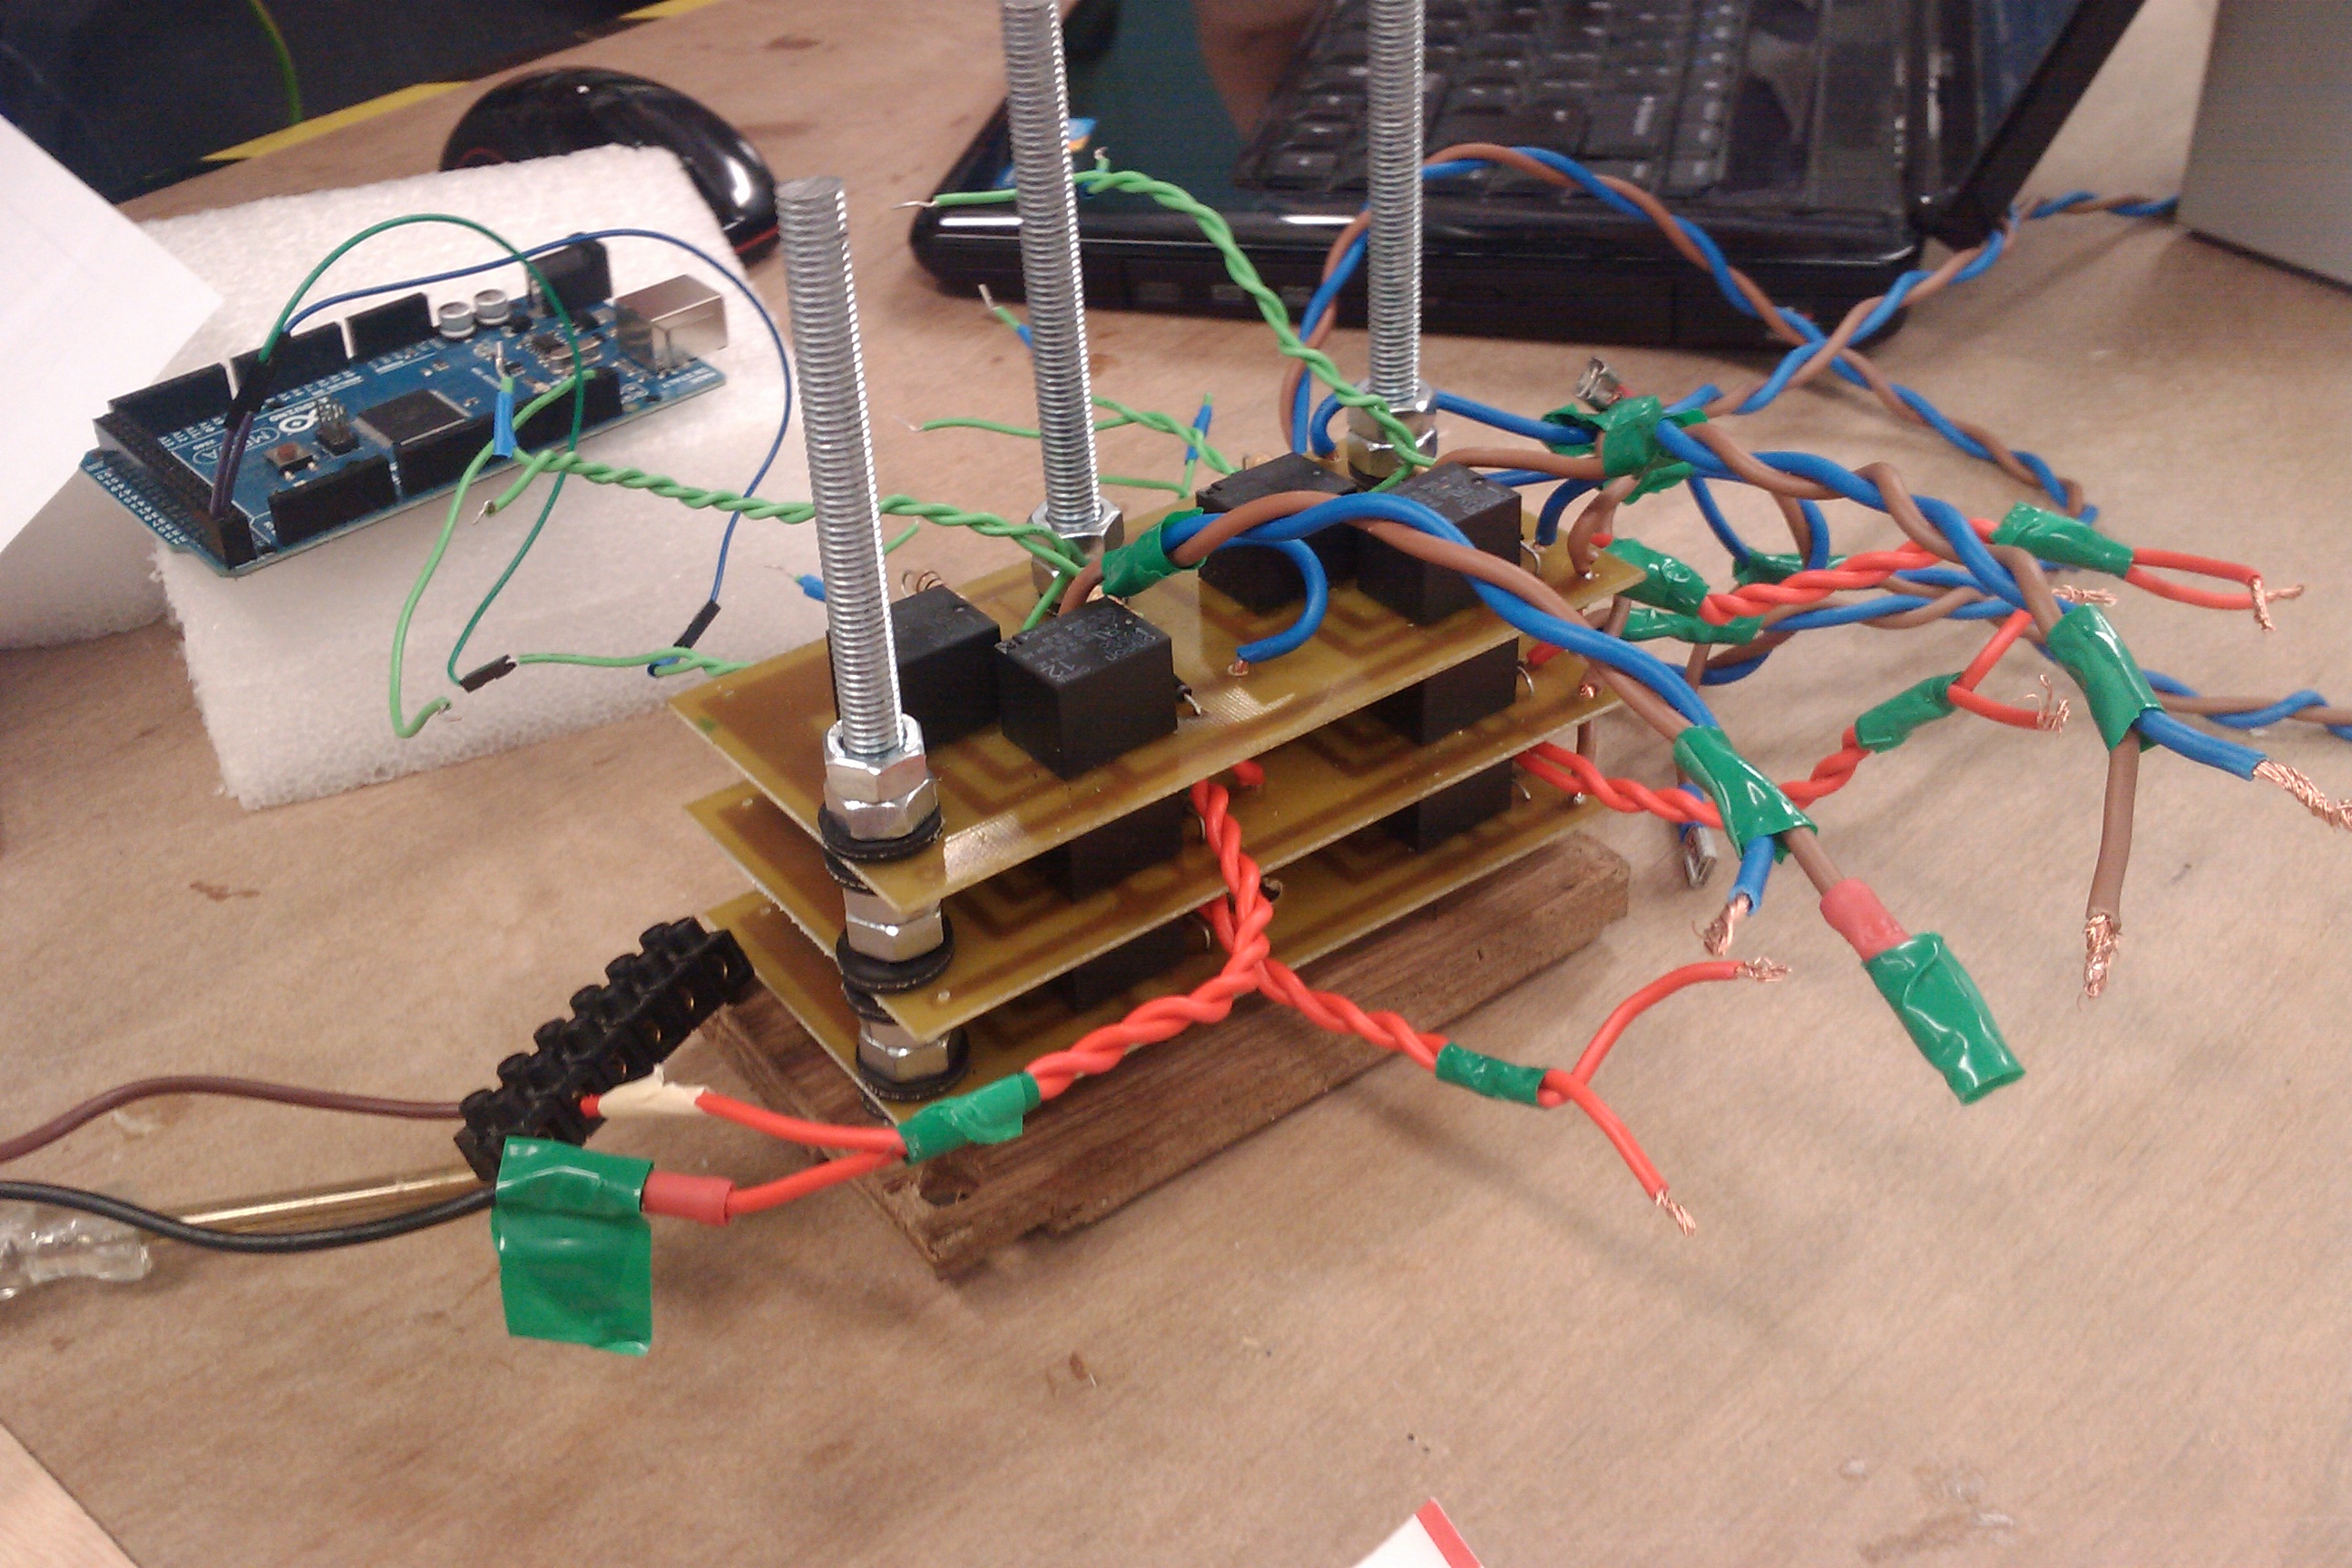
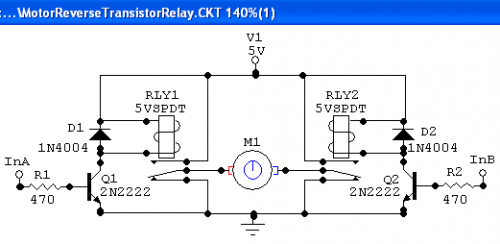
Shown above is the motor driver boards and weeks of painstaking effort. At first it was hoped to use power mosfets to construct an h-bridge. However after several melted mosfets, on-fire transistors and shorted PCBs, the decisions was taken to opt for mechanical relays instead. Two SPDT relays were arranged in an H bridge configuration, shown below:
Six motor controllers were built, on three PCB boards. The only deviation was using relays rated at 12v/10A instead of 5v. Each board is powered by one 12v Lead acid battery. Tracks on the PCB are sitting at just over 3mm.
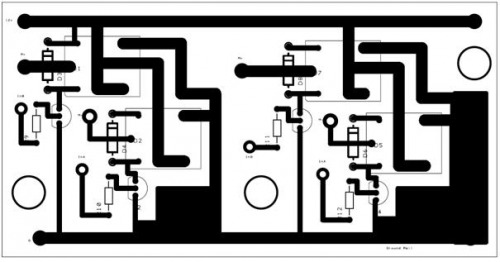
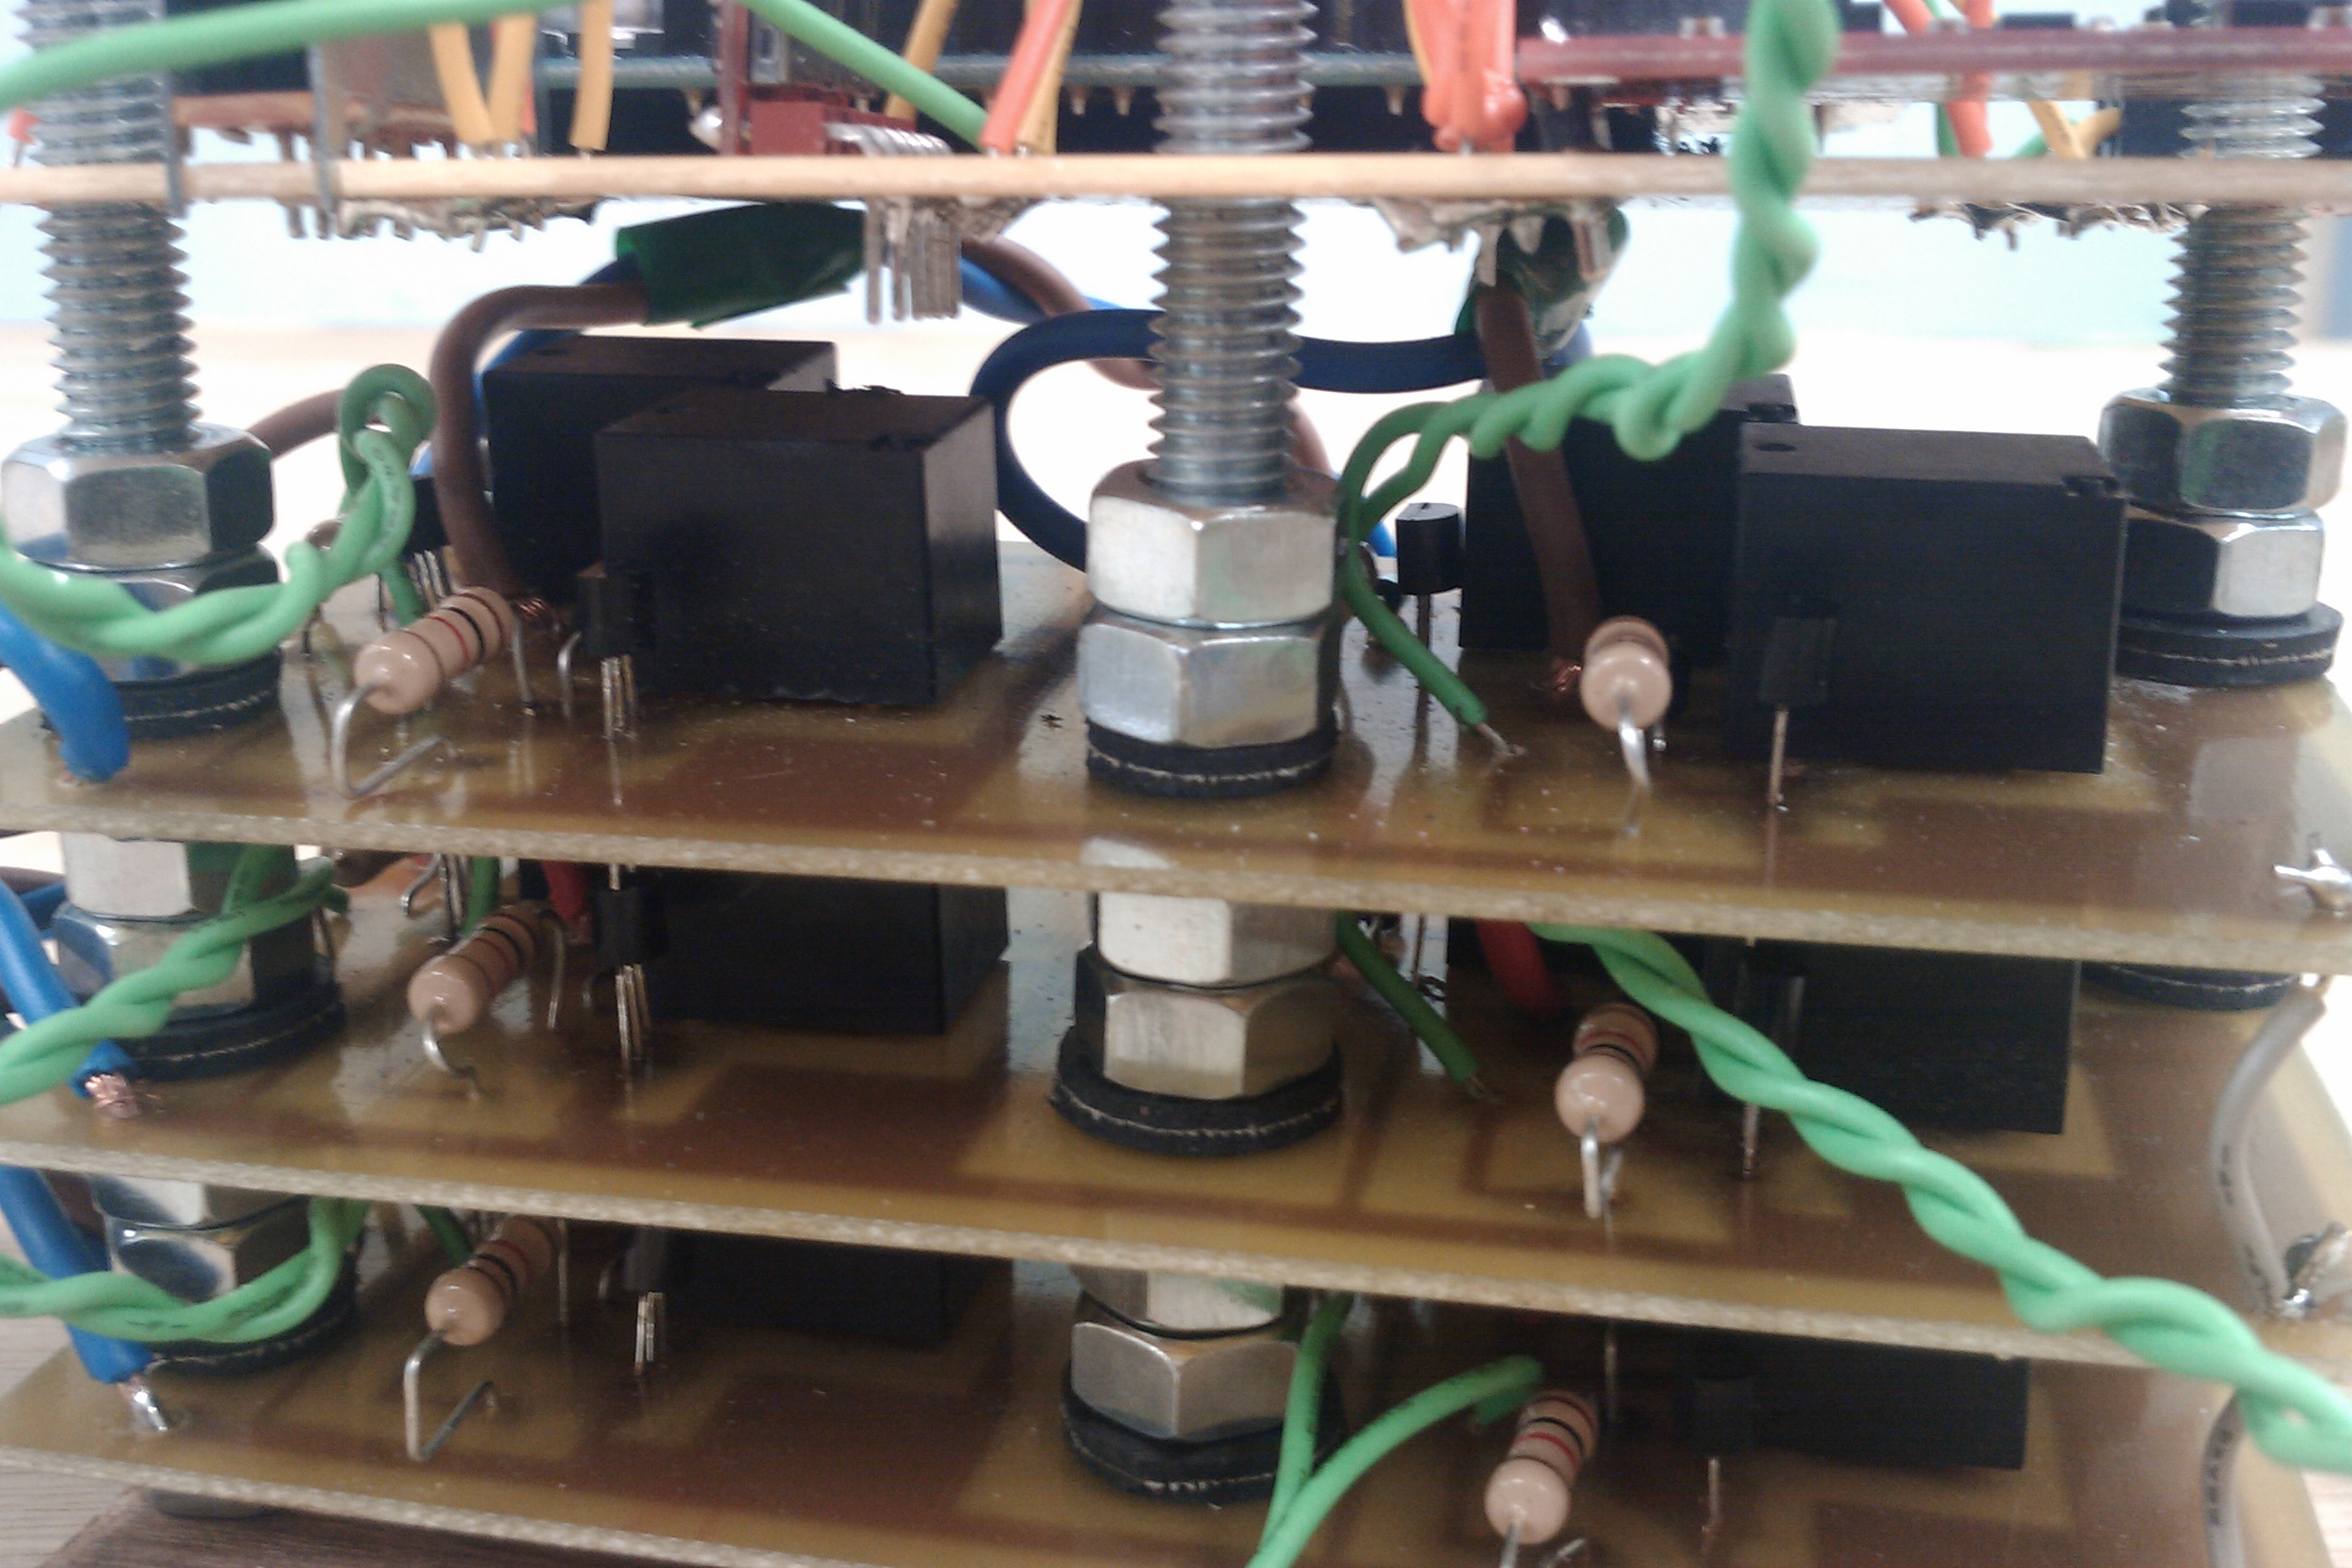
Note mistakes on this board. Three of the relays do not recieve power from the power rail, this was correcting by soldering wires on. Also some of the tracks (where the motors will be drawing their current) are far too thin and were made thicker before manufacture. Close up of boards shown below:
The final electronics tower can be seen below:
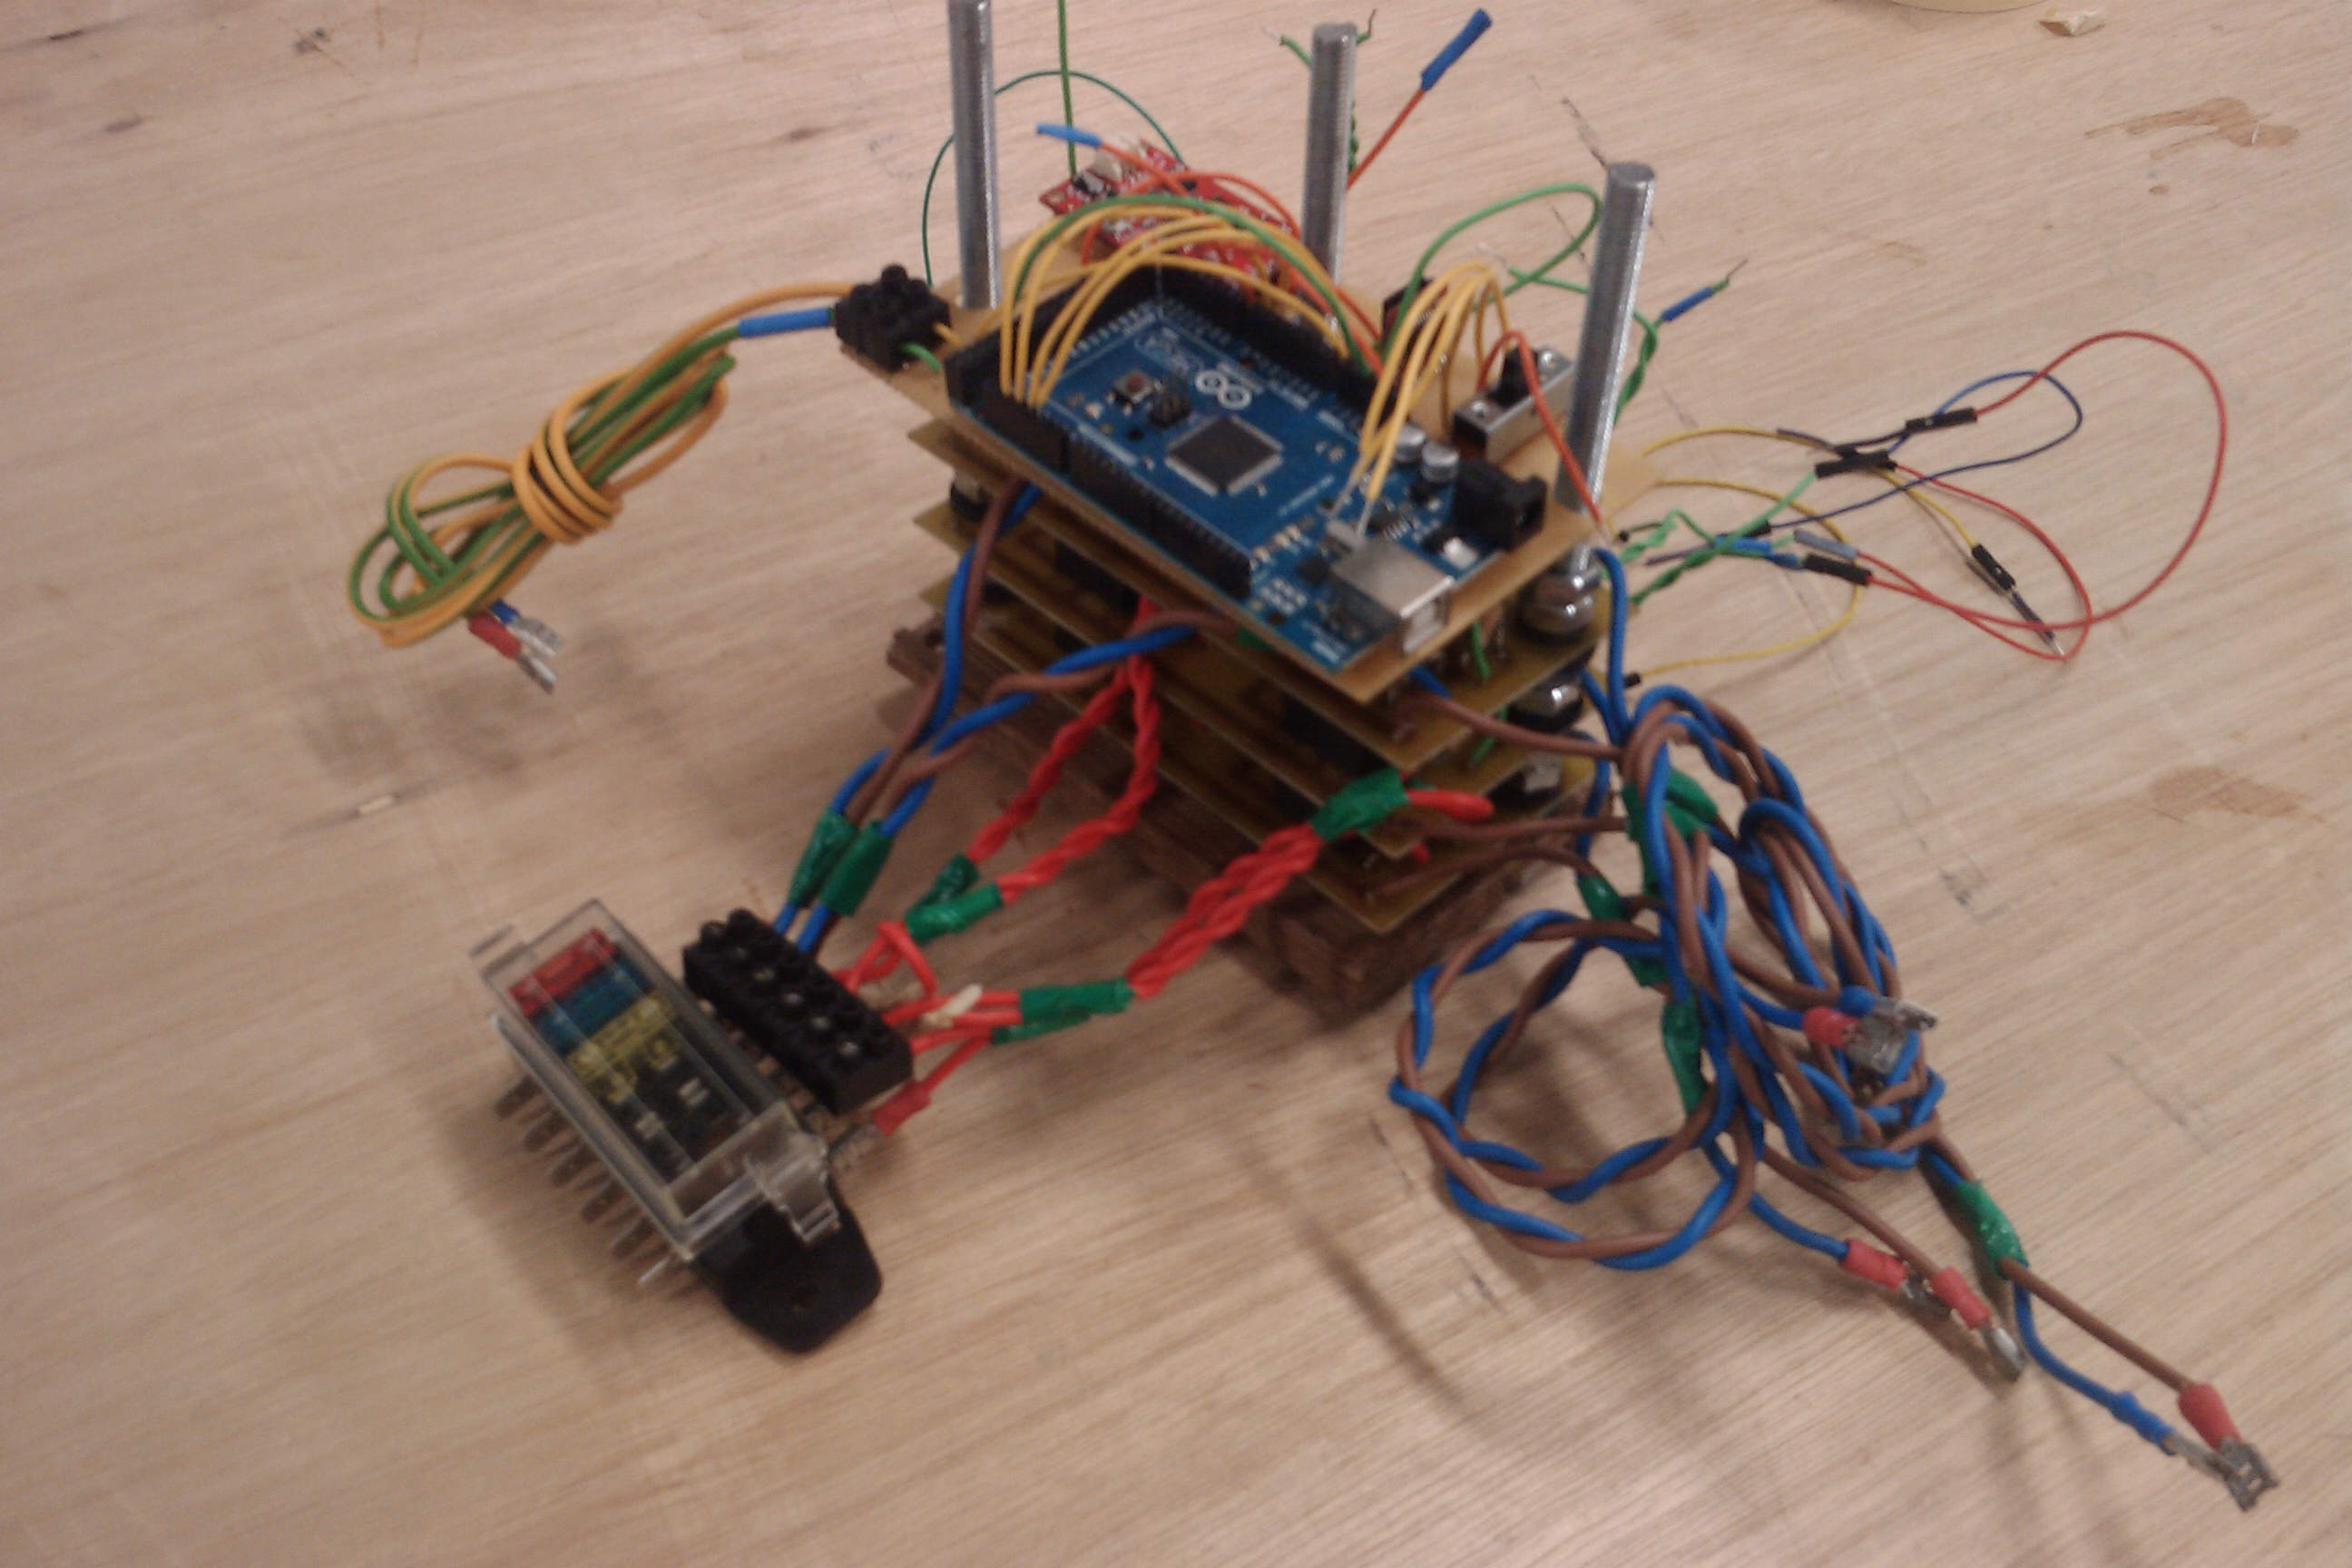
Show is the small fuse box, obtained from ebay. It used blade fuses. The size of fuse is yet to be determined. The power wires (blue/brown) can be seen, as can be motor wires (red). At the rear of the picture is the arduino control wires. On top is a piece of copper strip board. The IMU / Datalogger and Arduino was secured onto this strip board. The Arduino was held in place using velcro.
Final testing will be put up soon.
Update 08/04/2011 - Final Testing Complete. More Videos to follow...
Path Movement Underwater, Autonomously maintains a stable position in the water.
- Actuators / output devices: 6 x 12v DC Motors
- Control method: autonomous
- CPU: Arduino Mega 2560
- Power source: 4 x 12v Lead Acid
- Programming language: C#
- Sensors / input devices: 3DOF Accelerometer, 3DOF Gyroscope, 3DOF Magnetometer.
- Target environment: underwater