Arduino RC Car
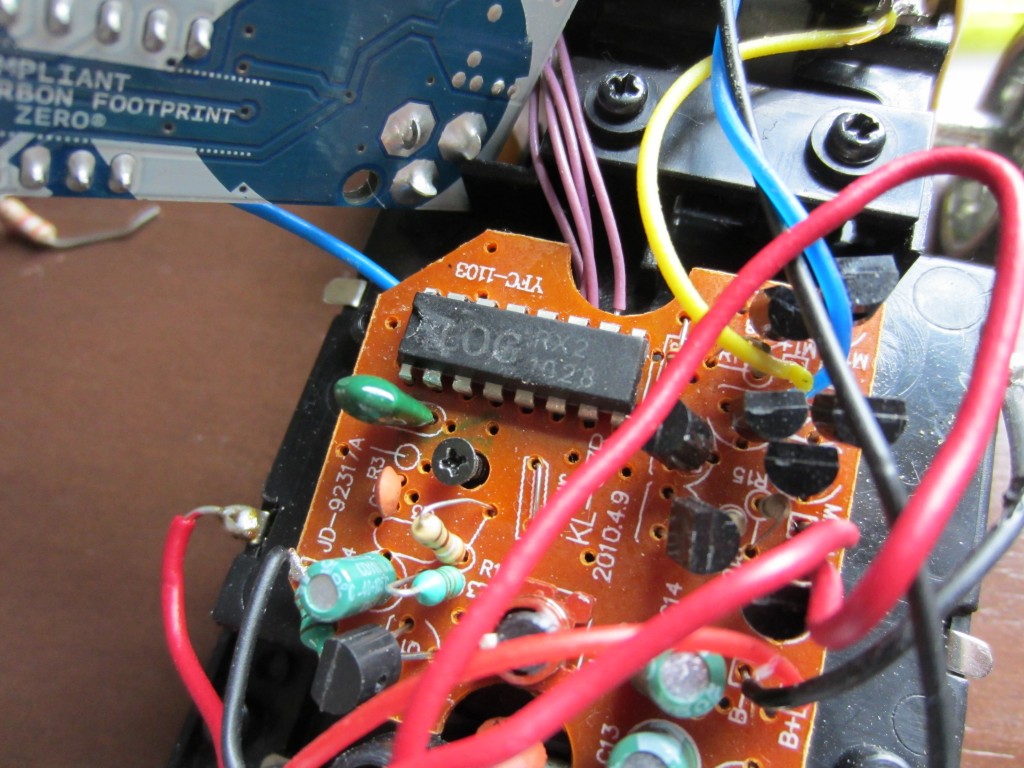
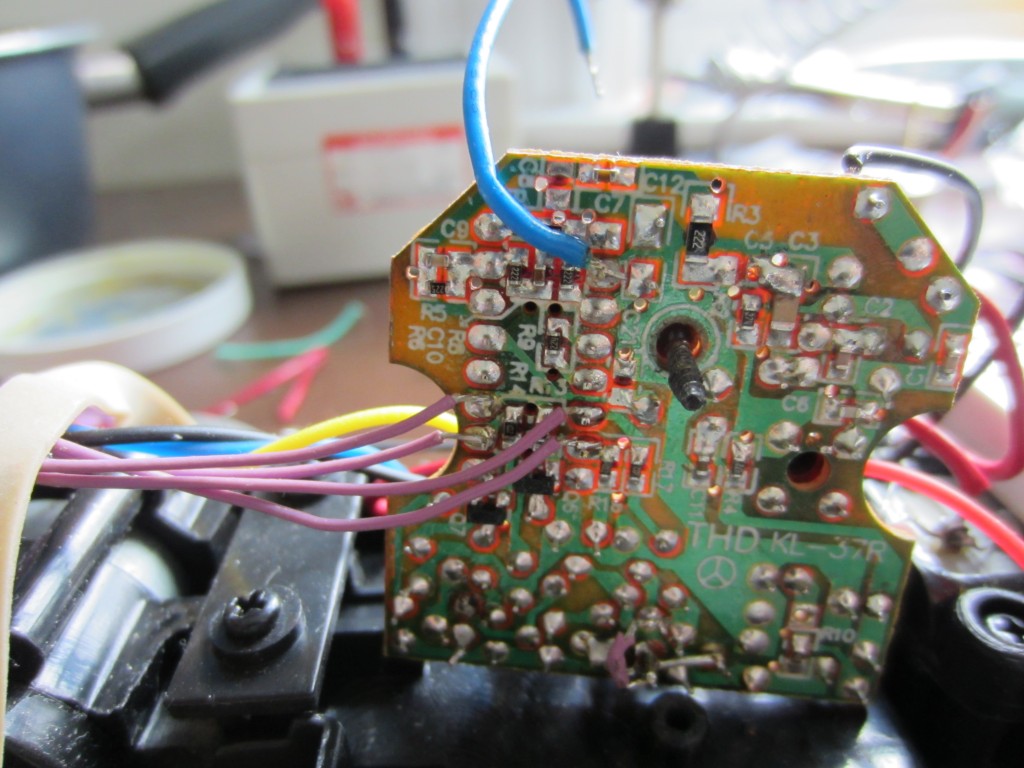
I had bought a RC Car from walmart for about $15 to use with the Arduino Motorshield a while back (see here). Fortunately, I had taken some pictures before I removed the RC receiver circuit from it. Turns out that its lot more efficient to use the onboard controller along with an Arduino instead of using a motorshield. I didnt some research and found out that many “cheap” RC cars use the same Realtek TX2 & RX2 chips inside. I was lucky enough to find the same inside this RC car. I was able to connect 5 wires to the Arduino and control the car by sending a HIGH signal directly to the RX2 chip. Here are the in assignments.
Arduino | RX2 |
Ground | PIN2 (GND) |
PIN 13 | PIN11 (Forward) |
PIN 12 | PIN10 (Backward) |
PIN 11 | PIN6 (Right) |
PIN 10 | PIN7 (Left) |
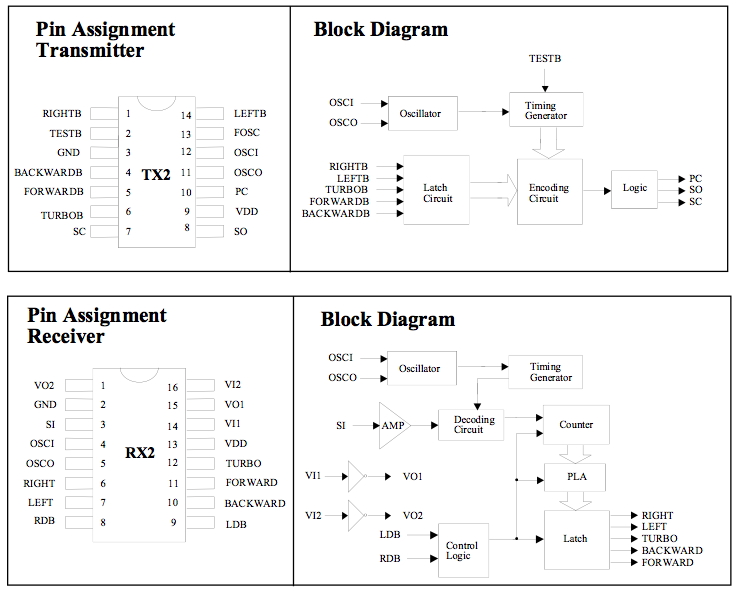
The 2 motors and the RX2 circuit is powered by 3xAA batteries in the car itself and the Arduino UNO was powered by a 9V battery. I also decided to add a PING sensor to make the car backup automatically when it comes close to something. The code is not perfect as you can see in the video, but it can be modified later.
TX2 RX2 document Link
RC Car Arduino Code Link
Video coming soon... Video added.
Image before I took the RC apart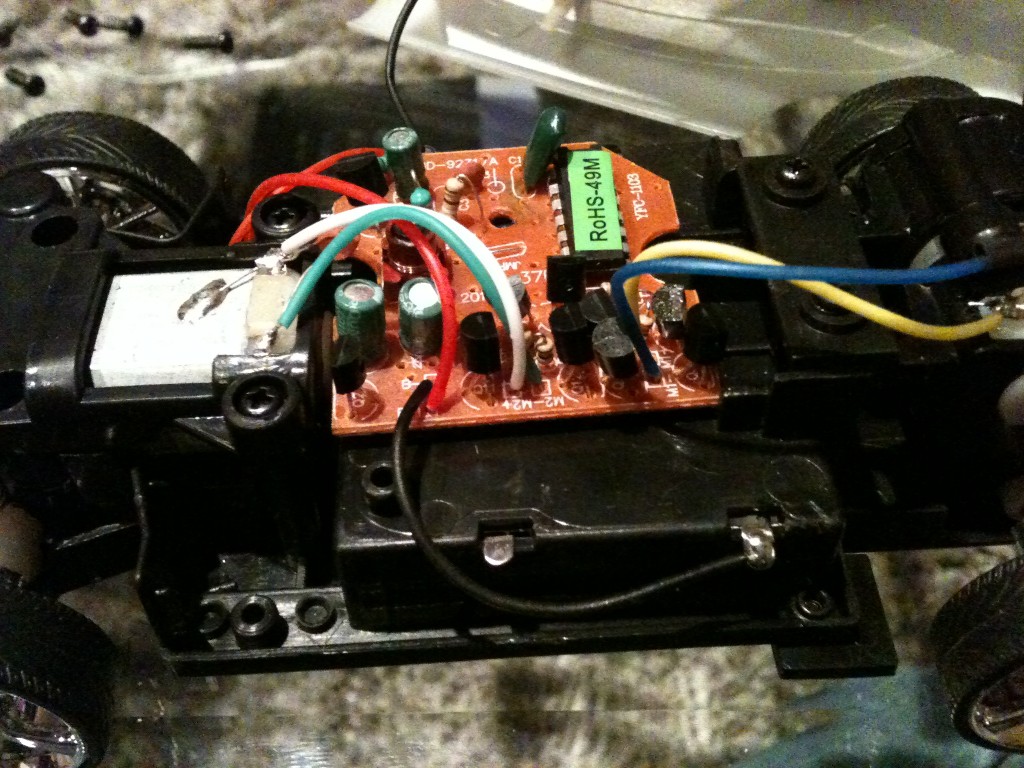
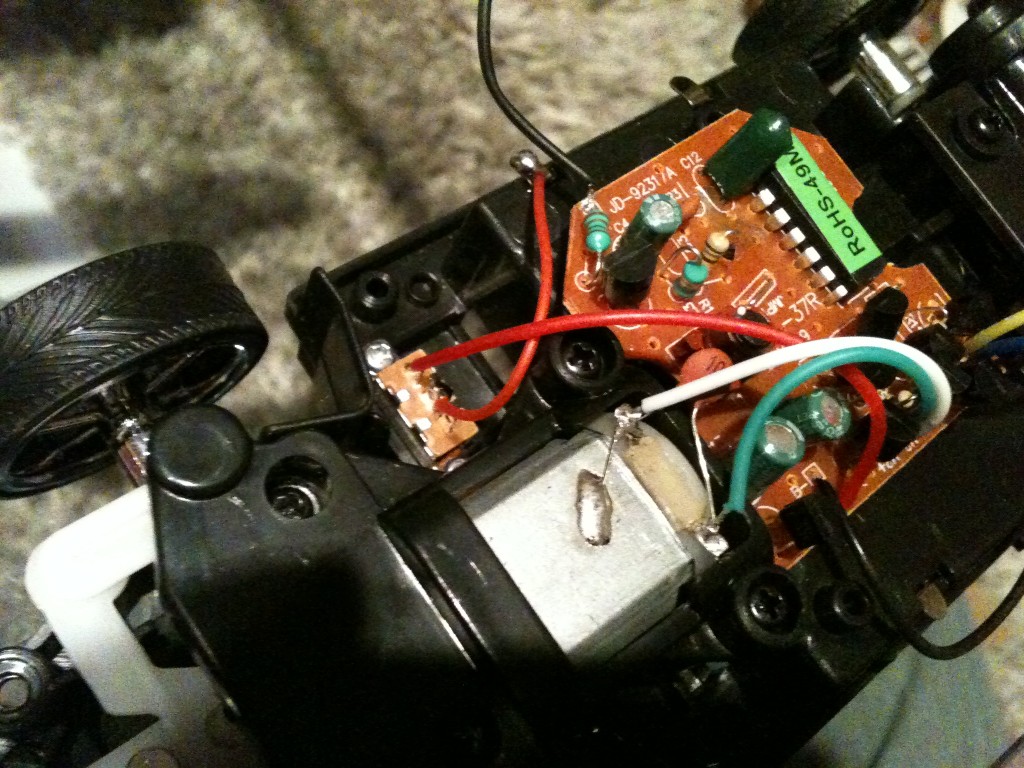
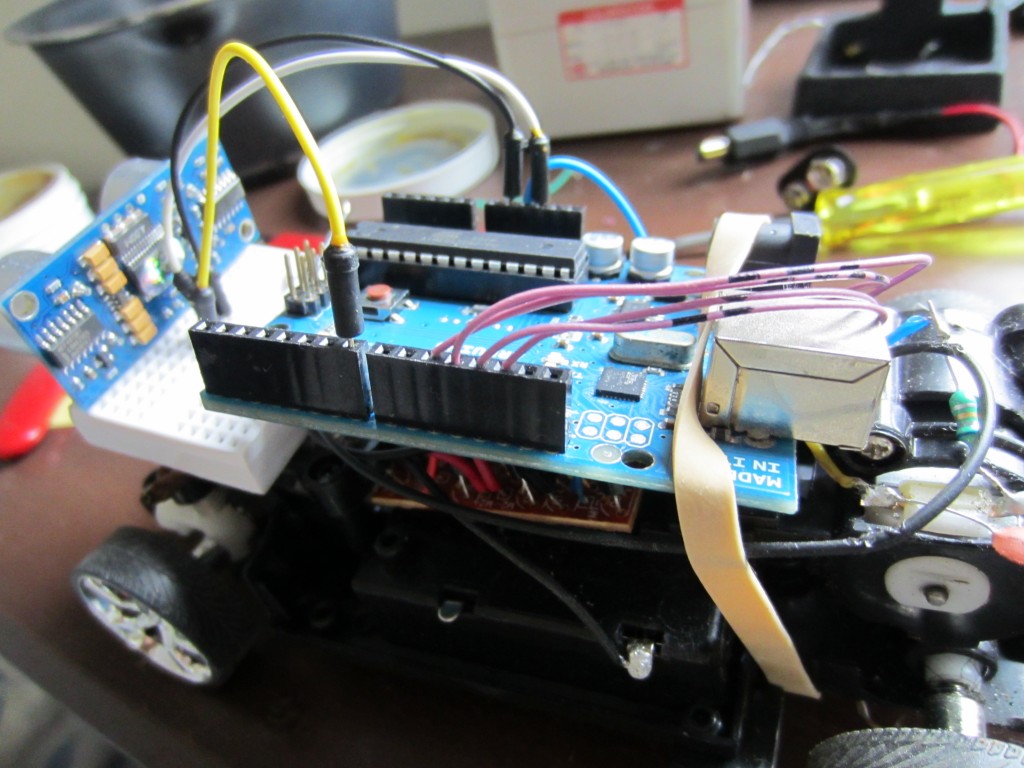
Full Picture
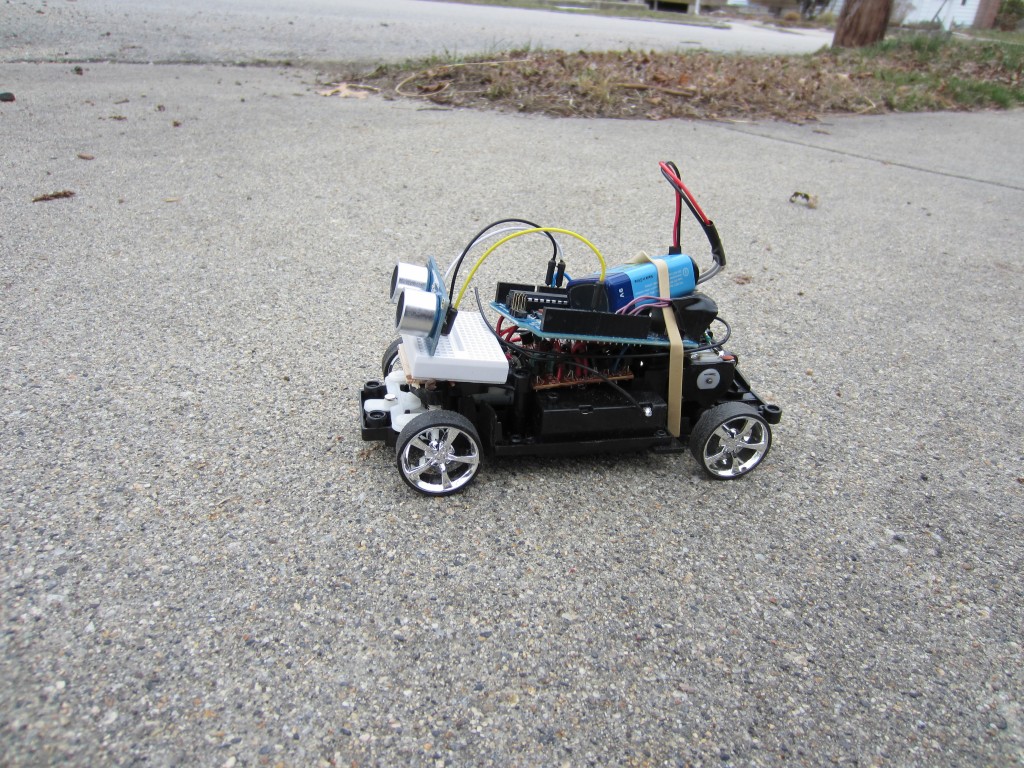
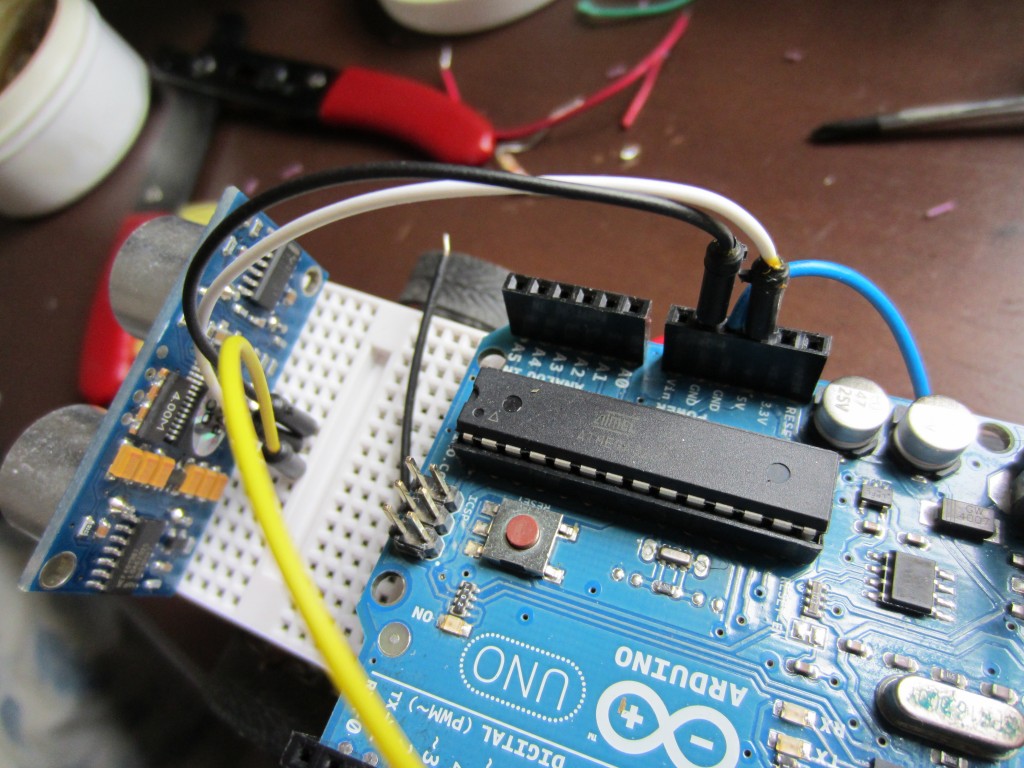
Ping Sensor & RX2 Connection
RX2 Front & Back
Drives and avoids obstacles
- Actuators / output devices: 2 motors
- Control method: Autonmous or RC
- CPU: log rx2 stock, arduino uno
- Operating system: Arduino IDE
- Power source: 9v battery, 3x AA
- Programming language: Arduino ide
- Sensors / input devices: Parallax Ping)))
- Target environment: indoor and outdoor


