


Annihilator Behemoth: Blaster Shark (Sumo)
**UPDATE** Blaster shark has a new title under his belt. I modified it a little to lose some weight as well.
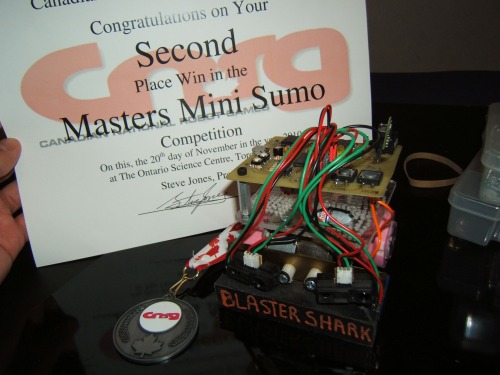
I noticed I was slacking in the project updating, so finally I got around to putting up my robot project. Here it is, the Annihilator Behemoth: Blaster Shark !!!!.
Since I have made blogs about the different build stages, I don't have to bore you with an uber long page. You can check out that stuff here.
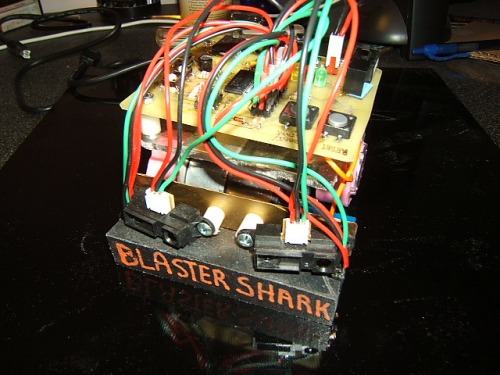
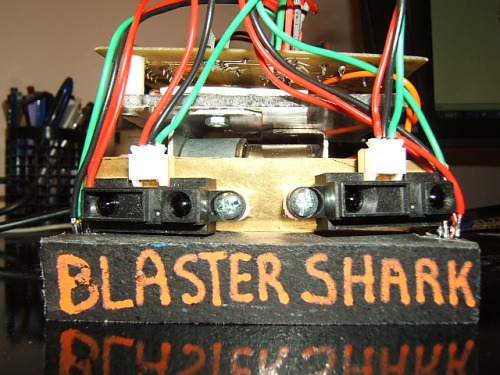
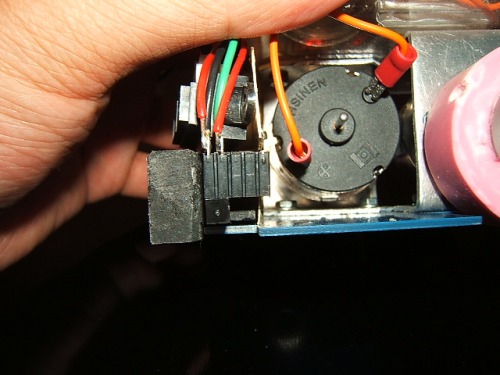
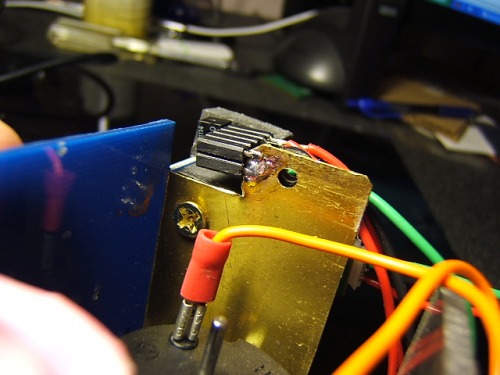
One of the things I am proud of though however is the mounting of my floor sensors. After I finished putting the motors, scoop and PCB on, I began mounting the sensors. I discovered right away that mounting the sensors with mounting tape was not going to work. I needed something behind the scoop to mount the distance sensors and also make mounting the floor sensors easier. At the time I was working at a friends place and he gave me a piece of brass. It was thin and light so I didn't have to worry about adding extra weight. I cut it to the proper shape and screwed it to the back of the scoop. It would be perfect for the front sensors and I could use spacers to angle them outwards and get a better spread.
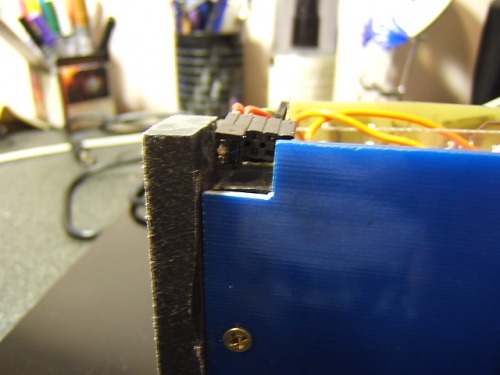
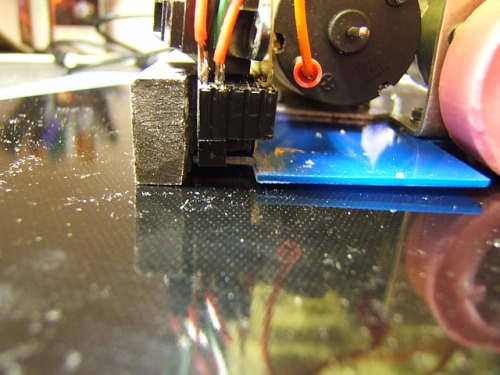
I went home and thought for a long time about how to mount the floor sensors. The solution came to me, like most of my other ideas, when I was looking through my parts bin. I found a ribbon cable for a hard drive, and I thought this would be perfect. I just need to find the kind that mounts into a PCB. I managed to find some and soldered some wires to it for the floor sensors. All I would have to do is trim the leads and insert the sensor. If the sensor burnt out, replacement would be simple. But this is not the ingenious part. When I was going to mount my these headers I found that I could solder them to the brass back plate. What a discovery (well probably not but I want to feel special). This way I can adjust the height to the appropriate place, and the sensor will remain rigid in place.

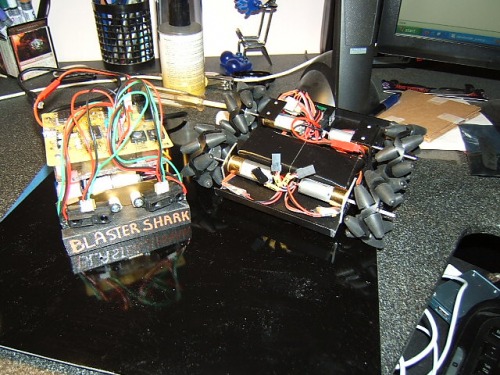
Here is a shot of the base plate. You can see the cutouts for the wheels and the modification I had to make for the floor sensors. The little nut in the corner is there to keep the scoop from lifting off the ground when the robot backs up. This is cause by the offset motors.
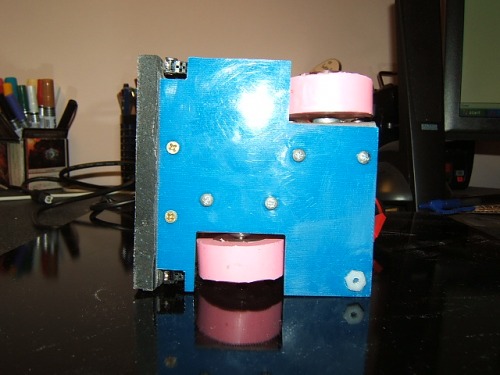
The battery fits neatly into the small space between the PCB and top plate.
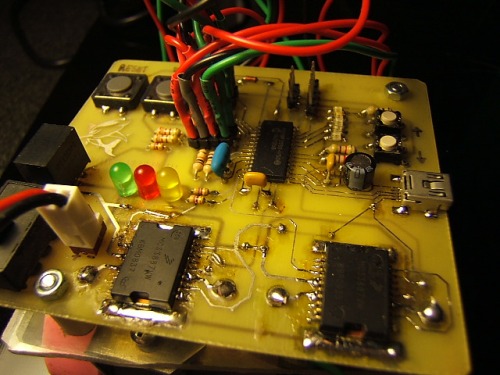
The brains of the beast is a Microchip PIC 18F2550. The circuit is essentially the same as Samm, but I decided to use a surface mount chip to save on space and weight.
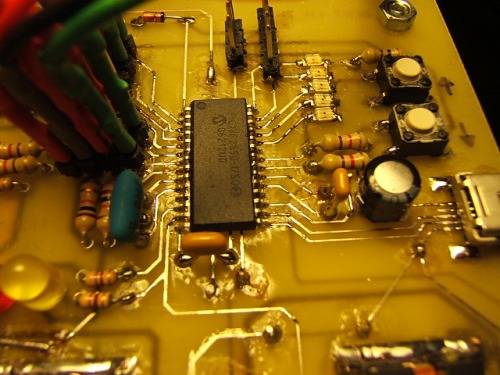
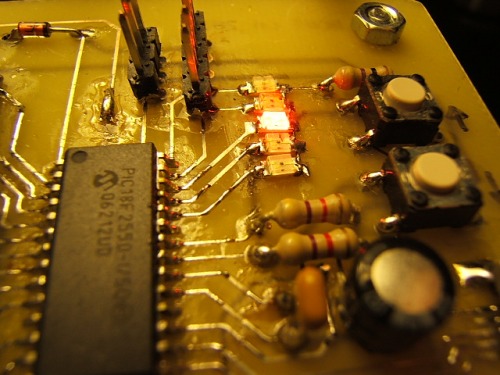
The surface mount LEDs are for mode selection depending on where the robot starts in the ring. I found this to be very helpful in winning matches.
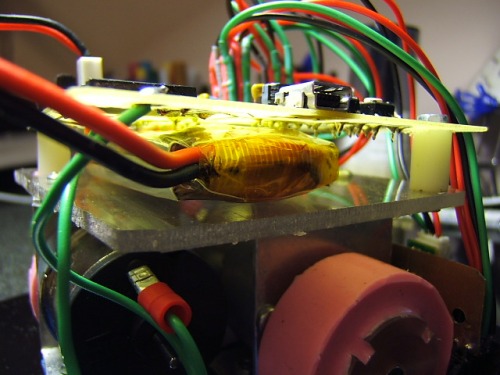
That black box above the switch is a switching power supply. It was basically a drop in replacement for the LM7805 but 10x the cost. But the benefit is that less power is lost from stepping down the voltage, so the battery lasts longer. Blaster Shark also uses the same Motorola MC33887 motor drivers as Samm. The unfortunate thing about these drivers is that they have become obsoleted. I hope there is some replacement in the works.
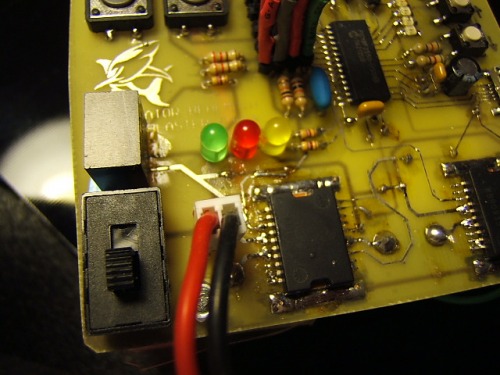
Nice big buttons for reset and start.
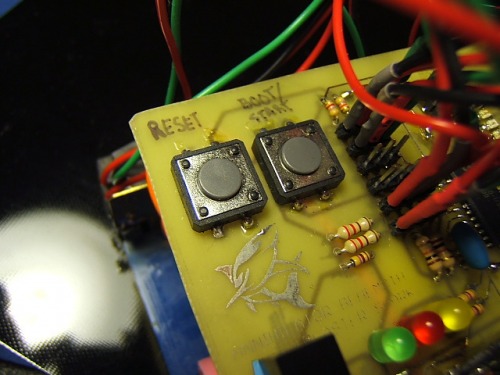
Since it is almost the same circuit design as Samm, I program the chip with a bootloader. The bootloader code however has to be put on manually, so i was sure to include header pins in the circuit. I put the bootloader code on with my ICD2 programmer. So any subsequent code changes that need to be put onto the chip will now be done through USB with the bootloader.
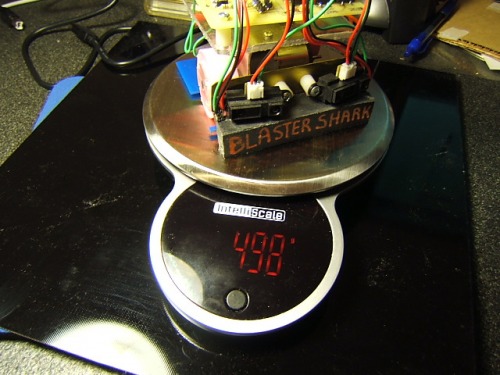
Final weight is cutting it pretty close to 500 grams. I will probably shave off some weight later to be on the safe side.
Obligatory chiken photo.
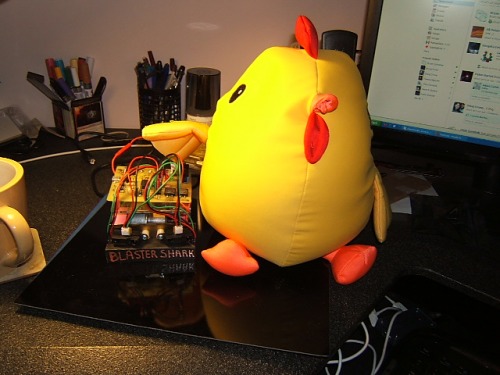
Blaster shark next to not so super secret project for Fingertech Robotics.
Well thats all folks. If there are any questions I'll try and answer them the best I can.
Placed 2nd at WCRG and CNRG
- Actuators / output devices: Lynxmotion 7.2VDC 291RPM 54.31oz-in GHM-03 Spur Gear Head Motor
- Control method: autonomous
- CPU: Microchop PIC 18F2550
- Power source: 11.1v Lipo
- Programming language: C ( C18 )
- Sensors / input devices: Sharp GP2Y0A21YK0F IR sensor, QRD1114 floor sensors
- Target environment: indoor, on a dohyo(sumo ring)