


all terrain/butler robot v2 of my humanoid
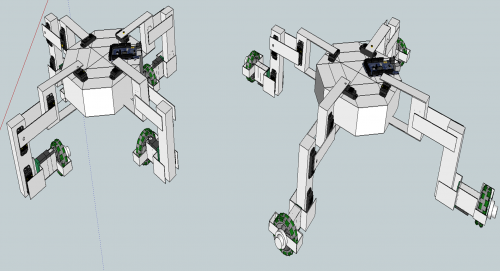
This is the more resent version of my humanoid and omniquadruped robots the humanoid has had its legs upgraded since my last post for it so now it is able to stand on its own even when the servos arnt powered and is able to lift up one foot with the tophalf attached but as you can see in one of the videos i have taken the top half off for it to take its first step because the weight of the tophalf tends to make the robot less ballenced so im going to do a further revision of it makeing the robot less top heavy. As you can see in the sketchup design on the main picture there is another robot other than my humanoid it is a 4 legged robot that will be able to walk then fold its feet up and drive around using omni wheels which should give it quite a large range of motion. I have also included a video of my robots first step well its the better version of his first step with better coding makeing his movments smoother.
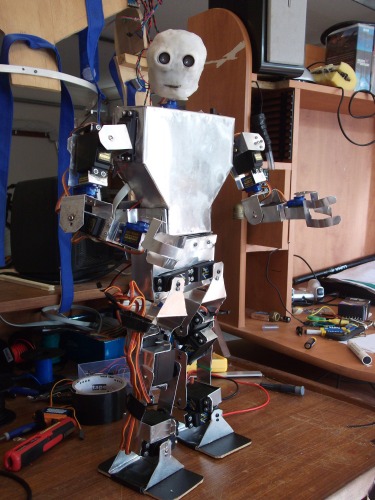
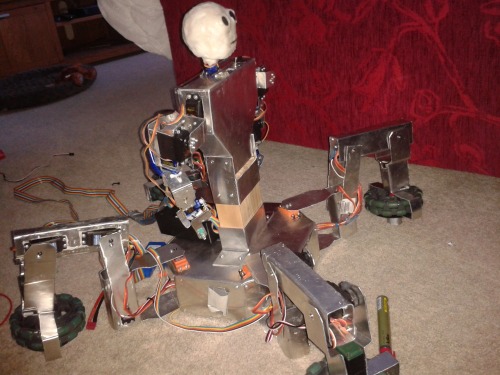
this is the new and improved humanoid with better designed leg servo brackets as you can see its fully self supported .
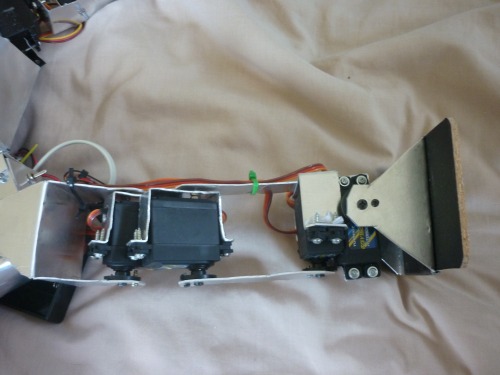
this is what the leg looks like up close. I built the brackets out of 18 guage aluminium sheet metal from jaycar and cut it useing tin snips and shaped it useing a vice and hammer.
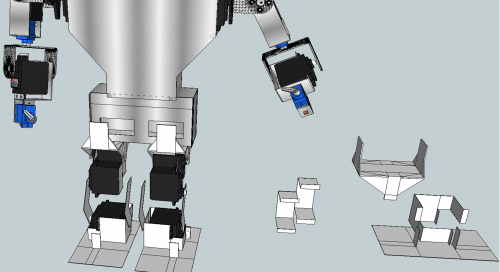
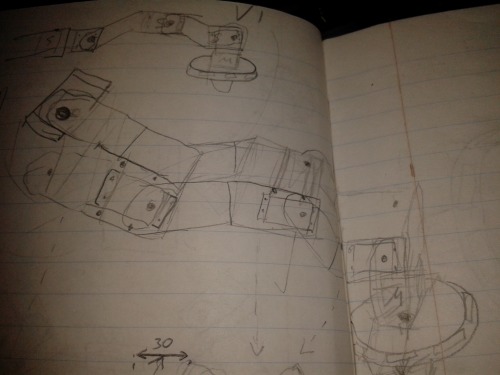
this is the sketch up design i did of the new legs.I decided to go with the straight calve section on the leg rather that the bent one shown in the sketch up design.
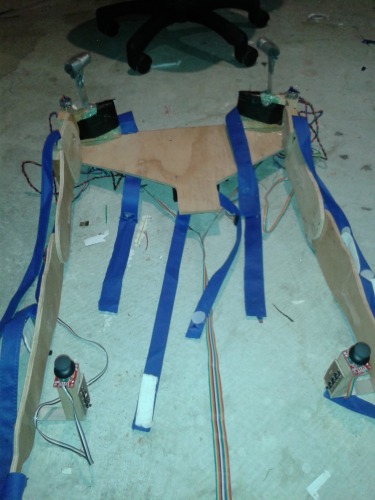
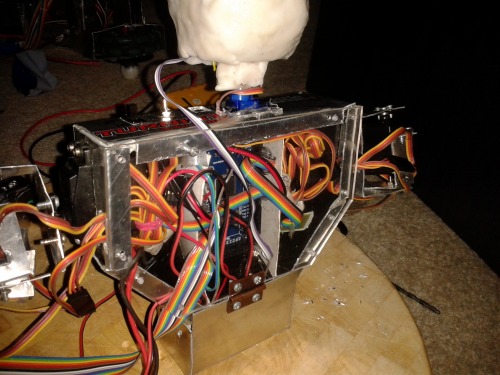
This picture shows my humanoids control suit version 1.5 it is still tethered to the robot because havent quite got wireless working with my xbee modules yet. This version is different to my last one showed in my last robot post because it now has joysticks and buttons where the hand potentiometer used to be the joysticks are going to be used to control the head and also control its walking or to controle the hands. Im also planing to be makeing the suit automaticaly connect to me useing servos and also put fpv googles in and put a camera on the humanoid later on amkeing it more of a telepresence robot.
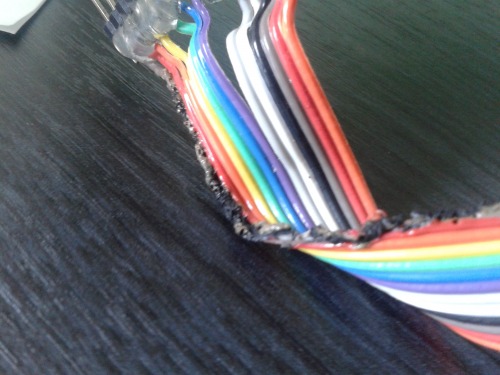
ive also had some problems along the way of making the humanoid such as the circuit board shortcircuiting I think and makeing the wires catch fire as shown in the picture above . I have now taken extraprecautions to make sure this doesnt happen ( duct tape the bottom of all circuit boards and put duct tape on the inside of the humanoid chest plate. )
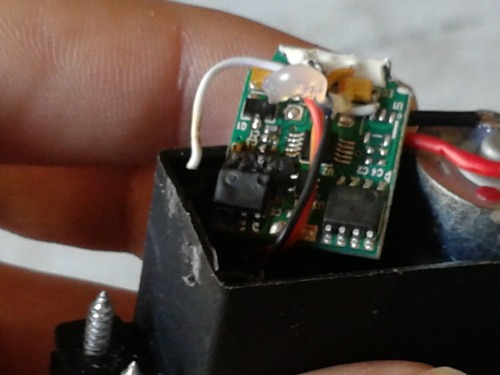
I also had 2 of the servos catch fire . Im still not totaly certain what caused this I think it may have been that I was putting too much strain on them by makeing them go to positions that they cant get to.
I also decided to put a clear purspecs back plate on so its easyer to see the electronis on the inside and looks pretty cool at night with the lights on on the inside.
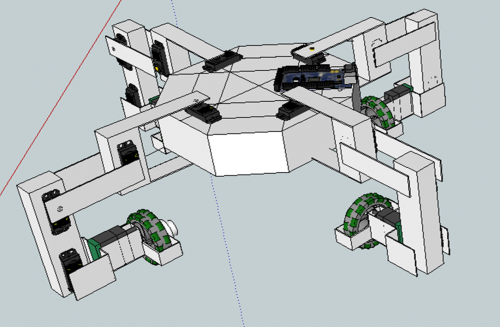
This is the new base of locimotion for my humanoid butler/teleprecence robot since my room is upstairs in my house i needed my butler robot to be able to get up them easily and be able to move around on the ground easily which is why i came up with this design . It was also slightly based on NASA's athlete robot but it saves on haveing to use a extra motor to turn the wheels on the y axis because of the omniwheels.I should have another update on the robot next week which shows the robot driveing around and possibly the different driveing positions. Im going to be using vex omniwheels and vex 3wire motors since they are easy to use and dont need motor controlers because they have them built in.
lower down position
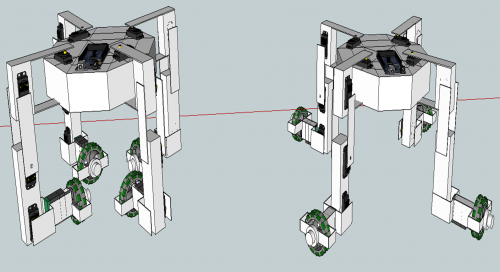
higher up position
here you can see the other positions used for driveing.

before the wheel/motor brackets

Here is a picture of what I have done at the moment it cant quite stand on its own when the servos arnt powered but it seems to stand up just fine when they are. It was very hard to shape the aluminium into a tube shape by just using a vice and a hammer since it is quite thick i was going to use a already made aluminium tube but i couldnt find any to the right size.
first design

previouse attempt for legbrackets this bracket was what i was originaly going to use for the robot but then decided to go to the design i have now because it takes less aluminium to make, making it cheaper.
quadruped with humanoid attached
butler, all terrain movement, suit controlled, partial telepresence
- Actuators / output devices: 6 hxt900 servos, 6 hxt5010 servos, 12 tgy s901D servos, 4 HK15298 servos, 4 vex 3wire motors
- Control method: autonomous, controlled by a suit
- CPU: Arduino Mega 2560 Clone
- Power source: 7.4v 5000mah lipo
- Sensors / input devices: potentiometers, buttons, SRF05 Ultrasonic sensor
- Target environment: indoor and outdoor