


A.R.C.O.S
December 2013
Maintenant en Français et en Anglais. Now in French and English.
ARCOS a eu beaucoup de modifications depuis ma dernière publication. Non seulement une transformation mécanique mais aussi électronique ou électrique.
ARCOS has had many changes since my last publication. Not only mechanical but also electrical or electronic transformation.
L'aspect extérieur n'à pas changée beaucoup si ce n'est quelques trous en plus. J'ai adopté un concept "modulaire", cela afin de permettre des réparations plus rapidement.
The outward appearance changed it does not reach much if not more air holes. I have adopted a "modular" design, that repairs to allow faster.
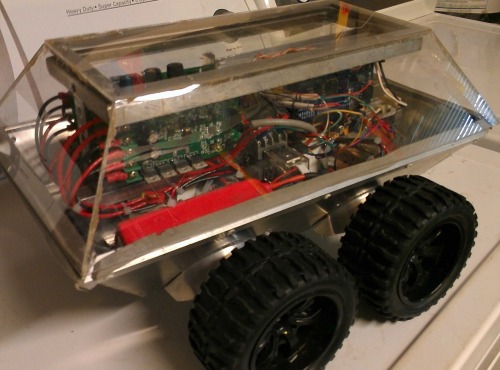
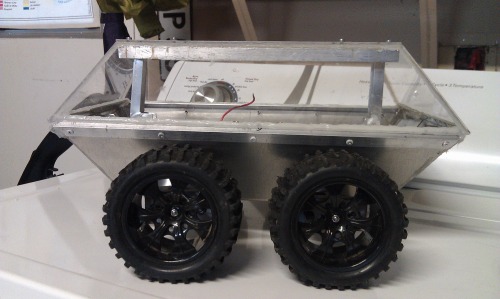
Voici la coque, l'on peut voir le chassis attaché au fond. En rouge c'est de la peinture antirouille.
Here is the shell, you can see the frame attached to the bottom. Red is the rust paint.
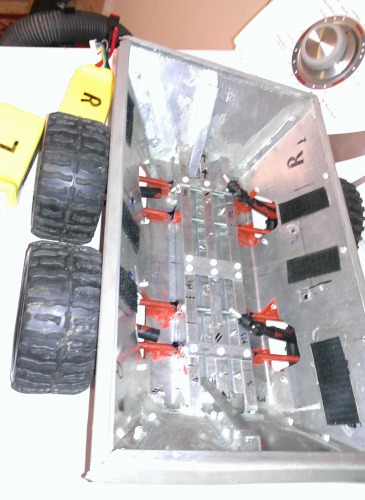
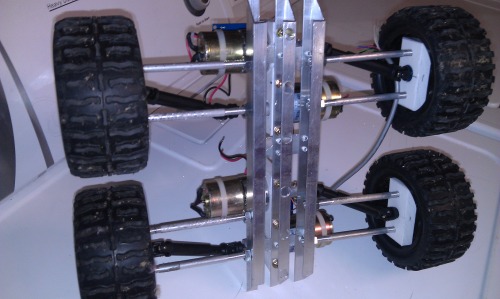
C'est une vue du dessous de la coque. Les parties blanches vont bientôt être remplacées par des parties imprimées avec une imprimante 3D (merci père Noël) dès que je là recevrai. Ces parties vont recevoir les encoders optiques qui permettront de controller la vitesse de chaque moteur séparément afin que le robot avance droit. je suis surtout obligé de faire cela parce que mes moteurs sont très peu cher et donc aucun ne tourne a la même vitesse. Chose qui serais plus facile a faire si ils etaient de meilleur qualité, ou avec encodeur intégrés, ou même si ces moteurs étaient des moteurs pas-a-pas. Une autre stratégie serais d'utiliser des chenilles a la place de quatres roues afin d'éviter les problème de différence de vitesse sur un même coté. Peut-être vais-je faire çà quand j'aurai l'imprimante !!!!?
This is a bottom view of the hull. The white areas will soon be replaced by printed parts with a 3D printer (thank you Santa) as soon as I receive there. These parties will receive the optical encoders that allow to check the speed of each motor separately so that the robot goes right. I am especially obliged to do this because my engines are very cheap and therefore none rotates at the same speed. Something that would be easier to do if they were the best quality, or with integrated encoder, or even if these engines were stepping motors by-step. Another strategy would be to use caterpillars instead of four wheels to prevent the problem of speed difference on the same side. Maybe I'll be here when I get the printer!?

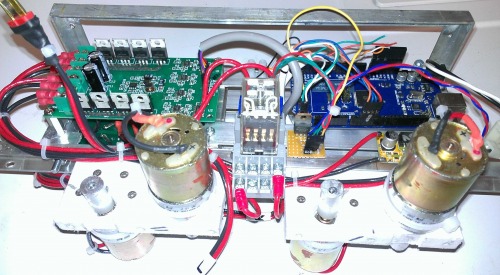
Une vue de dessus du module interieur. Après avoir grillé un arduino mega, j'ai monté des fusibles pour protéger les batteries contre les court-circuits. vous pouvez voir les pilotes des moteurs de chaque coté des fusibles.
A view of the interior module. After a toast arduino mega, I mounted fuses to protect the batteries against short circuits. you can see the pilot motors on each side of the fuses.
Sur cette photo vous pouvez voir une autre protection. J'ai installer un relay pour couper les batteries si celle-ci vont trop bas afin de les protéger contre les sous-descharges. Je vais bientôt recevoir tout les composants nécéssaire pour mesurer le voltage des trois batteries par le arduino.
On this photo you can see another protection. I install a relay to disconnect the batteries if it goes too low to protect against sub-descharges. I will soon receive all the components necessary to measure the voltage of the three batteries by the arduino.
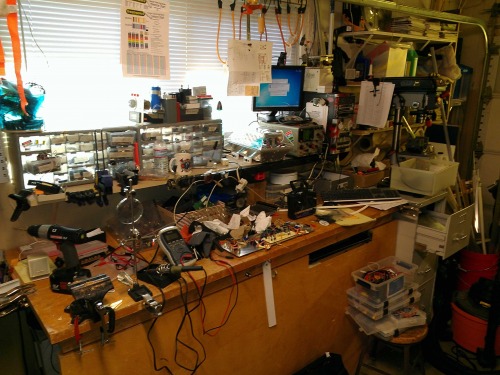
Je sais que je n'avance pas très vite dans la construction, mais c'est parce que j'apprend en même temps tout ce que je doit savoir pour ne pas faire trop d'erreurs qui peuvent me couter de l'argent a remplacer des pièces comme cela est déjà arrivé ! Aussi ma place et assez petite pour travailler sur le projet, je n'ai pas encore décider ou je vais installé l'imprimante.
I know I'm not moving very fast in construction, but it is because I learn at the same time all I should know not to make too many mistakes that can cost me money to replace parts as it has already happened! Also my place and small enough to work on the project, I did not decide or I'll installed the printer.
Previoulsy December 2013
This robot is for patrolling on my backyard to detect an intrusion, squirrels is the most common thing the robot will be encounter.
For now I am concentrate to the traction (motors driver) of the robot. ARCOS has 4 DC geared motors, two on each side, the direction will be change like a tracked vehicle. My actually problem is to regulate the speed of the motors because no one has the same speed, and obviously the robot is not going in a straight line (lesson 1 = cheap motors is not a good choice)
I thinking to use encoders on the wheels and regulate the speed of each motor, also the encoders can be use for odometry in the futur.
Here is a link of what I can use with the wheel I have on my robot:
http://www.parallax.com/Portals/0/Downloads/docs/prod/robo/DigitalEncoderDoc.pdf
http://www.parallax.com/Portals/0/Downloads/docs/prod/datast/ApplyEncoder.pdf
Bellow you can see the four motors and the actually two driver motors (MC33886), obviously if I install the encoders I will need two more drivers.
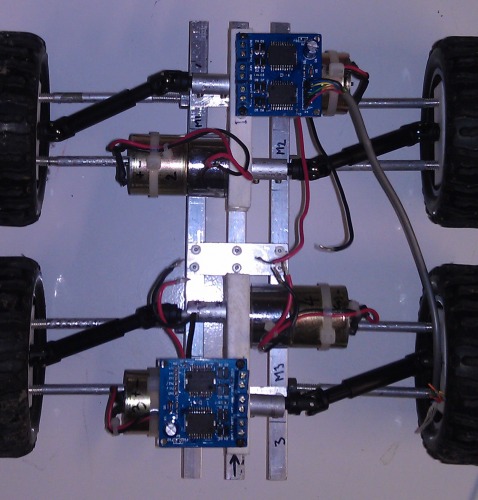
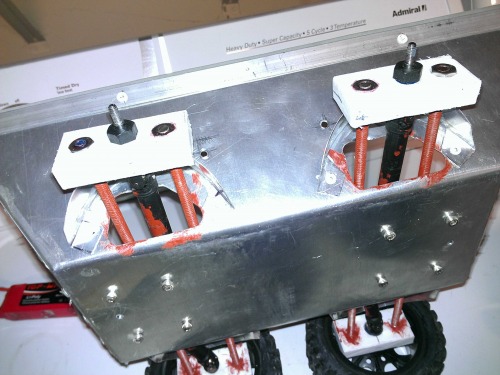
In this picture, the white part is a HDPE plastic, I still have enought space on it to install an encoder
I like this idea to use the wheel's holes for the tracking.
Patrolling the backyard
- Actuators / output devices: 4x 12V geared DC motors 160RPM
- Control method: autonomous
- CPU: Arduino Mega 2560R3
- Power source: 2x LiPo 22.2V 20C 3000mAh + 1x LiPo 11.1v 2200mAh
- Programming language: C++ (Arduino)
- Sensors / input devices: IR, US, photo
- Target environment: outdoor