


4WD Rover - my first robot in progress
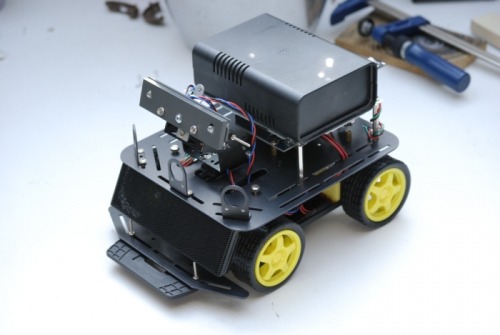
This is my first autonomous 4WDBOT on a DfRobot Base.I try to keep all mountings as clear and functional as possible - no decoration parts.
Update:
After some code-tunings the obstacle avoiding system runs fine now - even with higher speed. I've implemented a speedboost-mode if the distance is higher as 200cm, so it much faster on larger distances. There is a new video online with the second obstacle avoiding test.
Update:
Success! Even there is a lot of finetuning with gears and delays to do it is really nice to see the bot running! There is a new video with the first obstacle avoiding test.
Update:
All sensors and motors are running great now. I got clear readings. Everything is hooked up nicely and the sensorhead reacts on lightconditions just fine. I can read the light on the left and ride side now with values between 0 (darkness) and 255 (bright sunlight). The URM gives me now smooth values between 5 and 300 (cm). Maybe I can start the first autonomus tests today. It evaluates three variables - front distance, left distance and right distance. It should be possible now to make movements because of different lightconditions and front/left/right distances. The code is cleaned up and commented out - but here is still a lot to do (there ist enough codespace free on the chip).
Update:
A new URM arrived. It's working just as it should be! Great! Yippie! I got a full range between 0cm and 280cm. In the meantime I had enough time to rearrange nearly every cable twice... A nice little green plug-backpack is ready, too.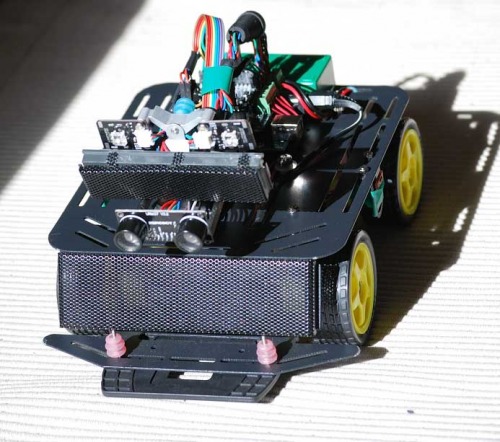
The mounted URM sensor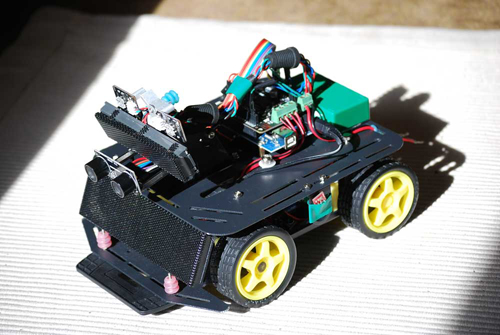
Better cable layout with a cleaned out cable backpack
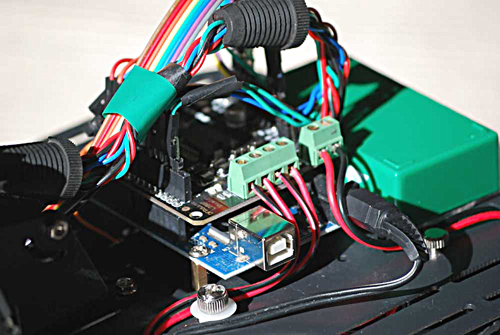
Thumbscrews for cable holdings, antishake cable holder, vibration damper now everywhere...
Update:
At the moment I am working on the ultrasound navigation. I am not sure if my URM3.7 unit is broken - I can read the values over Rx + Tx but the measurement range is only between 4cm and 10cm. It should be between 4cm and three meters. I am using Miles Burtons URM library with Arduino 2.2 wich is originaly written for 1.7. Or I have to put the URM in another Mode over serial - I am not sure at the moment. If somebody here has got a good idea because of this strange behaviour I would be glad to hear it.
URM Update: The URM3.7 is destroyed - two of the capacitors on the back are missing. Maybe because of a weak solderingconnection? Maybe because of my fault? Who knows. But finally I have found the error and I can reorder a new part. Maybe is possible to fix it - but it's smd size and really small.
Update:
Today I have soldiered the cables to the two lightsensors and rearranged the cable layout. Maybe I will multiplex them later to eight - but at the moment two sensors are good (left side + right side). Additionally I have prepared the front for two speaker, for hyper hifi stereo. I have just ordered my second URM - and I've found a nasty little analog alcohol-sensor for 4€. Ordered.
The black box on the back is a 12V batterybackpack. It is planned to place a solar-cell on the back for autonomous power charge. There is still a lot to do, but I'll try to submit pictures of every stage of the building process. I hope you like it. Comments, suggestions and help are much appreciated.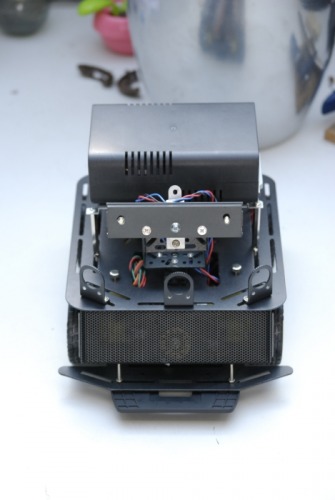
Alpha
Sensorhead preview and batterypack mounted...
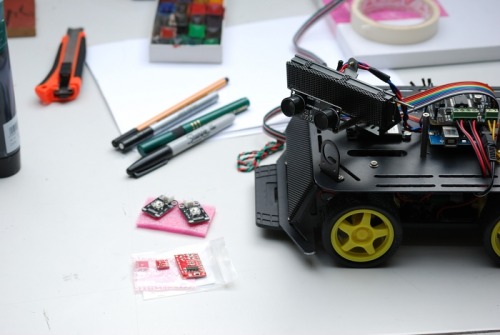
Light sensors, sharpies and 3W Stereo Audio Amplifier...
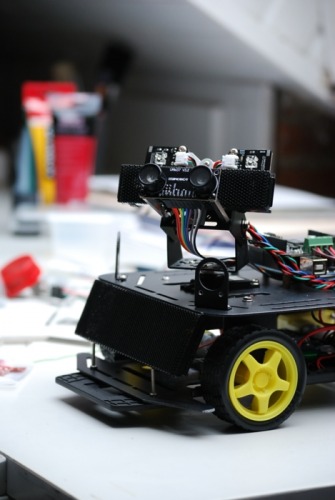
The sensorhead with the URM3.7 and sharpies mounted
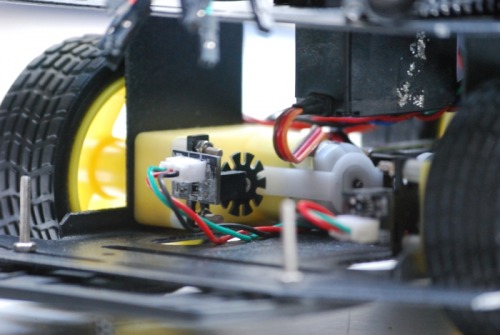
Rotary encoders mounted
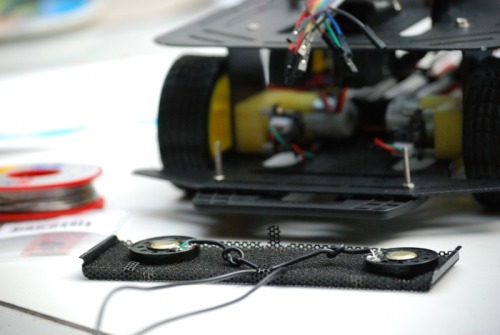
Preparing Stereo Audio in the perforated metal plate front (dustblocker)
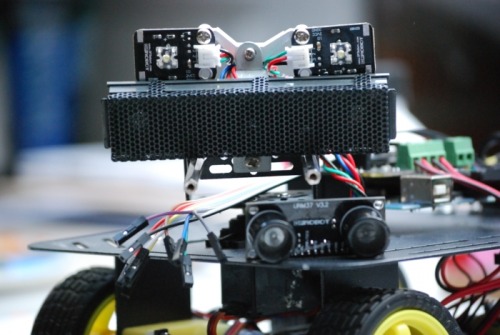
Face with unmounted URM (arrrgghh!) - rearranged, cleaner cable layout... the perforated metal plate is for the hidden white LEDs - otherwise you would not see it's eyelights at daylight.
Update:
First pictures of my processing controlterminal for sensor- and encodertests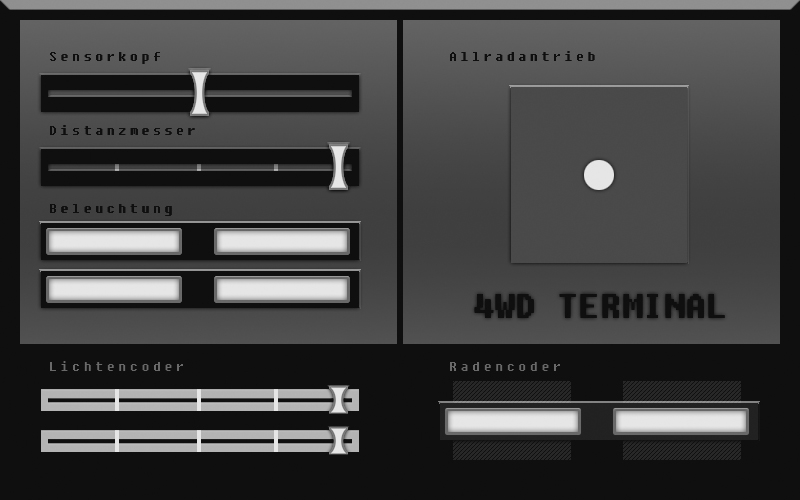
Ultrasound navigation, reacts on nearfield bodyheat, detects light
- Actuators / output devices: 4x 1:120 gear motors (12V) 1x Graupner Servo
- Control method: autonomous
- CPU: arduino - atmega328
- Power source: 12V Battery
- Programming language: Arduino C
- Sensors / input devices: 2 x light sensors, 1x URM37 ultrasonic, 2x rotary encoders
- Target environment: indoor flat surfaces