


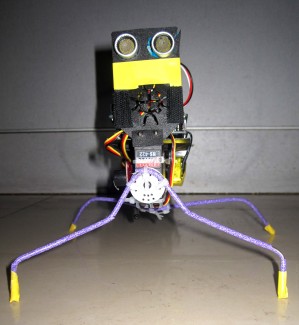
4 Leg Insect
UPDATE May 20:
I just want to share some experience with this little guy. Once I showed it in the Shanghai hackerspace Xin Che Jian and published the video on the Chinese youtube youku.com the interests did awake. My friend got a lot of requests of people (mainly kids) who want to build one. So we bought the parts and he did a workshop in Chinese language with 13 attendees (pics here). Last Sunday I did another one in English, so far 4 attendees and all of the bots was walking in the end.
Look what the guys there tried to achieve: Cup robot
What I want to say is that it's really easy to build one without to be an engineer. Also the parts are not expensive and you can reuse them in other projects. (this is why we decided to include the Arduino Duemilanove and not the Nano). with the Duemilanove then can do further projects as it is easier to put some shields on it.
Edit: I marked it as "Finished" since the main purpose of the project is achieved. He might get disassembled later that his components can serve a greater purpose but he will always be my first robot ;-)
I built my first robot with help of the Make Magazine March 2011 and the description there. So I did not invent this little guy but modified him a bit.
First of all, I am new here and being infected with the virus ;-) ...oh...and English is not my first language...so please forgive my grammar thing ;-)
How to start. Ok, i was reading the "Oreilly Make Arduino Bots and Gadgets March 2011" after my friends introduced me to an autonomus toy car with Arduino.
Here we go:
First assamble the parts:
2x HS-422 servos
1x Arduino Duemilanove & 1x Sensor shield
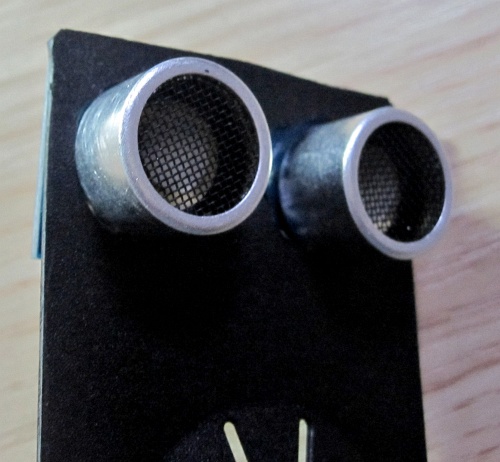
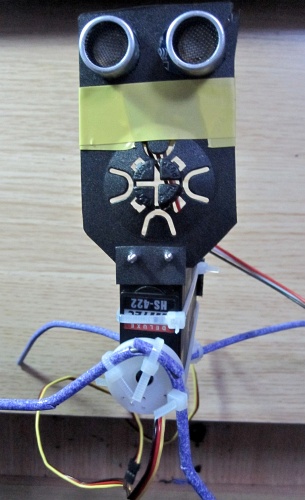
1x Ping))) Ultra Sound sensor
1x 9V block battery
1x clothes hanger (metal), cable, cable binder, tape, Velcro, empty DVD case
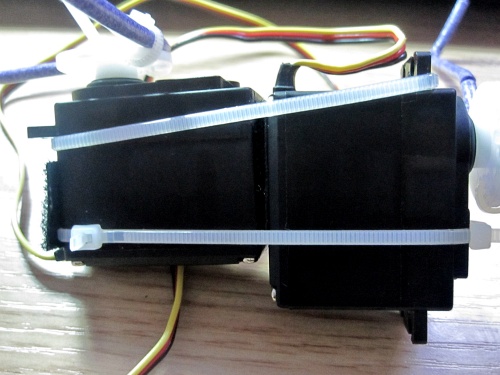
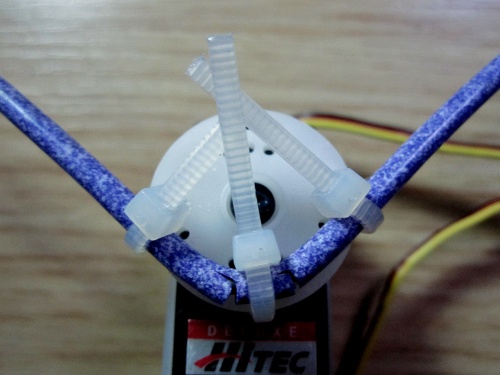
First put the two servos together using a piece of Velcro and 4 cable binders. This i a very strong connection and you can disassamble it very easy by just cutting the cable binders.
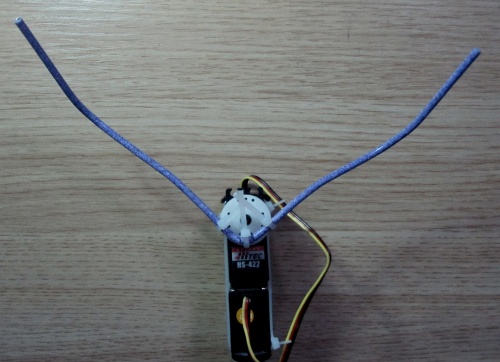
Then cut the clothes hanger in one 25cm and one 28cm piece. Bend the long piece for the rear legs like this
The short piece bend like you see on the title picture...just be creative...it will work.
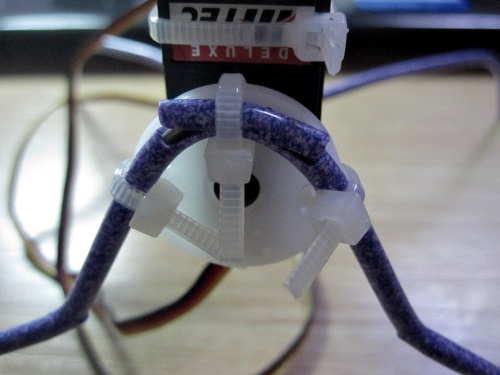
My idea to attach the legs on the servo was this...with cable binder.
Front leg:
Rear leg:
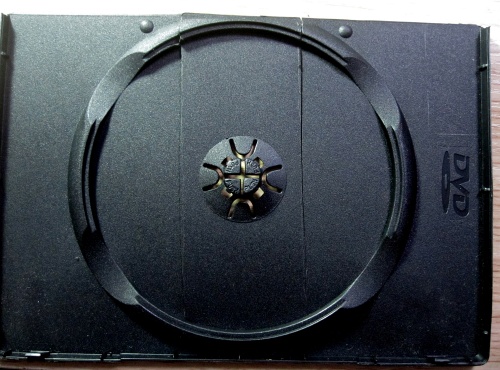
Then used one of my DVD cases to cut out the front plate for the Ultra Sound sensor eyes...
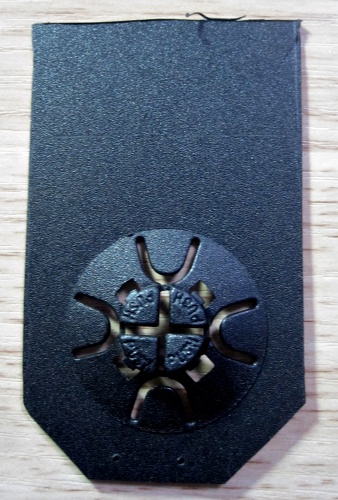
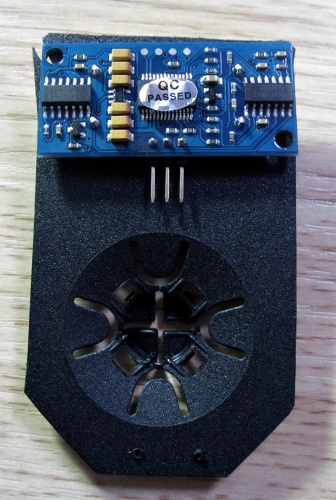
The front plate is attached to the front servo with 2 screws.
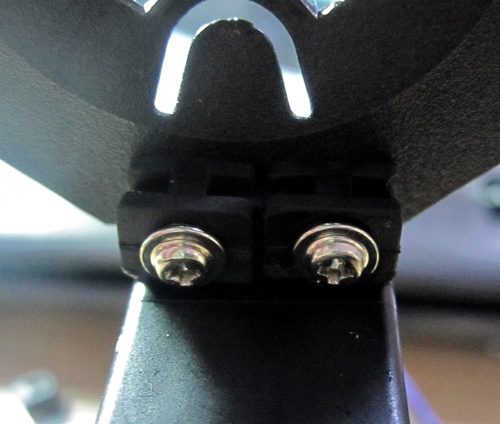
The front looks like this then.
As you can see I put one more plastic on the srews to give them a little mor stability since the DVD case is not very thick.
Then mount a back plate (also made of DVD case plastic) on the back to attach the Arduino including the sensor shield. I used again Velcro.
On the rear servos backside put another piece of Velcro to stick the 9V battery on it.
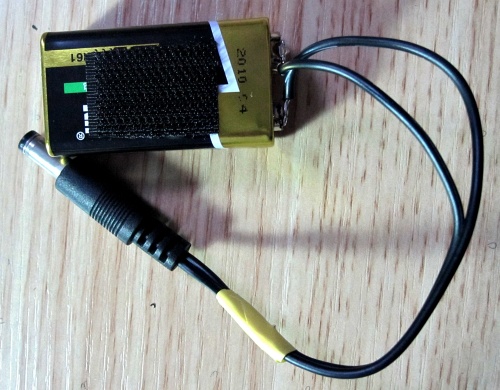
The cable is a spare part ;-) (frankly...one of my power adapters had to sacrifice this) and in lack of the clip i solded the cable directly on the battery...yeah i know...but i wanted to see it walking...
...and It's walking now as you can see on the video. I did not take care of the beauty just of the functionality ;-)))
Last news: I attached a buzzer and two white LED's and programmed some subroutines for it. The buzzer will beep several times when detecting an obstacle and the LED's will light up in the way he is walking. straight forward both LED's, backward right the right one, left forward the left one...This i just did to get some ideas about the programming and wanted to try the other components ;-)
Obstacle avoidance
- Actuators / output devices: 2 servos
- CPU: atmega168
- Operating system: arduino duemilanove
- Power source: 9v battery
- Programming language: Arduino ide
- Sensors / input devices: Ping))) Ultra Sound
- Target environment: All terrain