


2Deckard
Hi everybody!
First of all, I want to thank all of you guys who's robot projects and blog entries make this site such an amazing place! You all ignited my passion for robotics! I've dedicated my life to computers and programming and this is a really cool way of connecting it with the real world :-)
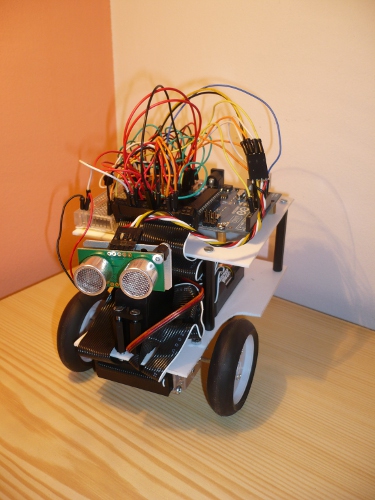
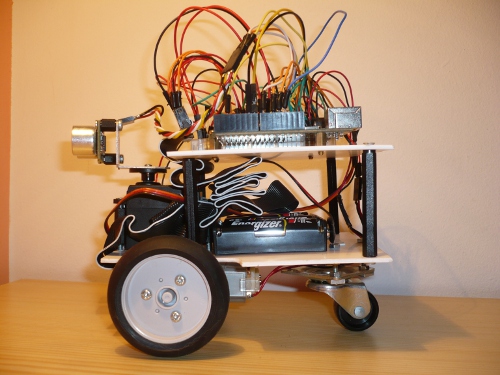
This is my very first robot called 2Deckard and is far from done but I really feel like sharing my first steps :-) The robot is driven by Arduino Uno, it has 2x 3V DC motors controlled by SN754410 IC (in combination with one 74HC04 hex invertor IC), two TM70145 wheels and one TM70168 gearbox form Tamiya, and SRF05 distance sensor attached on servo. There is also an IR detector that will be used to switch robot modes by TV remote control (right now I've got some problems with detecting signals from remote, I've made it work when the motors are disconnected but as soon as I plug them in I'm recieving a lot of noise... but since there is just one mode at the moment it doesn't bother me so much :-) ).
As a power source I use one 9V battery (for Arduino, servo and sensor) and 4x AAA alcaline battery (for motors). I'm planning to switch to rechargable batteries because the alcaline ones are drained pretty fast (especially the 9V one).
Right now it's just a prototype with lots of wires hanging from solderless board :-) One of the planned improvement is to create custom PCB that would be used as an Arduino shield (I know there is a lot of similar projects on the web but I would like to try making my own version).
So far the robot is moving around the room and avoiding obstacles. It seems that it's "navigating" quite well and it made it's way out even from a dead end of room. I have in plan to add line following (such a popular "hello world" of robotics :-) ) and maybe some other cool stuff, like aiming a poisoned darts throwing cannon :-) For a line following I'll use QRD1114 attach to the PATA cable that is taped to a gearbox on the front (one of many nice ideas I saw while wandering on LMR :-) ). One pair of QRD1114's will maybe end up as wheel encoders. There is so much more I would like to improve, still there is 6 analog inputs and 7 digital I/O left :-)
obstacle avoiding
- Actuators / output devices: 1:344.2 Tamiya gears, 2x 3V DC motors
- Control method: infra-red
- CPU: arduino uno
- Operating system: Windows7
- Power source: 1x 9V battery, 4x AAA (1.5V) battery
- Programming language: C++
- Sensors / input devices: SRF05, ir detector, QRD1114 reflective sensor
- Target environment: indoor