The easiest way to do it is to use the IRIN command on the robot and the IROUT on your remote control (which will use something like a PICAXE 08M2 or bigger). It uses the same infrared communication protocol that a Sony remote control uses. There is a more detailed explaination in the PICAXE manual 2. You will need another chip (the 08M2 or something suitable), an IR receiver like a TSOP38338, and an IR LED (and its current limiting resistor!) that matches the wavelength detection range of the receiver. In the TSOP38338’s case it likes the 940nm-ish range so look for an LED with that wavelength peak.
My examples link to Mouser because they take care of me but you can find the same kind of receiver and LED on ebay, Radioshack, and many many other places. For the receiver look for the three-pin variety, not the two pin, and with a 38kHz modulation/carrier frequency (it helps to block out background IR noise). Then look for its peak detection frequency in the specs and find an matching IR LED. Some like 940nm, some like 890nm. Either LED will work but it’s a matter of detection range, really.
In manual 2 it shows a circuit schematic for how to wire up the receiver but I’ve found it better to follow the schematic that the manufacturer suggests for whatever IR receiver you end up choosing. You can find it in the datasheet.
1) Yes, the white wire is equivalent to the yellow wire but the connector is set up in a servo configuration which will fry the Sharp IR sensor unless you do as Frits does in the tutorial and do some wire switcheroo-ing.
2) Something is awry. If you’re using Frits’s code than even the 124 and 135 that you say you get should not make it stop and go into avoidance mode. Which leads to…
3) It’s been awhile since I cooked a Sharp IR but it sounds like it might be toast. One test is to power the sensor and use your camera from your phone or whatever to see if the sensor LED still works. We can’t see IR but digital cameras can. IR shows up as a purple glow. If you don’t have a purple glow from one of the “eyes” on the sensor than it’s time for a sensor obituary.
4) The 150 refers to the pulse width of the signal that positions the servo and it isn’t something that changes from day to day or power-up to power-up. Hard to say what the problem is but it’s late and my brain is underpowered right now, however I will sleep on it.
I recommend taking a look at ignoblegnome’s Penny. It’s an Arduino Start Here Robot. It’s not going to be a direct plug-and-play code but a little tweaking of the pin assignments and making the .pde a .ino is all you really need to do.
Thank you so much for all the advice! I rewired the Sharp wire correctly, and luckily it wasn’t fried! It works now, and I can see a purple glow from one of the ‘eyes’ whenever my robot is on. Everything works right, even the weird servo problem is fixed. Thanks once again!
I’m a new guy here with so many interests on this field. I want to start with this kit but I’ve researched a bit and I want to be 100% confident before buying one and I have just a couple questions right now.
First is the main chip, the PICAXE-28X1 which have been replaced by the new AXE010X2 (PICAXE-28X2), It’s more expensive but how much more could it cost if the shop change the 28X1 for the new 28X2? It is possible to order the kit replacing the older chip for the newer one?
Last question is basically the same, I’ve found the HY-SRF05 more convenient for what I’m planning for my very first robot, although the Sharp could be useful for some sort of things like “lack of floor to ride on” sensor (as long as there are no black surfaces down). Could I replace this component too?
I know I should be asking the shop first, but I wanted to do here first to see if you sense I’m going to fail using the 28X2 when there are almost no differences or maybe the SRF05 needs more power or it’s not fully compatible with picaxe (I think it is).
More advices are obviously welcome, I’m just downloading and reading a ton of PDFs but sometimes that little things you only learn by practising is what could make a big difference.
Thanks for all, I’ll fill my profile soon and upload some pics of my progress.
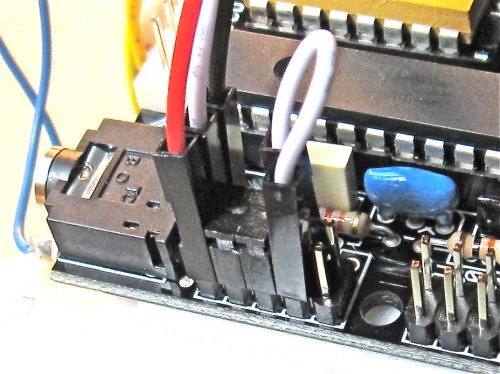
Heya guys! I just got my LMR kit, and everything was going pretty good until I got to testing the IR sensor. I will admit that it took me a little while to decide how to put the wires in. It’s hard to see in the picture, but ended up cutting and swapping the red and yellow wires in the cable so the yellow (signal?) cable actually feeds into the middle/red wire on the board. and the red wire feeds into the yellow.
Nothing smells like it’s burning or anything, but when I run the above “readadc 1, b0” code, I get a window with all this blank input, except the entry for b0, which just fluctuates between 0 and 4 and back again. I tried looking at the ir sensor with my phone camera and… sadly I am not seeing any infrared glow.
Did I set something up wrong, or is my sensor just busted?
Thanks for the awesome tutorial - I still can’t quite believe that a troglodyte like myself acually managed to build a functioning robot following your guide! The funny thing is, it took me longer to figure out how to get the axepad software to recognise the USB cable on my version of linux than it did to actually build the robot.
The only problem is, now I can’t stop thinking about the next project…
I’m to create a robot using Arduino Uno R3, L298N motor controller, and US-015 ultrasonic sensor.
I’m going the supply the Arduino from the DC barrel jack with 7.2v. The L298N will be powered from the Vin of the Arduino and the ultrasonic sensor will be fed through the 5v rail on the Arduino. However, I’m not concrete with this notion. Is this correct?
I made mine earlier in the year, and the parts came to a bit over $100AUD, not including the programming cable and other odds and sods you might need (I didn’t even own a soldering iron). I’d say Australia is probably one of the more expensive places because of shipping costs etc, so you’ll probably find it’s cheaper depending where you live.
My suggestion in terms of budget is to make an inventory of what you need and go from there. Here’s an example of mine for this SH robot:
Just got done building and balancing the body of the bot and went to set servo straight. Picaxe says the program uploads fine but the servo doesnt move when I write code to make look left and right. And if I leave the batteries in while troubleshooting it starts to make this high pitched chirping sound.