

That is correct I still did not put the caps on the feet because I was thinking about installing the sensors since I bought them. I also bought the pixy but I dont know how feasible that is
The Pixy interface is quite user friendly, so it’s more of a question of what commands you want ti to send to the robot, and how you want it to react.
Hi, I did connect the SSC-32U to the botboarduino by connecting the VS2 on SSC-32U to VL on botboarduino but it does not seem like there is power on the botboarduino (no light). the light only flashes once once i turn on the power button.
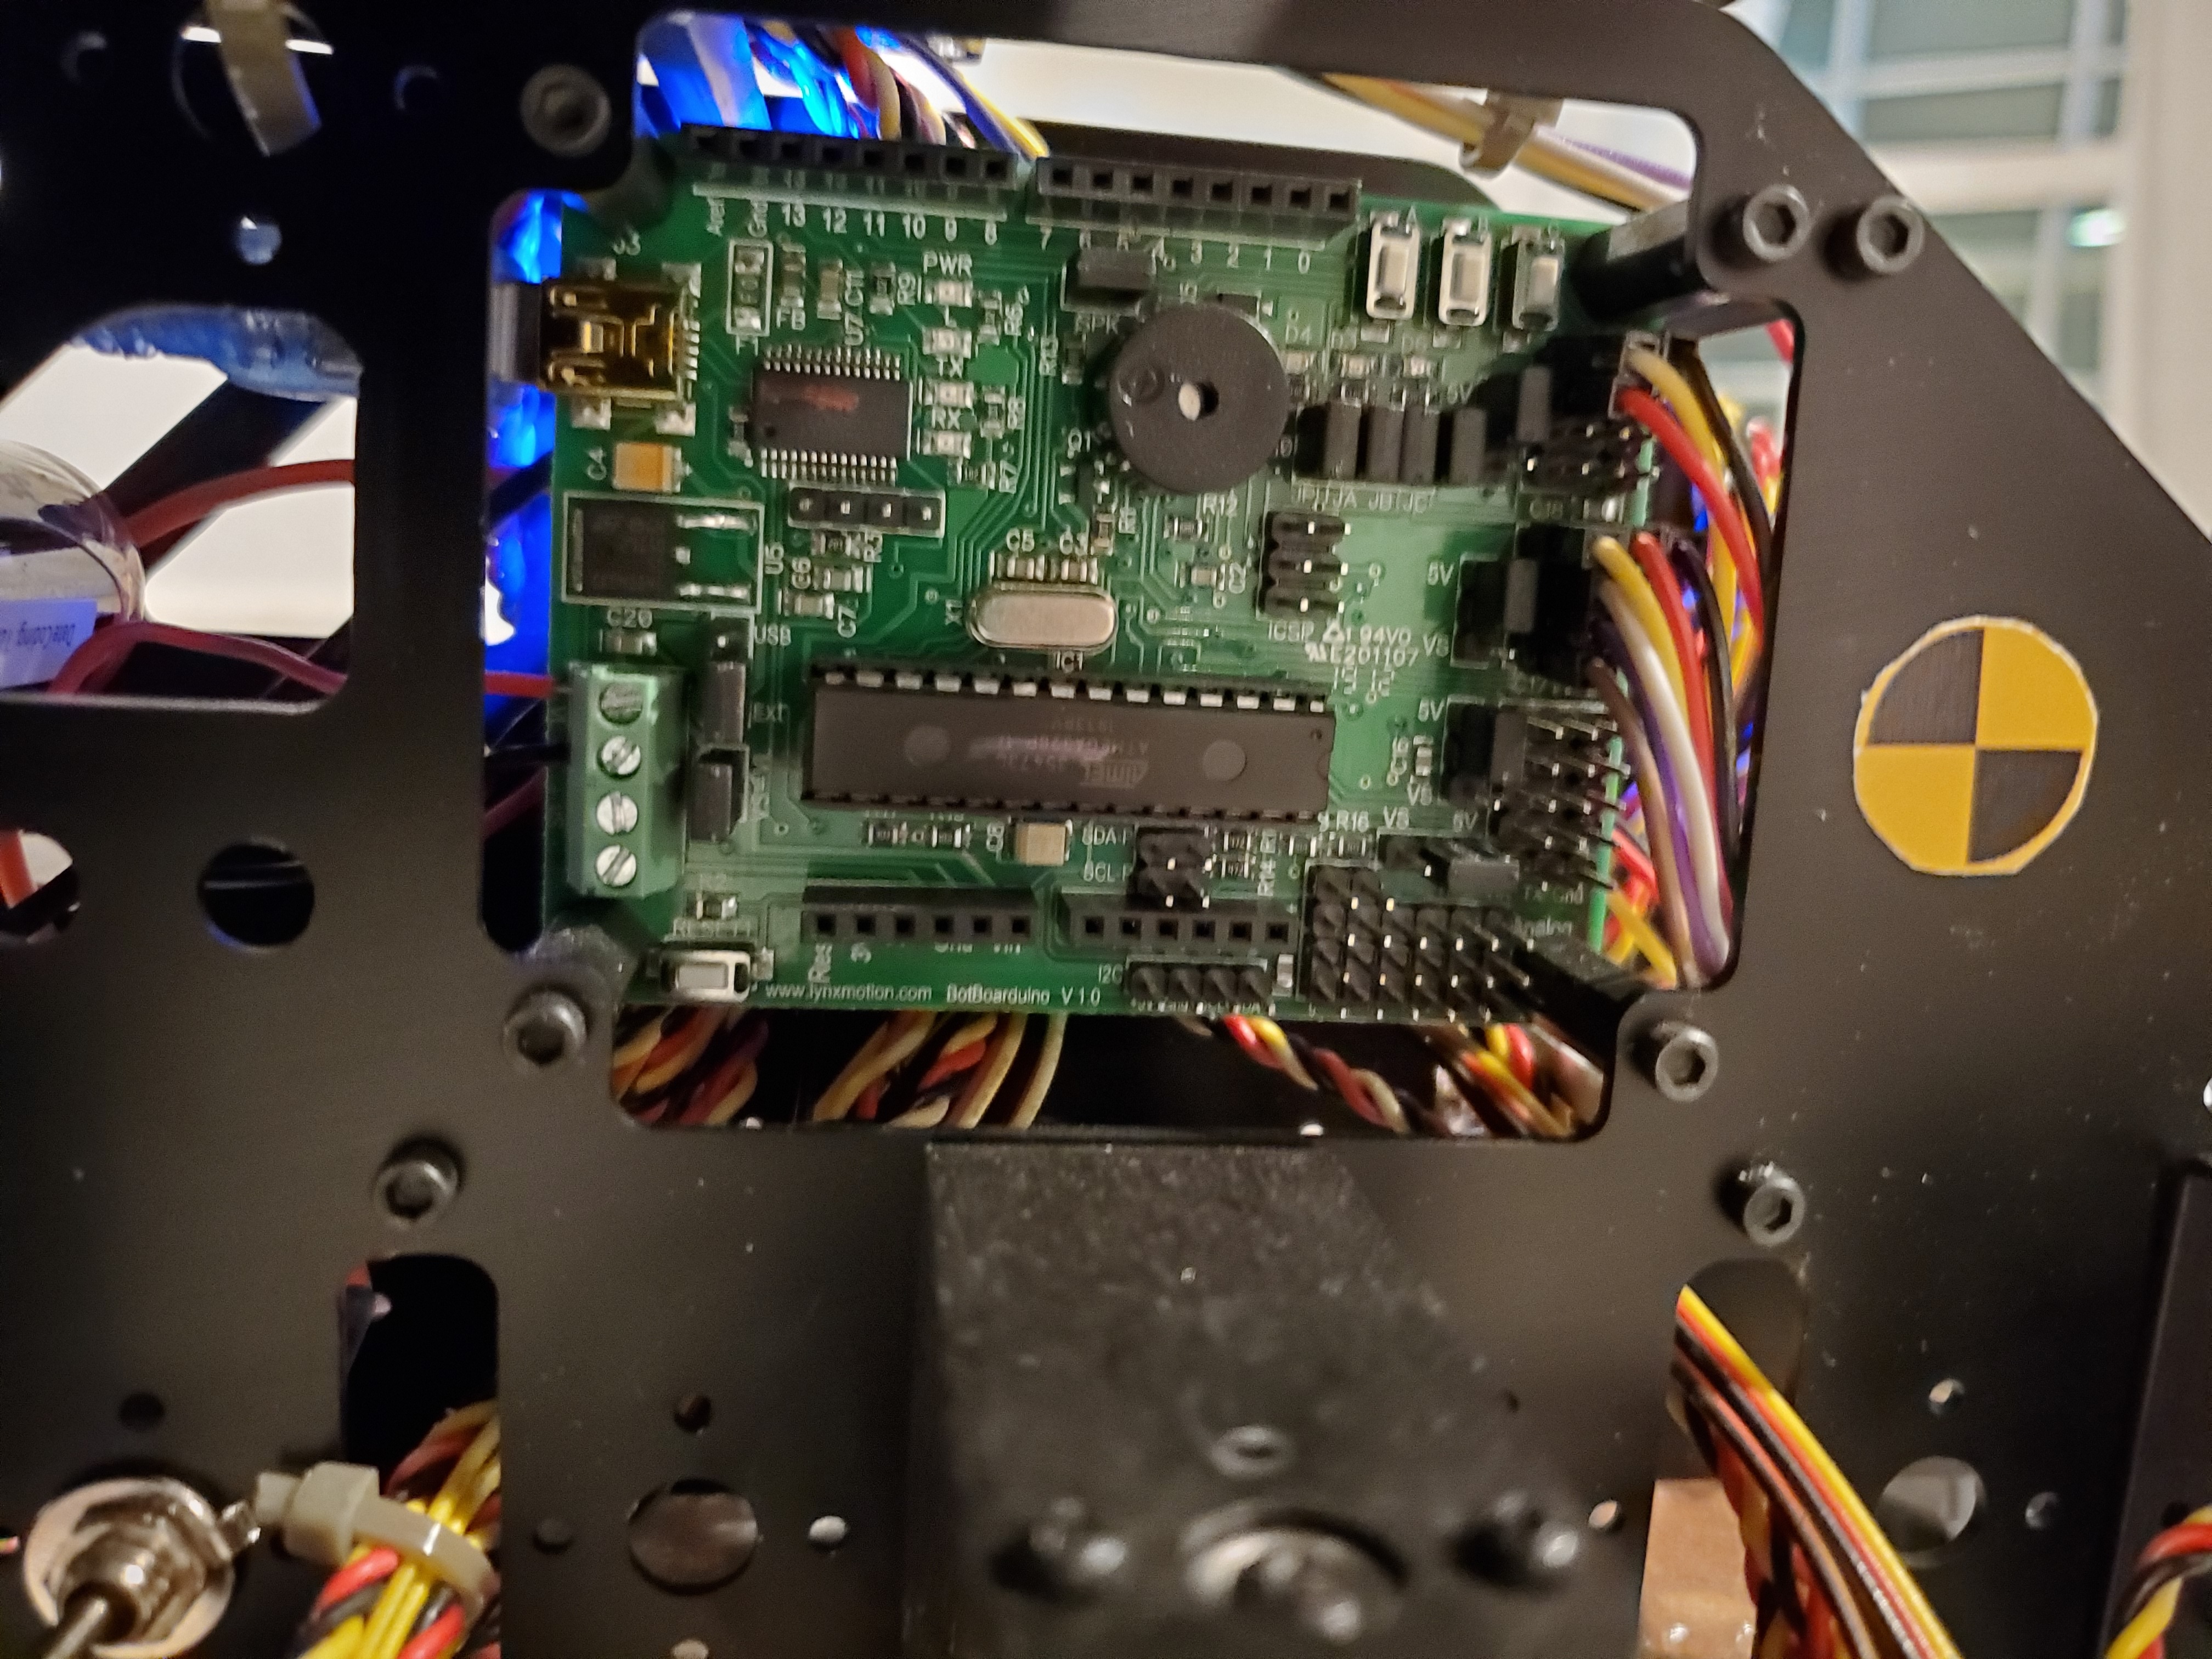
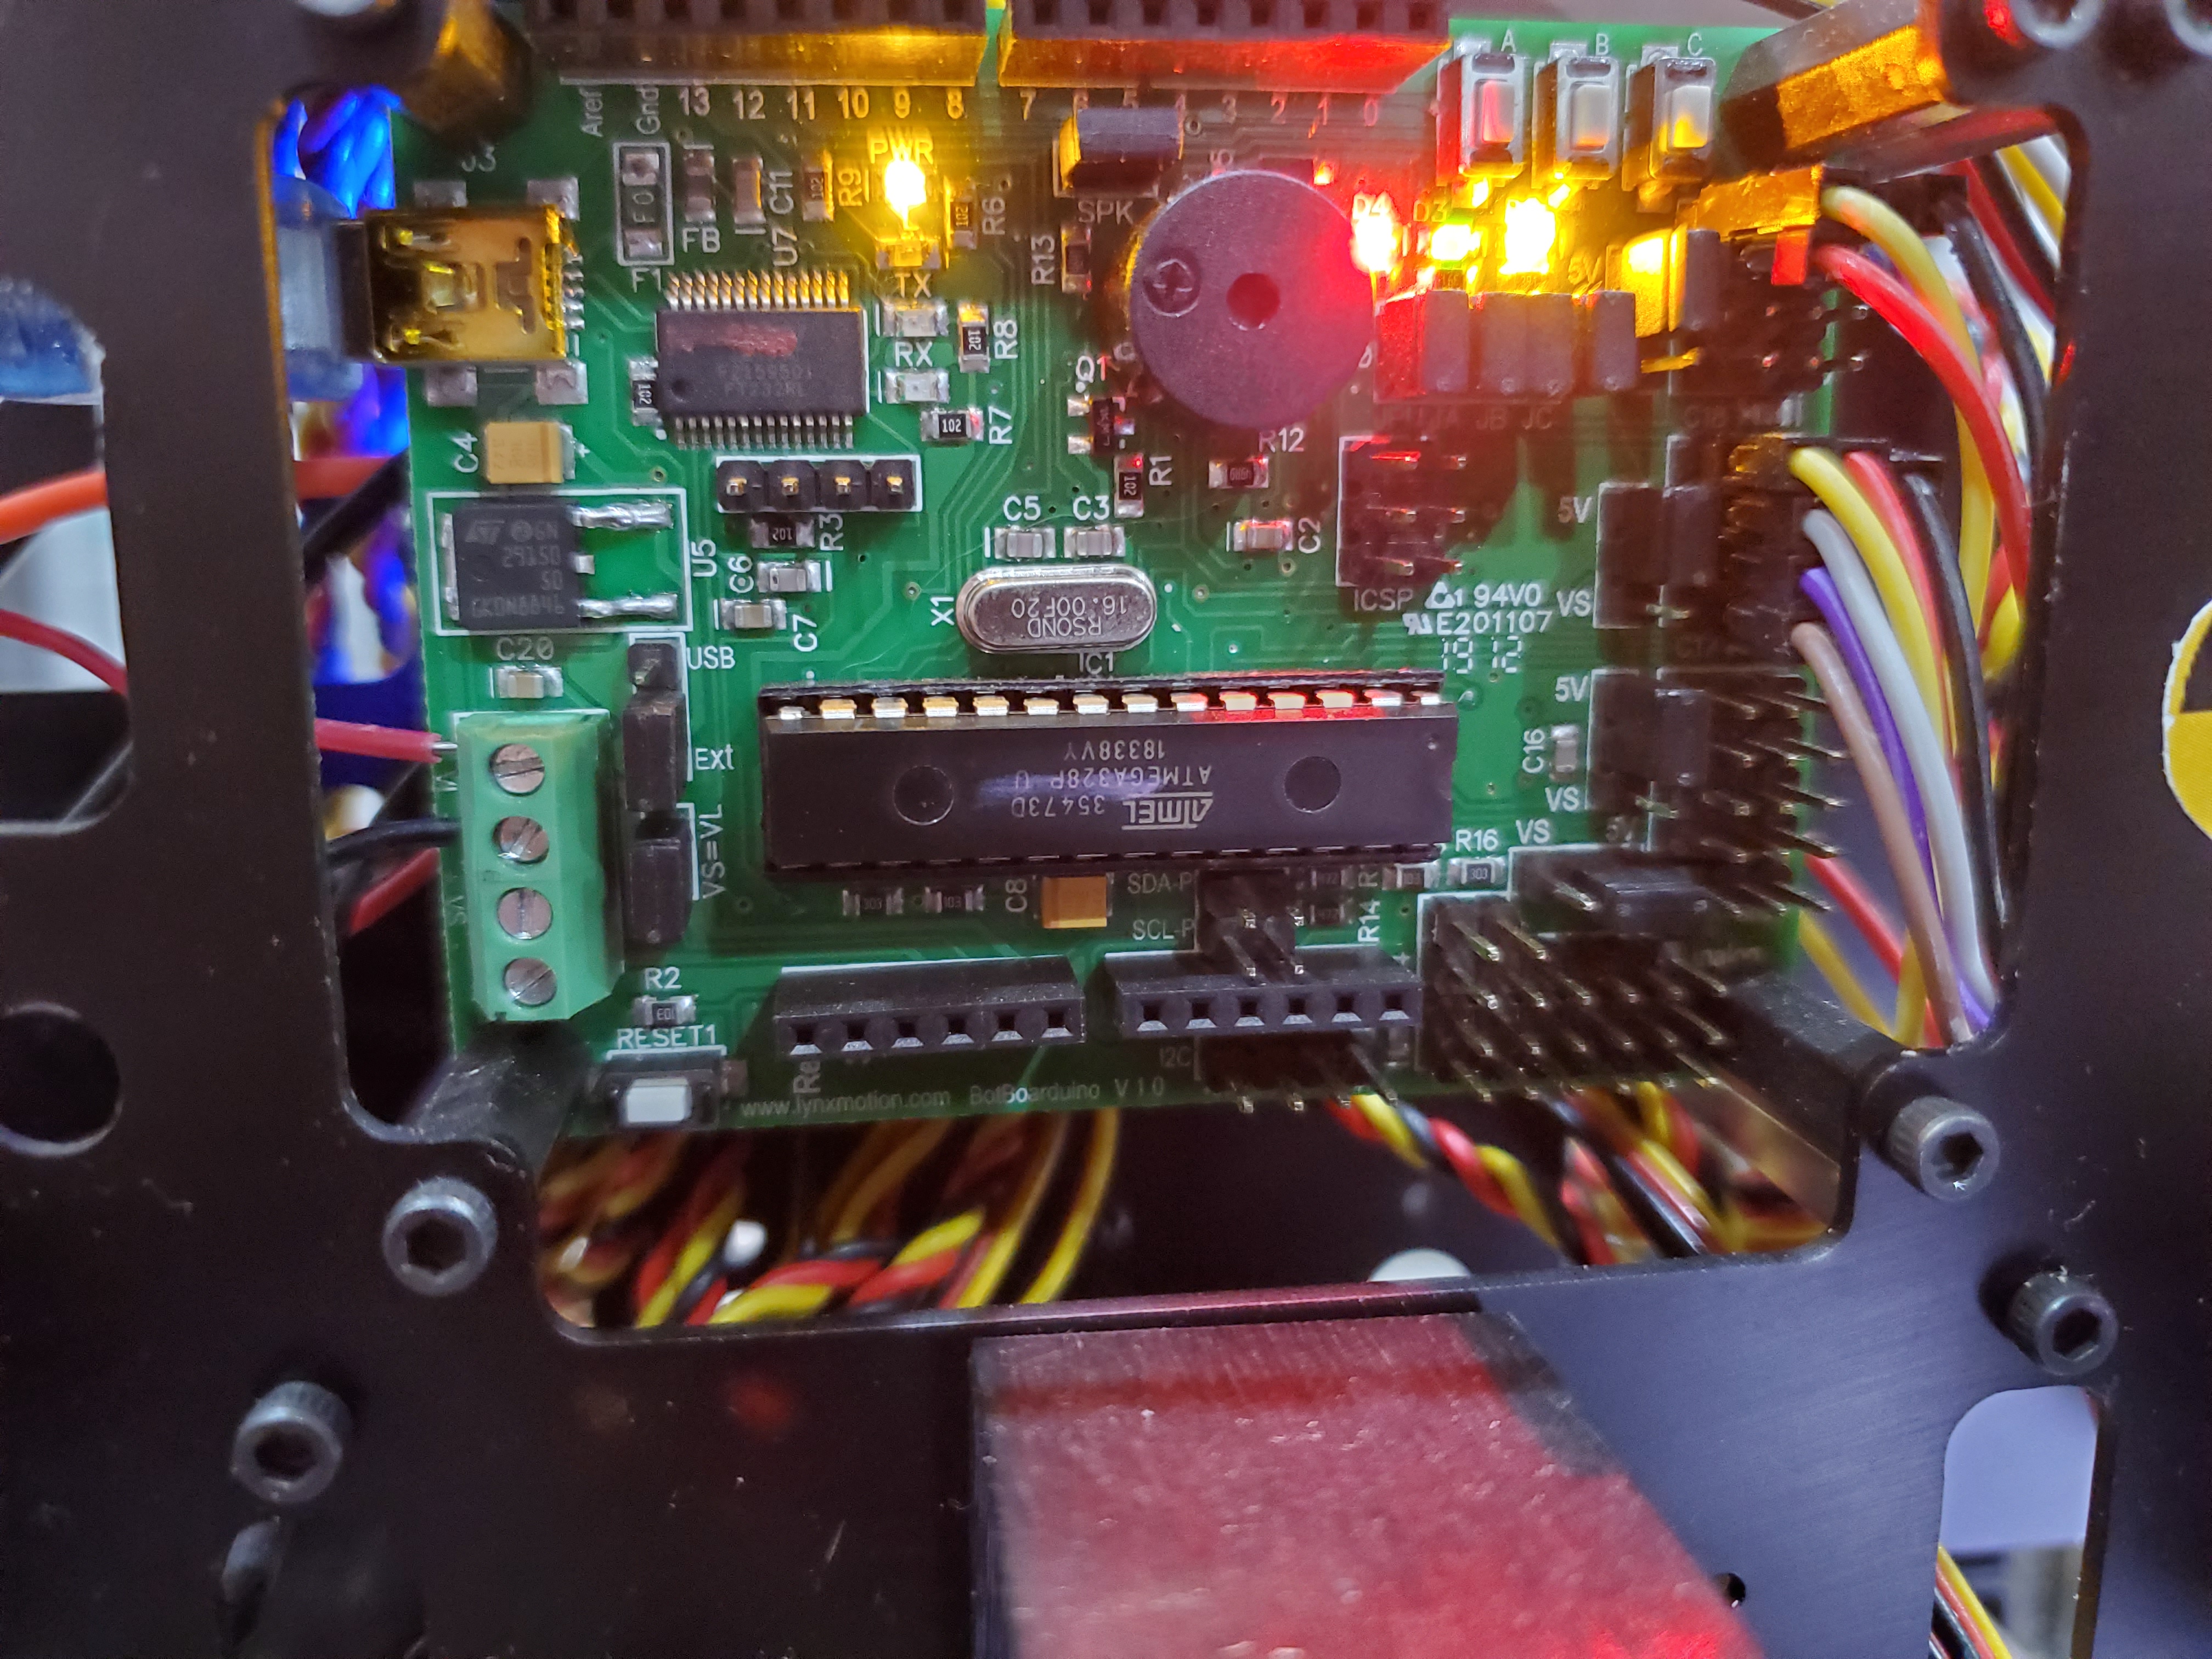
So the botboarduino is driving me insane. Only powers up if I connect it through USB. if I try to connect through battery to the SSC-32U nothing happens. Also, I downloaded the adruino software and tried to upload the code (while board is connected to USB an powered by USB and it keeps giving me an error. I’ll upload pics below.
I’m so confused. The SSC-32U is powering but the botboarduino is nothing unless it is connected to USB pleeeeease help 
also there is some kind of electrical shock when I touch the board that makes some servos move on their own.I checked all cables and nothing is exposed or touching the board. 
Hi,
-
For the error you have in the Arduino IDE, please make sure to use this PS2X_lib Arduino library. You can download the package directly here and follow this tutorial to properly install it in the Arduino IDE.
-
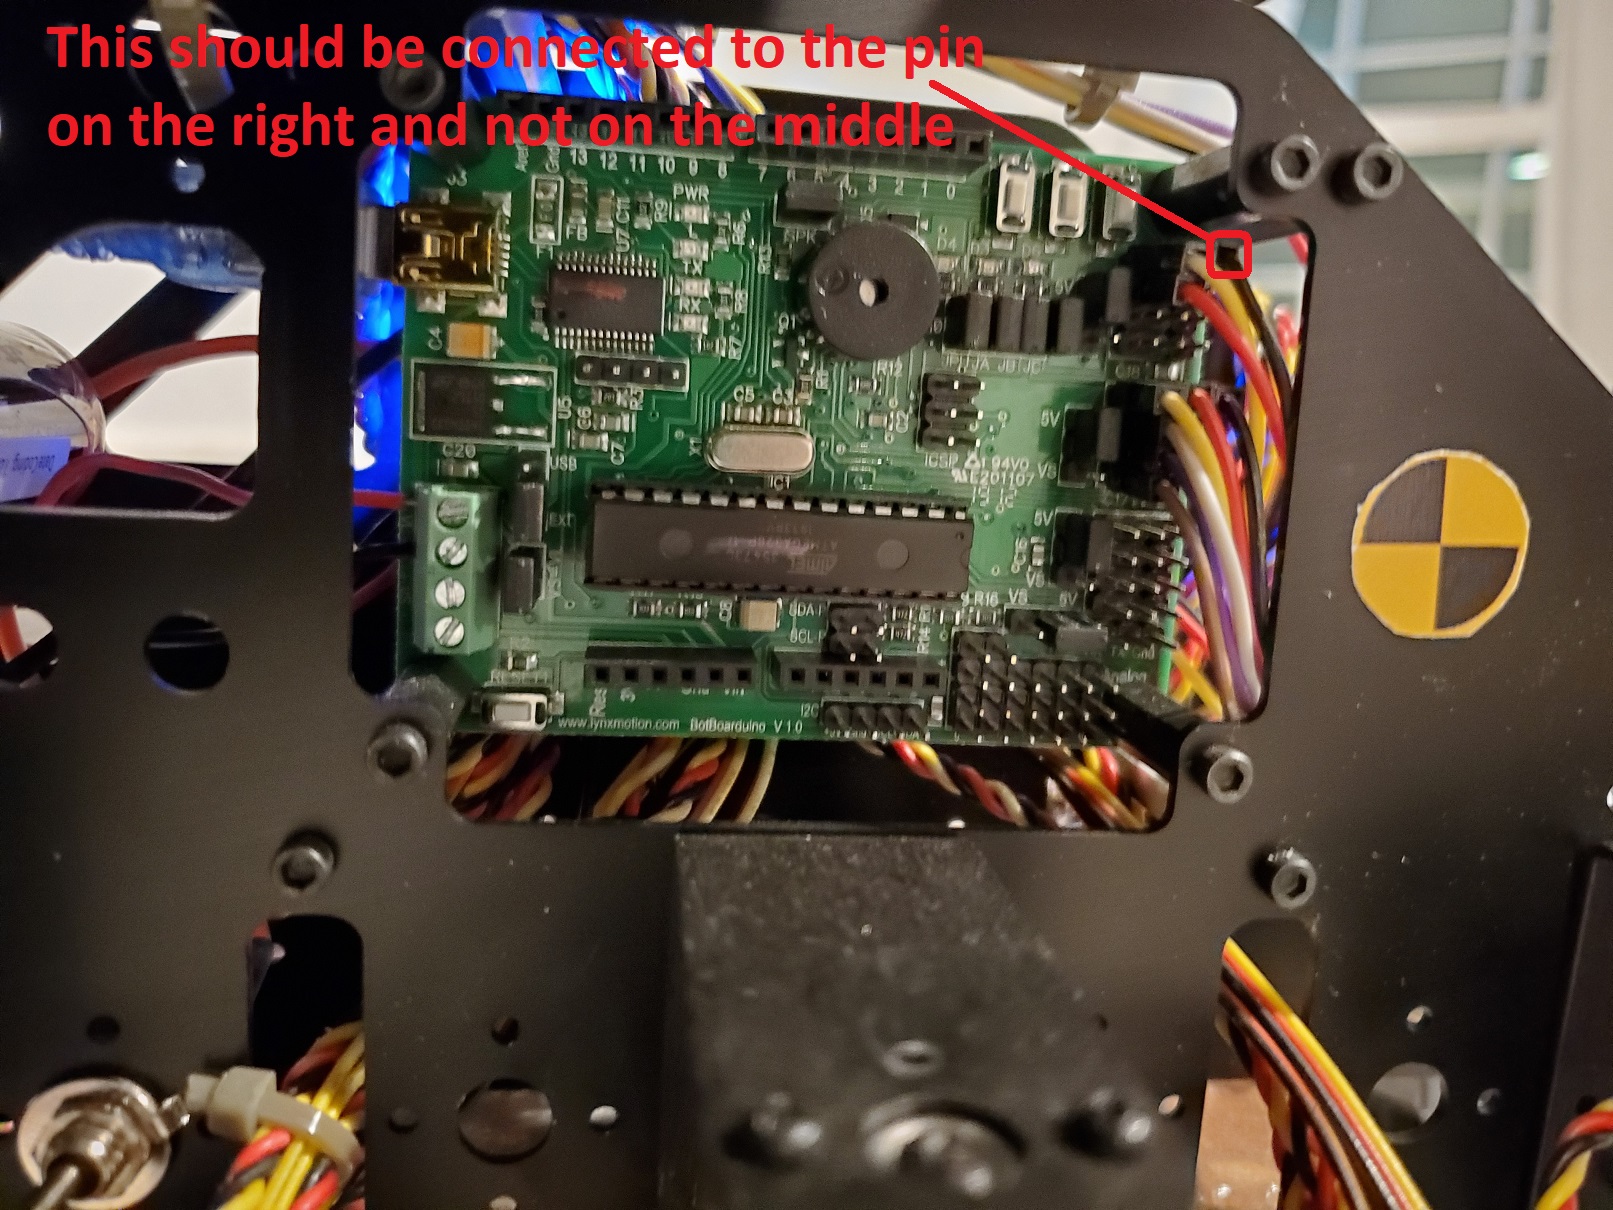
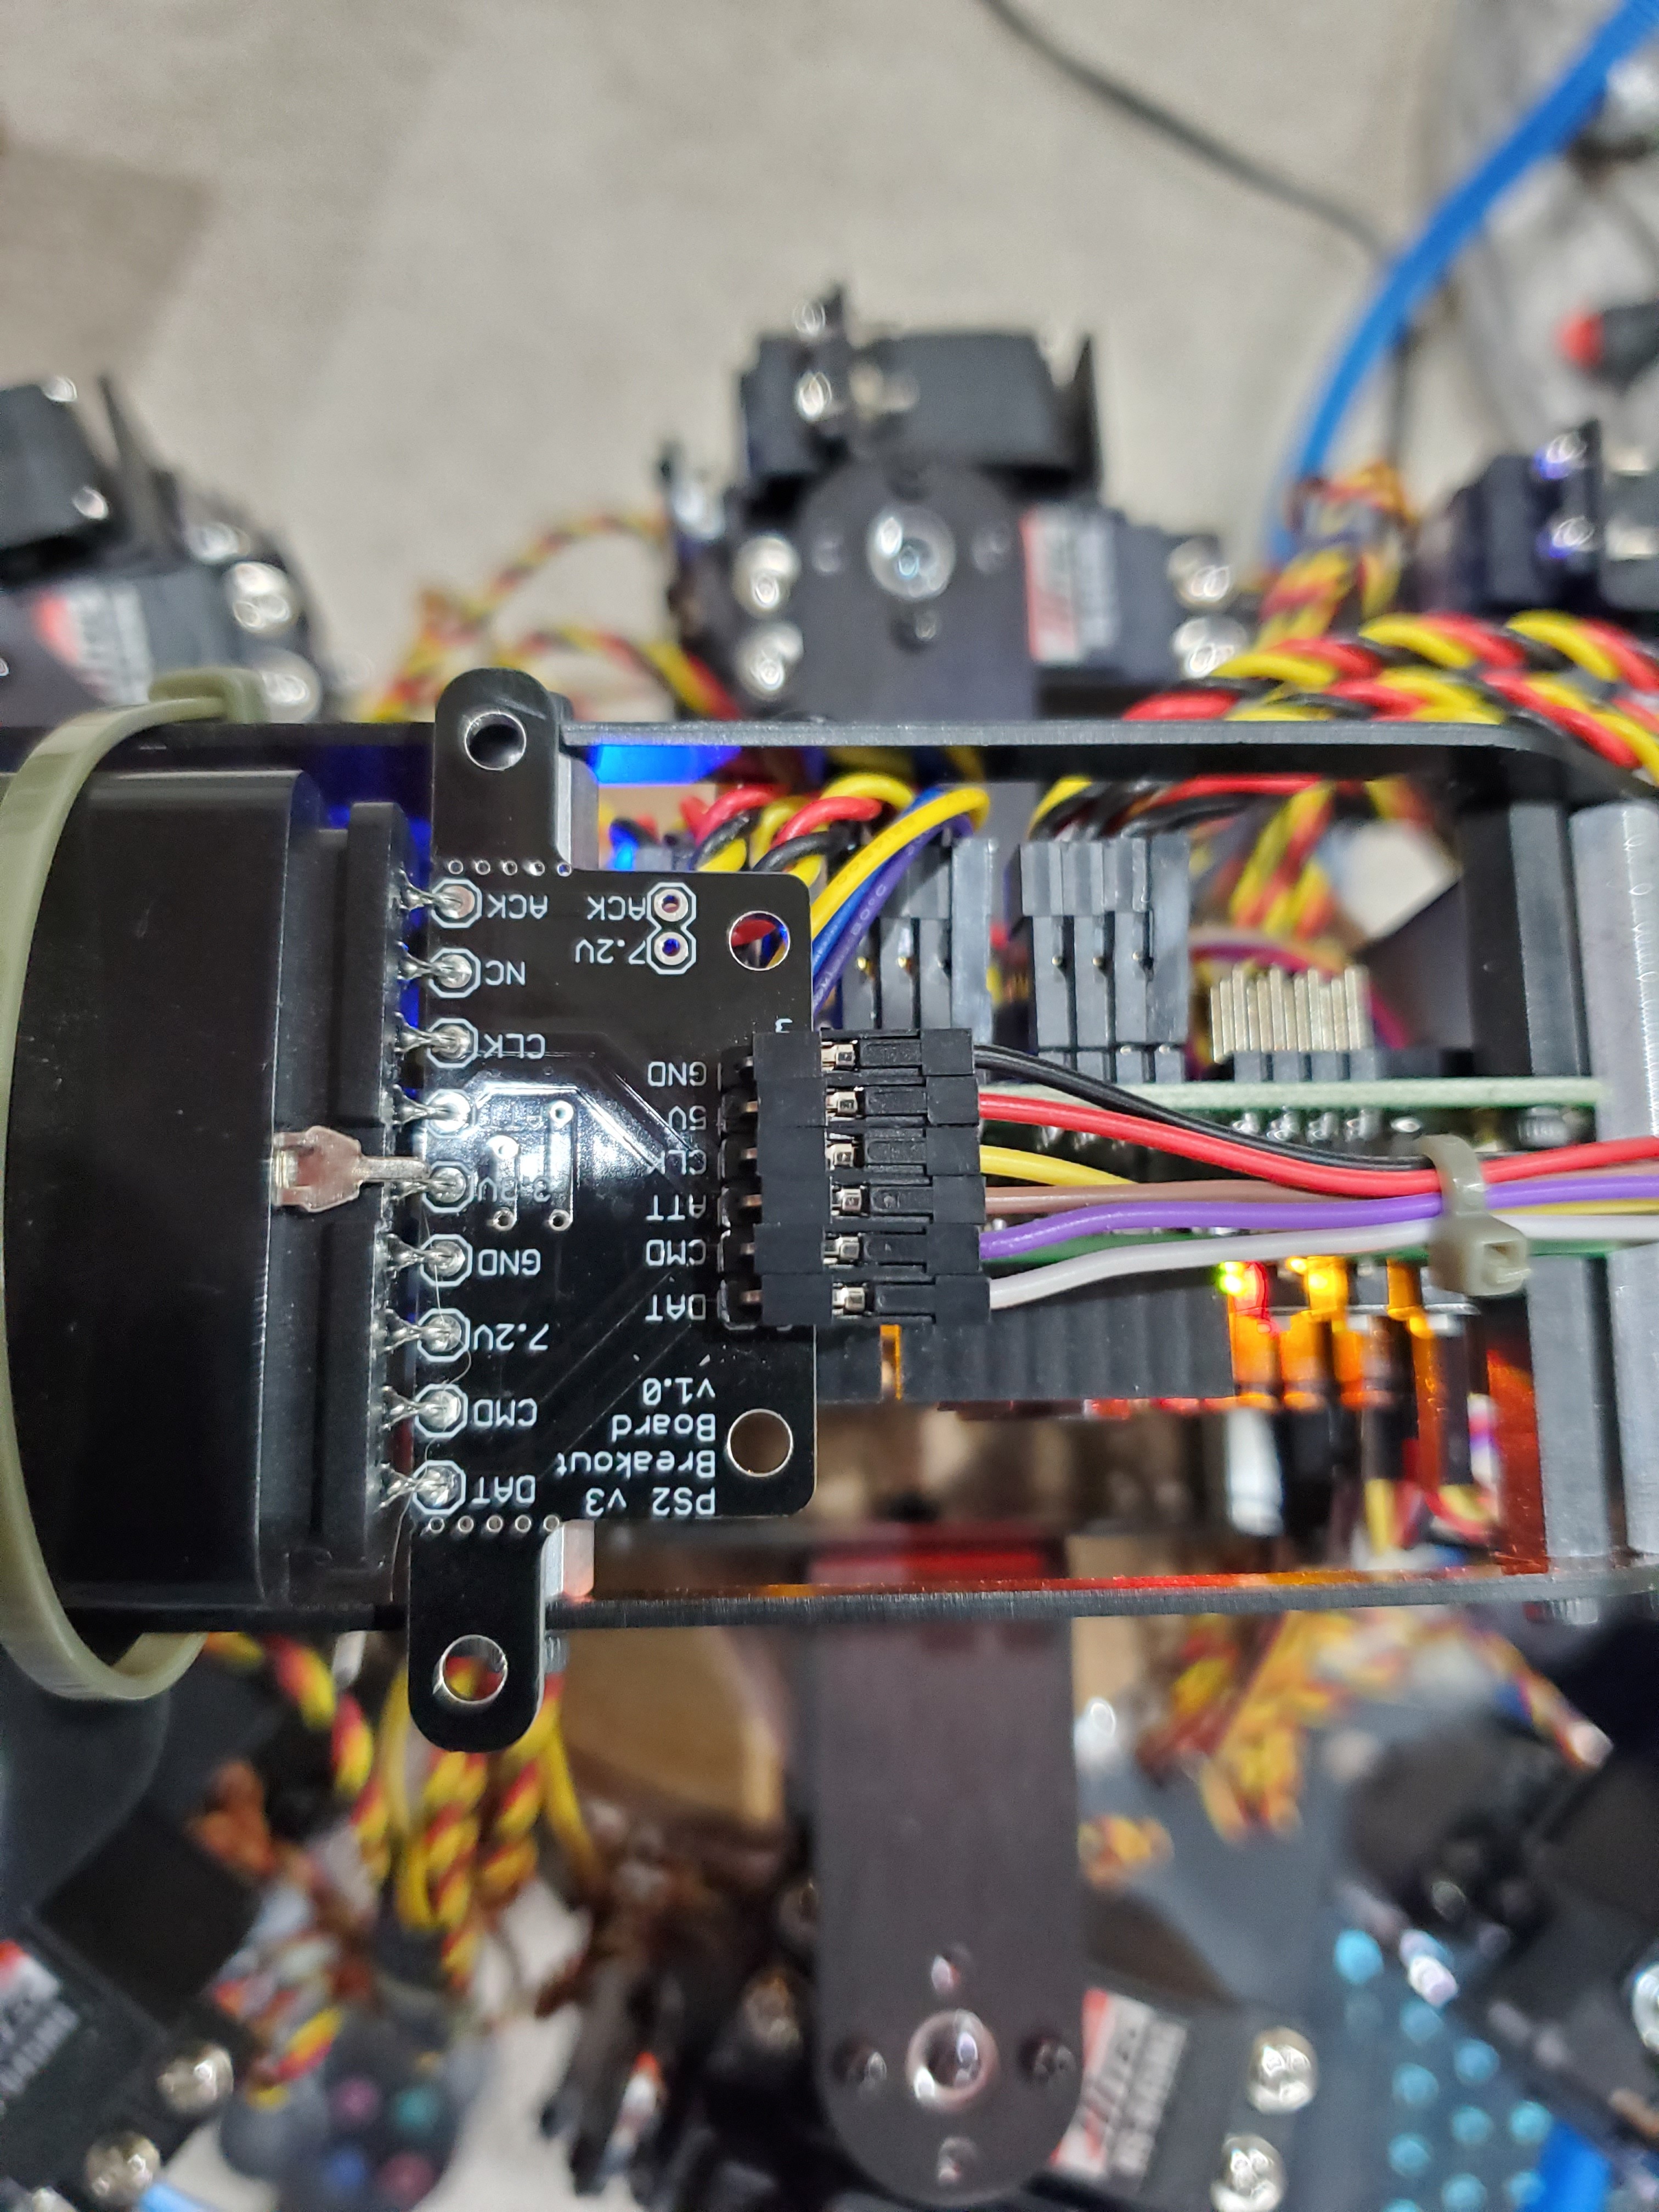
As for the issue with your BotBoarduino, the picture does not clearly show but you seem to connect the GND wire from the SSC-32U to the 5V pin (middle pin rail) of the BotBoarduino which means that you were shorting GND and 5V each time you power your boards. If that’s the case, this has most probably killed your BotBoarduino on-board 5V regulator. Please connect the black GND wire to the pin on the right and not in the middle as shown in the picture attached hoping this didn’t damage your BotBoarduino.
Thank you. I have the botboarduino powered up now and thank god it is not damaged. I made sure the PS2 wires are in the right places (see pics). I downloaded the software again and installed the library per instruction (to he best of my knowledge for someone who never coded a thing). However I still get an error message and now the PS2 receiver light never goes on. I’m really confused and this thing is driving me crazy. I would appreciate a step by step troubleshooting as I have never done anything similar before. 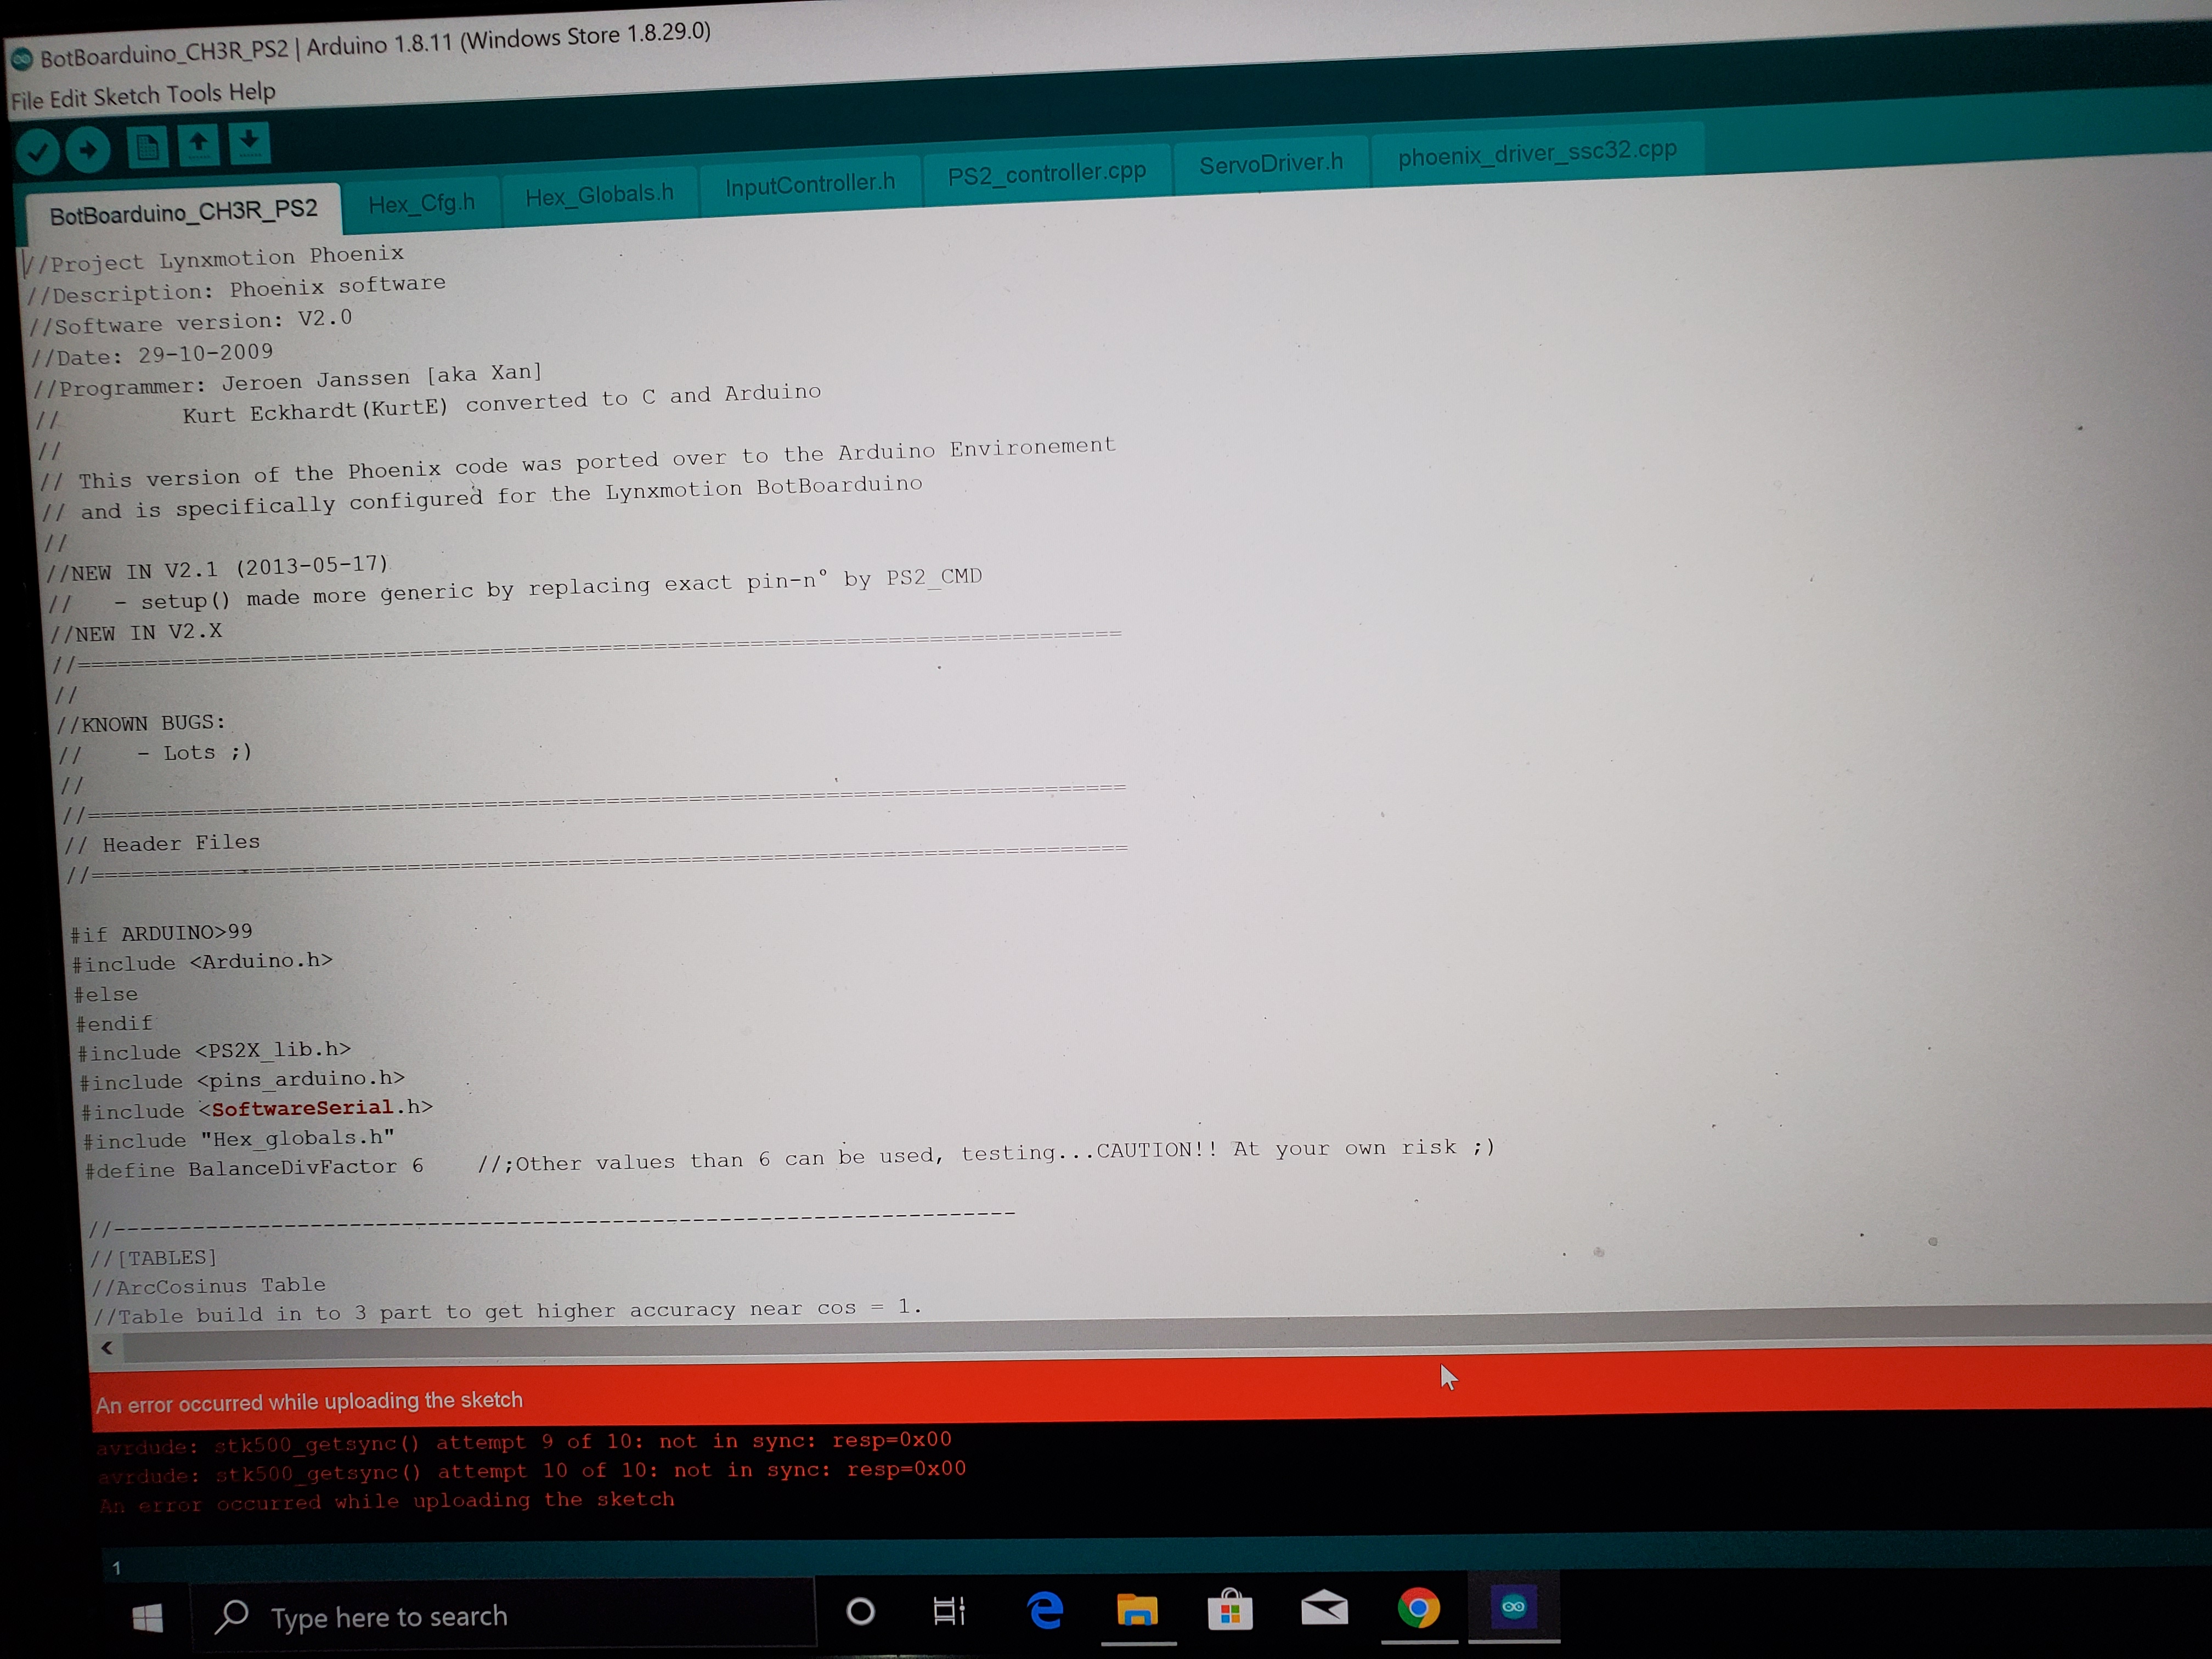
Hi,
The error you are encountering in the Arduino IDE could be related to these :
- The USB cable (make sure it’s a data USB cable and not power only) should be connected to the BotBoarduino properly.
- Please make sure to select Arduino Duemilanove or Diecimila in Tools -> Board in Arduino IDE.
- Also make sure to use the appropriate COM port in Tools -> Port in Arduino IDE.
1 Like
@bdaouas @cbenson @scharette so I was able to finally get it to work. However, the ankles are not working. The robot walks and everything but only as a 3DOF not a 4DOF, meaning the ankles are just not moving. Am I using the wrong code? I did exactly what you guys told me. Please advise. Thanks
1 Like
In this Github repo there is 2 source codes :
- 3 DoF Ready (the code you seem to be using)
- 4 DoF Ready (untested)
We suggest you to try the 4 DoF code
1 Like
So I installed the 4DOF code. When it walks on tile it acts a bit retarded like it is sliding itself into motion. I put it on carpet and the movement got a bit better. Are the legs supposed to be touching each other on movement? I dont know how those guys on youtube control theirs acurately and their robots walk around very smoothly. I feel like I wasted over $1500 building this.
Could you post a clear video showing your robot walking ?
As bdaouas indicated, a clear video (perhaps taken from a few angles) showing what you’re seeing would certainly be appreciated. You can upload it to your YouTuba page for example.
I put it on carpet and the movement got a bit better.
The video will help us determine what’s happening.
Are the legs supposed to be touching each other on movement?
No, they are not.
I dont know how those guys on youtube control theirs accurately and their robots walk around very smoothly.
Exact joint calibration is all that’s needed. The inverse kinematics does not take into consideration any uneven terrain at all - the surface needs to be flat.
@cbenson @bdaouas please be patient with me guys. I know I have been a pain and I apologize but this is my first time and I’m building this for a kid with lymphoma who saw it on youtube and I wanted to surprise him with it. The video is through the link below:
You’re almost there. The 4DoF legs take quite a bit of calibration - if even one angle is slightly off, the tip of the foot will not be at the right position. Do the calibration again and try to get each joint as perfect as you can.
Second, the heavy battery being offset to the very front of the robot doesn’t help - it needs to be located at the center mass of the robot.
Last, the code may require some small calibrations to the dimensions - we’ll take a look and get back to you on that.
Note that this is one of very, very few four degree of freedom walking robot kits on the market - the inverse kinematics is not easy.
Thank you, @cbenson. Just to make sure, could you please provide me with the exact angle calibration of each leg is supposed to look like when clicking “All 1500”? I’m pretty sure I did it correctly and made sure I did it twice and all legs looked like they were at the correct angle so I’m really confused. I will do it again though and make sure all feet are perpendicular with the ground.
Just wishfully thinking, I really wish it would act like how this guy had it in his video:
See steps 1 to 12 here: http://www.lynxmotion.com/images/html/build171.htm
As before, you should only have the SSC-32U connected to the computer via USB.
The servos need to be powered. No need for the BotBoarduino for calibration.
You have the same robot, but keep in mind it’s a complex robot and requires setup.
We do not sell a complete 4DoF kit since not all of the documentation is up to date.