

Here is a small and rather coarse box I use for pulling uncomplicated parts
http://home.roadrunner.com/~eballou/images/IM000632.JPG
and here is a model I built for a friend that has the engine cowls, nose canopy, and gunner canopy parts I pulled on it.
http://home.roadrunner.com/~eballou/he111/IM000654.jpg
The box is built from MDF and pegboard and I use my shopvac to draw vaccuum. The plastic sheet is clamped in the holder which is placed on a cookie sheet in the kitchen oven and heated until the center of the plastic has sagged about 2 inches, then the holder is removed and pulled over a plug on the box. I use a small heatgun to encourage any edges that cool before they have had time to fully draw. Plastic comes from a number of sources such as hobby stores or mcmaster even. thickness ranges from 0.010" to 0.080" or so. I have the parts set aside to make a box about 2x this size and it will use perf board with 0.042" holes on a 0.156" (I think) pitch. that will allow me to make considerably more detailed and larger parts next year for another project.
ok eddie, not ur just showing off… 
wat do you use for the plugs? wood? can you use clay maybe? i cant really think of wat would be the easiest material to make it tout of. 
I am really not sure what the right way is to go about making plugs you would use to skin an SES based model with vaccuum formed parts. My idea on this though is that you might be able to use wide masking tape to cover the openings in the brackets and determine where material needed to be releived to allow for movement. Basically this makes a solid form around the skeleton. Now you can use modeling clay to build up those surfaces to the desired shape, remembering that you need to articulate each joint as you go so you don’t bind a movement axis. I’d say if you had a walking gait worked out and could walk without hitting the surfaces on each other it should be good to go. Then I would cover any holes or openings and try to cast a rubber mold around each part so you can use the mold with plaster of paris to make a plug form. That plug form is used with a vaccuum table to make plastic sections. You will need to make attachment points to “connect” the skin to the SES brackets. I think though that this would be a fairly light-weight way to put a skin on an SES model.
@ EddieB : So the Plastic parts you made with a vacuum?
not meaing to show off really, it was just a couple pics I had already on the web from when I was building the thing. if I was going to show off I would have linked the video.  (no I am not going to so don’t bother asking.)
plugs can be anything that you can build from and can handle some heat surface contact without melting. Pulling clear parts is really tough because anything on the surface of the plug shows up as an imperfection in the surface. for the big canopy I used something called plastic balsa, nasty dust but has no grain per-se so it is easy to carve to specific contour. even then I coated it with an epoxy, put 6 coats of polyurethane on it, and sanded smooth with 1600 grit paper. a lot of work but it kind of stands out there in front of the thing so it was difficult to cheat. other parts I either made a solid version from balsa or built up a surface using formers and sheeting so I could pull plastic over it. parts that have cavities need to have vent holes through the plug so the vaccuum can do it’s thing, and you have to rememver to put a draft on surfaces so the thing comes apart from the plug.
Eddie, can you show the video? 
yep. make a plug which sits on the vaccuum box then heat a sheet of plastic up so it’s real soft and pull it down over the plug. the vaccuum sucks all the air out from between the plug and the plastic.
Oh, Ok. It’s a bit confusing to me. Do you have a Pic of what the plug is?
It’s… really not complicated. Look, take a bowl, okay?
Sit the bowl on the table in front of you like you’re going to eat out of it. This is a cavity, so it’s a mold. You’d end up with, uh, another bowl.
Now, turn the bowl over. It’s upside down and it’s a projection, so it’s now a plug. You’d end up with, uh, a big half-sphere.
Get it?
If you still don’t… Google (and reading) is your friend.
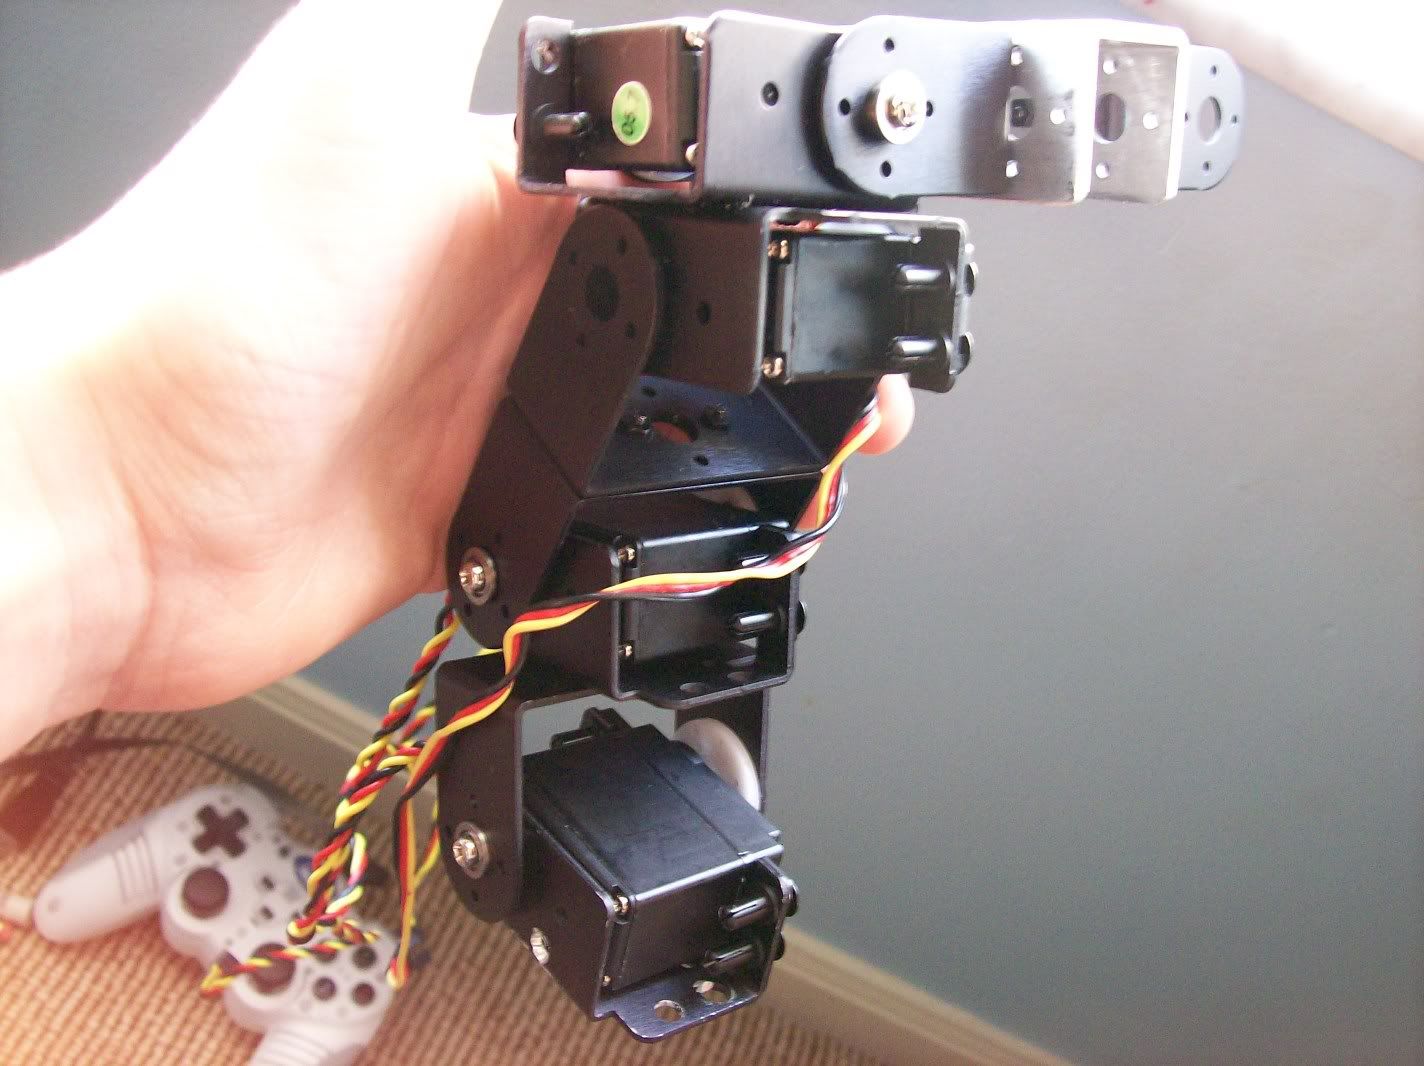
Update : Ok, SO far I’ve gotten one of the legs done, But I’m short 1 Bracket (C bracket), But as soon as I get it, I’ll be able to finish the other leg. Keep checking back here, 'cause i’ll have pics in a little while.
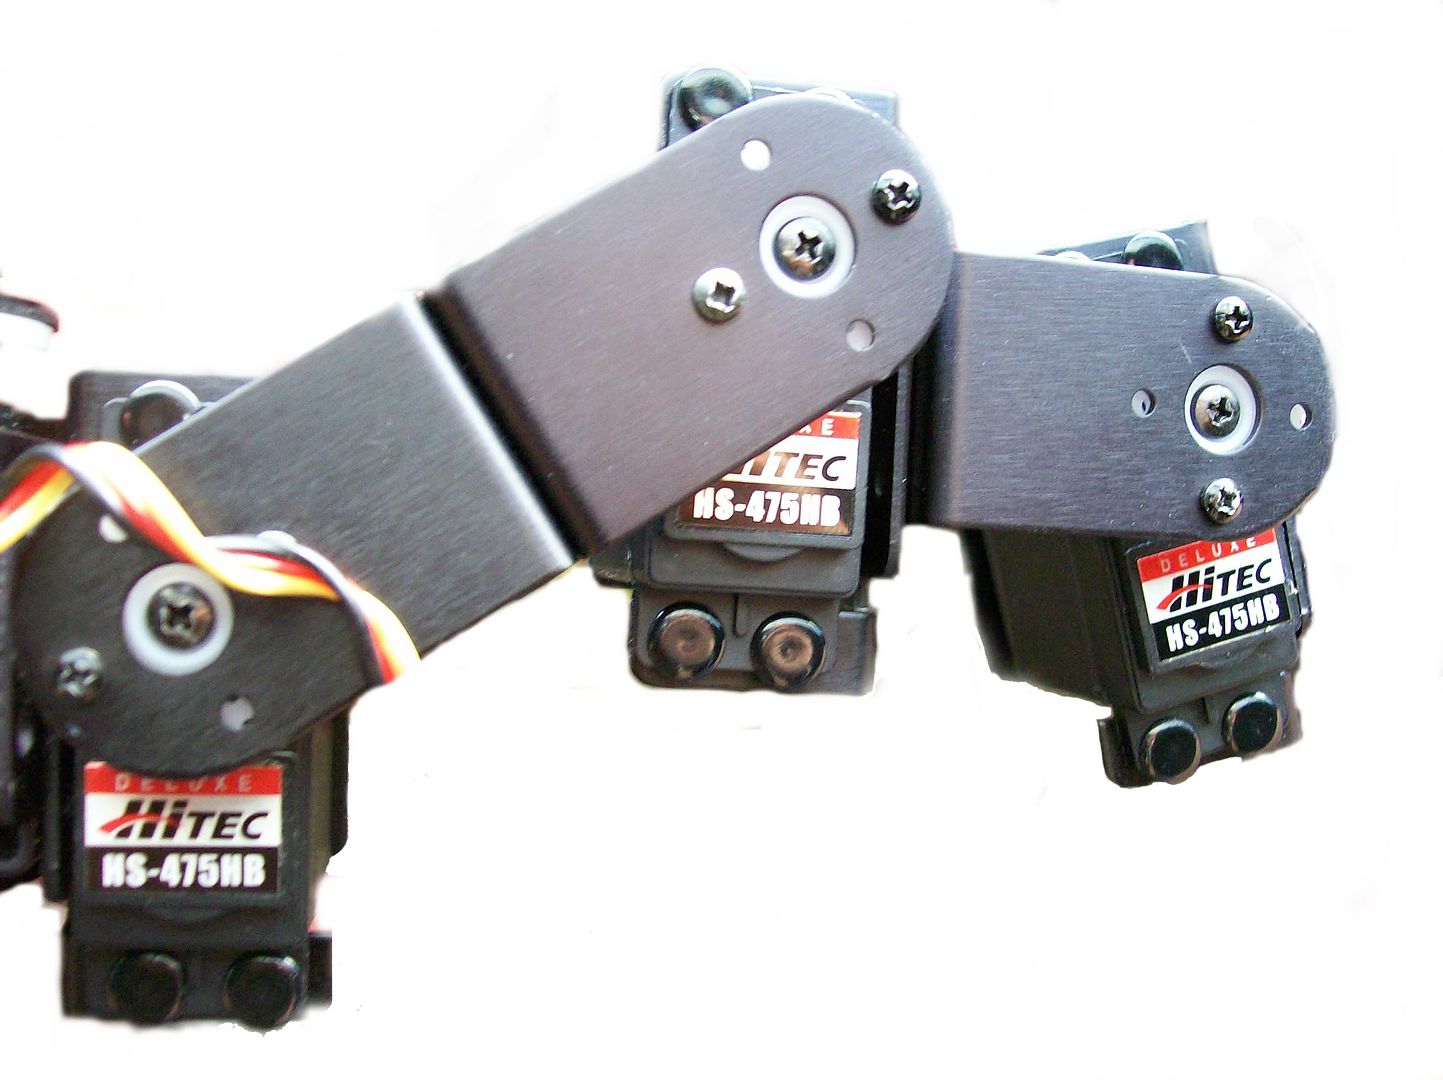
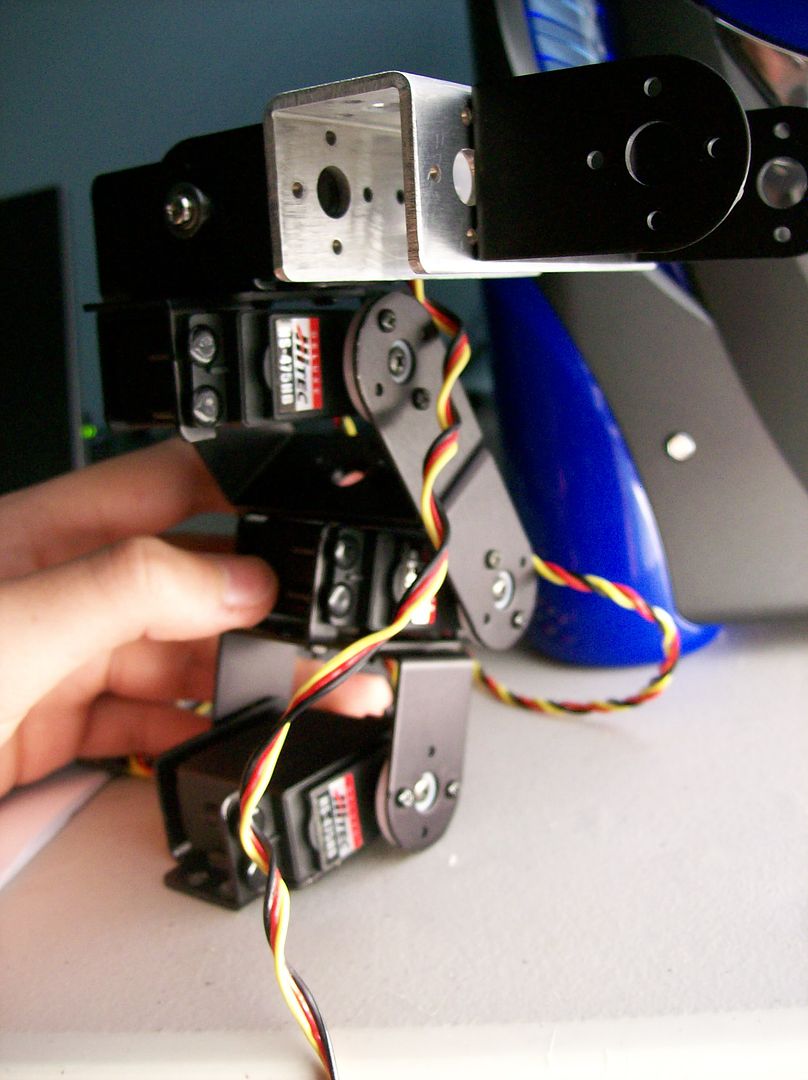
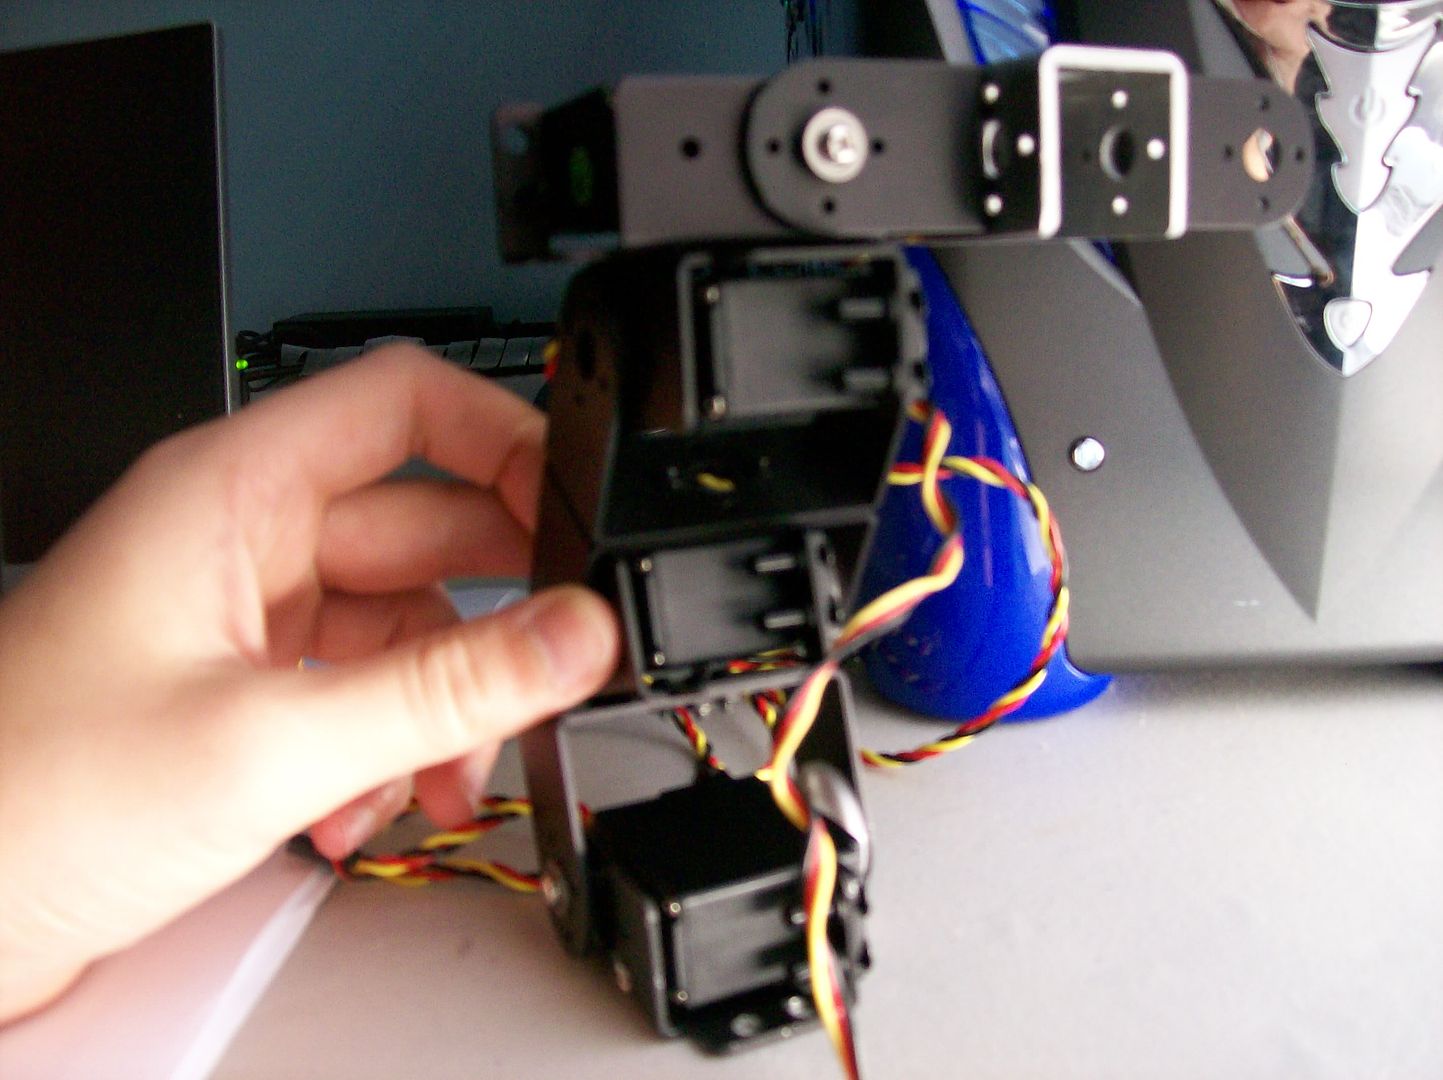
These two photos… Are they shown in what you expect to be the standing position? If so, you may experience problems with a lack of range of motion in the reverse knee joint when it comes to stepping high enough to clear the ground by any meaningful amount, since it appears that the knee joint is already fully contracted in the photos. Adjusting the position of the knee servo so that the short side of the servo’s case points toward the front (instead of the long side, as pictured) may result in a wider range of motion, since you won’t be pinching the case between the two brackets.
I guess I am wondering… how does it turn? walking forward and all should be fine, but how does it go left?
Turning might have to be done brat style where the legs are moved in opposite directions simultaneously, but it depends on the foot design he uses really. If the foot is not smooth on the bottom like the brat, then the sliding action may not work very well.
Looks that way from the photos. No hip yaw axis is shown, so I assume that foot-slide turning in in the plans. This is the primary reason why I haven’t done much with my BRAT-configured biped recently - it’s waiting for a hip upgrade, but it’s been losing the battle for attention and parts, so it’s still waiting on some more servos and brackets.
@ Seamus : I said I’m short on Brackets, But I didn’t say that I was also replacing them with Long “C” Brackets.
@ Everyone else :
-
I haven’t done the Upper body yet, Because of lack of parts.
-
Yes, The bot will turn like the brat.
-
Just so I don’t confuse everyone, as I said in my other post, i haven’t finished the other leg yet, But once I order my parts from Lynxmotion, I’ll be able to finish the other leg.
The feet are going to be custom made, and they are going to have special touch sensors on them, and I’ll make them have little shocks near the toes, to keep it balenced.
hmmm, this is really interesting… last summer I wanted to get into vacu-molding… I guess I’ll do it this summer… The idea of custom foot (you can make it real cool) plus sensors on the bottom is cool!
Wow sam, I haven’t seen you in…FER-EVER. 
Anyways, Thanks. 
Yeah, but I come once in a while to read the threads and keep myself updated.
I found this one interesting, so why not post I’ll probably be hanging out here in the christmas vacation, for the moment I’m to stressed out by all my exams.
See ya later
Exams? The’re in late Jan here in toronto…