4 DOF T-HEX robot is not turning on

Could you give the process on how I would enter in the right dimensions or at least start on it? Is there a manual on how to do this on the lynxmotion website? When you say dimensions, the dimensions of what specifically? Would the dimensions work through calibration?

. This was what I was looking at when comparing the codes. This is from github https://github.com/Lynxmotion/3DOF-4DOF-Hex/blob/master/BotBoarduino/4%20DoF%20Ready%20(untested)/BotBoarduino_CH3R_PS2/BotBoarduino_CH3R_PS2.ino and the other is a file as well from the Lynxmotion manual online for the 4 DOF T-HEX
T_Hex_4DOF_PhoenixV20.bas (48.1 KB)

Is github the only place where there are prewritten programs for the BotBoarduino of the 4 DOF T-HEX since the codes on the lynxmotion website 4DOF T-Hex Tutorial on step 16 won’t work? Are they any prewritten programs that work online without having to edit or am I having to edit online? The reason why I’m asking is because when buying the kit itself it said that the programming is already done for the robot.

Could you give the process on how I would enter in the right dimensions or at least start on it? Is there a manual on how to do this on the lynxmotion website? When you say dimensions, the dimensions of what specifically? Would the dimensions work through calibration?

  • No user guide is available for editing the code

This was what I was looking at when comparing the codes.

  • The code available on GitHub is made for Arduino microcontrollers. (HERE)
  • The original code with a “.bas” extension is code for the BASIC Atom 28 microcontroller.
  • In the above code, you also have a “T_Hex_4DOF_cfg.bas” which is probably what one would need to transfer to the “Hex_Cfg.h” for Arduino. (could be already the same but need to be verified)

Is github the only place where there are prewritten programs for the BotBoarduino of the 4 DOF T-HEX since the codes on the lynxmotion website 4DOF T-Hex Tutorial on step 16 won’t work?

  • *GitHub is a place to share code (and more for programmers) and you should not edit anything online. You need to download the code and open it in Arduino IDE. *
  • Step 16 will not work since it’s based of the old BASIC Atom 28 microcontroller.

Are they any prewritten programs that work online without having to edit or am I having to edit online? The reason why I’m asking is because when buying the kit itself it said that the programming is already done for the robot.

  • The only program is based on the Phoenix code and untested (HERE)
  • We have a disclaimer on the product page regarding the code.

Some tips:

  1. Download & Install Arduino IDE (HERE)
  2. Download the “3DOF-4DOF-Hex” repository from GitHub (HERE)
  3. Unzip the whole folder somewhere. (EX: Desktop)

  1. Download the “Arduino-PS2X” repository from GitHub (HERE)
  2. Install the PS2X library by unzipping the “PS2X_Lib” folder to the “Document/Arduino/Library” folder.

  1. Open the “BotBoarduino_CH3R_PS2.ino” project.

1 Like

Thank you for the response. In regards to the code, where would you recommend I start in regards to either contacts with people or anything else in order to understand the code so as to make the dimensions?

The installation and downloading of the IDE and files worked. Thank you! Could you specify please which body dimensions of the T-HEX I need to enter into the code in Arduino? For example, is it the start positions feet, min/max angles, the length of the tibia of the 4 DOF T-HEX. What I did was I replaced any values that was different in the ported code in the Arduino IDE from the BASIC code on the lynxmotion website manual. Would this method that I explained get the robot up and running with no issues? If so, could you please point it out. With what I understood, here is what I have done in case you want to see it. I have posted the file of the changed values of the Arduino code(it is the one that says “Copy_of_Hex_Cfg” and the file of the BASIC code. Thank you and have a good day as I appreciate you taking the time out of your day for doing this!
Copy_of_Hex_Cfg (1).pdf (12.7 KB)
T_Hex_4DOF_cfg.pdf (9.1 KB)

I can only say that it might work, since it’s actually untested.
At that point you need your replacement BotBoarduino to proceed and make sure to do the Calibration first.

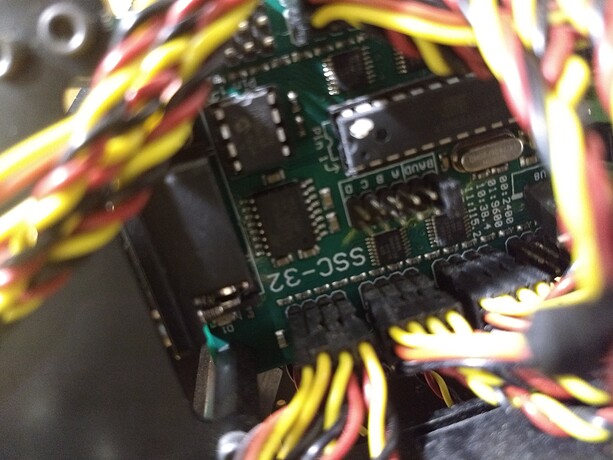
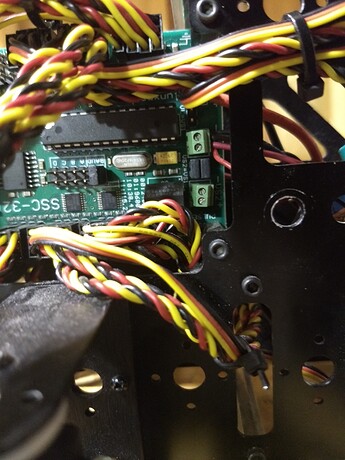
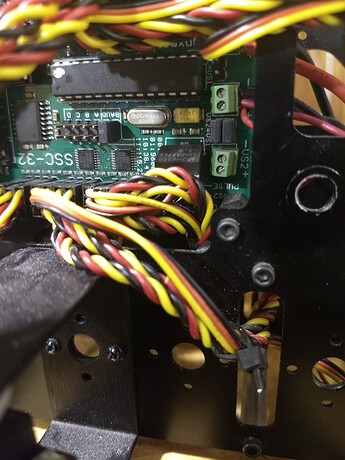
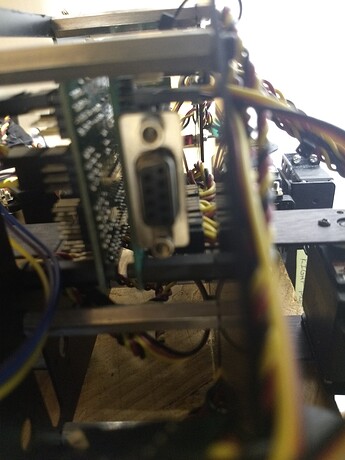
Can you take a picture of your SSC-32 ? Wondering if it’s the USB or not.

Regards,

1 Like

Are the only parts of the code that need tweaking are the body dimensions or are there more parts of the code that need it as well? Let me know if you need more clearer pictures.


In theory only the dimensions, but again this is untested code.

So you really have the SSC-32 original version, not the USB one.
In order to Calibrate the robot you will need a USB to Serial adapter (goes to the DB9 port) and Lynxterm.

Calibration is done in THIS guide.
It’s a process of moving each joints as close as possible to the angles in the guide and record them in the SSC-32.

1 Like

Well I am going to get the SSC-32U this Friday. The SSC-32 in the picture is the one I fried. Would the calibration be the same since I am getting a new SSC-32U? Have you looked at the files I sent with one in the BASIC code and the other in C? I wanted to see if the values that I inserted from the BASIC to the C code. Did only the Min/Max values need to be changed, the body dimensions, or the start positions feet values?

Also if replacing the values of the body dimensions don’t work, what would be the next best option regarding the code?

The board you fried is the BotBoarduino, probably not the SSC-32.
But you can change both if you want to be sure.

I was not going to compare the files, it’s really time intensive and right now I’m not able to do that.
The Min/Max values and any other values that configure the body and configuration would have to be transfered.

I might take some time to look at this later by picking up the T-Hex but don’t wait on me.

1 Like

Alright then. Thank you for the advice! No worries if you don’t pick up the T-Hex as I understand you are busy. Worst case scenario that the transfer of values did not do much in getting the robot up. What else would you recommend either in the code or the physical mechanisms of the robot?

1 Like

Hi I was trying to upload the program I have onto Arduino, however, when I tried to look to download the program onto my Botboarduino. All I saw was Arduino Uno and every other version of the arduino board except the Botboarduino?

The BotBoarduino use the Arduino Duemilanove bootloader, you need to select that board.
(Lynxmotion BotBoarduino Manual)

So I just realized while messing with the Arduino that the battery module (the red circuit board) doesn’t buck the voltage from the LiPo battery I have despite the number of turns made on the terminal blocks themselves from both left and right to the 5V I desire. Would I need to buy another battery module that works or is there a way to still calibrate the battery module for it to change voltage?

I don’t know which module you are referring to, might not be something we are providing with the kit.
We usually suggest NiMh batteries with a 6V direct output to the servos.

1 Like

Never mind. I got the buck converter issue solved. When centering the servos, I saw in the middle of the process this " IMPORTANT NOTE: If you have an SSC-32 or SSCU Servo Controller (USB port), contrary to the guide, DO NOT update the firmware." on this link Lynxmotion - SSC-32 Servo Controller. Why is it that the customer does not update the firmware? In attempts to still center the servos I saw on another post T-Hex 4DOF with PS2 that “If you have a USB to serial cable, you can center the servos without using the BotBoarduino as intermediary.” I plugged the servo controller into the computer with a USB. Where do I go from here?

Apologies, but dialfonzo will be on vacation for the coming weeks, so I can see if I can help. Can you summarize the current issue and where in the guide you are stuck? Note that we do not have any official sample code for the 24DoF T-Hex (only for the 18 DoF T-Hex) which is why we do not offer a complete 24DoF T-Hex kit. Can you confirm if you are using a Bot Board 2 or a BotBoarduino as the main microcontroller?

Mechanical setup: 3DOF / 4DOF Hexapod Assembly Guides
18DoF electronics setup and code: http://www.lynxmotion.com/images/html/build99f.htm

These legged robots are not considered toys and require the customer to read through and understand all associated guides, including that of the SSC-32U and BotBoarduino boards:
http://www.lynxmotion.com/images/html/build185.htm

A common omission is that customers often do not install the PS2 library (if that’s how they plan to control the robot) in the Arduino IDE.

1 Like

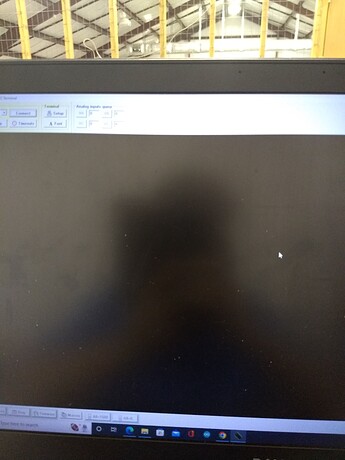
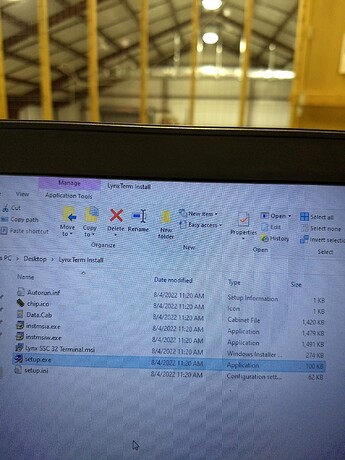
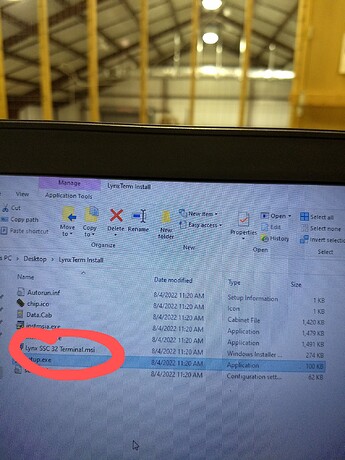
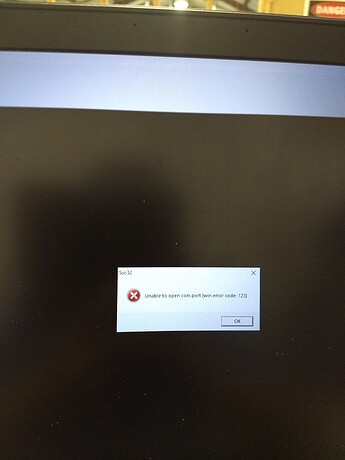
The board I have is the Botboarduino V 1.0. Here is the problem. I accidentally fried the circuitboards of the 4 DOF T-HEX. I replaced those said circuitboards and tested every single component to see if they were working by using a servo tester and a multimeter. I doubled checked the wiring and the circuitboards and all of the parts are working as should be. The problem is when I uploaded the software from here https://github.com/Lynxmotion/3DOF-4DOF-Hex into the robot after putting in brand new parts. The robot didn’t move. When I pressed the start button on the ps2 controller it did make a sound but that’s all. I wanted to see before checking the software if calibration may be the problem (however I am beginning to realize that maybe it is not although confirmation is needed). I was on step 1 of the calibration tutorial and got stuck. I wasn’t sure to connect the servo controller to the computer via USB while downloading and installing Lynxterm or after it as it seemed unclear in the instructions. A few problems came up, one, when I connected the servo controller to the computer while downloading and installing lynxterm I didn’t get any feedback as said in the manual “The green LED should light and stay on until it receives a valid serial command” which I didn’t get. All I got from the board physically was no blinking of lights or sounds. The whole time there was no flashing of the PWR LED or the A or B LED meaning the power is on but nothing is received. Second, when I downloaded lynxterm there was one file. I unzipped it by putting it in desktop. I then wasn’t sure what to do afterwards as I was left with files. I wasn’t sure what files I needed or not needed or what to do with those files at all. Third, from what I said in my second problem that led me to believe that if the servo controller is not communicating with the computer then the problem could possibly mean the servo controller and the Botboarduino was not communicating with each other at all. Is there a way to check the communication between these boards? Third, why am I not supposed to update the firmware? Fourth, I went on the forum to see if there was another way to center the servos to which I found this T-Hex 4DOF with PS2. However, I am confused on what is the step by step instructions to “center the servos without using the BotBoarduino as intermediary” using a USB to serial cable? Fifth, is there anything hardware related that is affecting the robot from moving besides the communication between the two boards that you could think of or is the main problem the software. If there is a software issue, would there be anybody on this forum that could help me step by step or would I be able to ask the creator of the code as of right now (to which I think may be scharette). Sixth, as shown in one of the pictures with a red circle. I pressed on the link and I go this black screen as shown in the pictures. However, I wasn’t able to interface with it.


Going through the reply, we picked out each of your points:

The problem is when I uploaded the software from here https://github.com/Lynxmotion/3DOF-4DOF-Hex into the robot after putting in brand new parts. The robot didn’t move.

Seems like the issue below, but also want to confirm the code uploads correctly (ensuring the PS2 library is working).

{First} I wasn’t sure what files I needed or not needed or what to do with those files at all

Assuming you have the BotBoarduino (Arduino compatible), you would need the BotBoarduino code (the other two on the page you provided are not at all compatible). Note that the 4DoF is untested.

{Second}, from what I said in my second problem that led me to believe that if the servo controller is not communicating with the computer then the problem could possibly mean the servo controller and the Botboarduino was not communicating with each other at all. Is there a way to check the communication between these boards?

In order to have the SSC-32U communicate with the computer directly, the easiest approach is to disconnect the BotBoarduino completely and set the VL jumper to USB. Note that for the servos to move, VS needs to be powered.

Third, why am I not supposed to update the firmware?

Assuming you purchase the SSC-32U recently, it’s already running the latest firmware.

Fourth, I went on the forum to see if there was another way to center the servos to which I found this T-Hex 4DOF with PS2. However, I am confused on what is the step by step instructions to “center the servos without using the BotBoarduino as intermediary” using a USB to serial cable?

It’s easiest to center the servos by connecting the SSC-32U directly to the computer rather than having the BotBoarduino as intermediary.

Fifth, is there anything hardware related that is affecting the robot from moving besides the communication between the two boards that you could think of or is the main problem the software. If there is a software issue, would there be anybody on this forum that could help me step by step or would I be able to ask the creator of the code as of right now (to which I think may be scharette).

Assuming the robot was working and walking correctly before, it’s unlikely that the servos or assembly are wrong.

Sixth, as shown in one of the pictures with a red circle. I pressed on the link and I go this black screen as shown in the pictures. However, I wasn’t able to interface with it.

It really sounds like a board configuration issue. To communicate directly with the SSC-32U, disconnect the BotBoarduino (Tx, GND, VL), move the jumper from EXT to USB (so the USB powers the onboard microcontroller), power VS(providing 6V to the servos), then open Lynxterm and connect.

Hello, I am unsure on how I would check if the PS2 library is working. I have been thinking about it but I am confused on how you could find other ways to test the PS2 library since the only way I am thinking is simply if the robot just moves because the PS2 library is in the circuitboard. Regarding installing the IDE and the library, I have just followed the videos that dialfonzo had posted. What kind of information would you like for me to provide for you to diagnose the issue I am having? If I am plugging the SSC-32U to the computer, why would I move the jumper from EXT to USB when that is on the Botboarduino and not the SSC-32U. When I plugged the SSC-32U in, I don’t see anything physical happening to the servo controller. When you said " It really sounds like a board configuration issue. To communicate directly with the SSC-32U, disconnect the BotBoarduino (Tx, GND, VL), move the jumper from EXT to USB (so the USB powers the onboard microcontroller), power VS(providing 6V to the servos), then open Lynxterm and connect.” Again I still don’t understand why are you moving the jumper from EXT to USB on the BotBoarduino when the servo controller is being connected. What do you mean by “power VS”. The only “VS” I see on the Botboarduino is VS=VL jumper and the screw terminals where is says +VS-. “In order to have the SSC-32U communicate with the computer directly, the easiest approach is to disconnect the BotBoarduino completely and set the VL jumper to USB. Note that for the servos to move, VS needs to be powered.” When you say “VS” needs to be powered. Do you mean “VS” on the servo controller or on the BotBoarduino? If so, “VS” by itself I only see on the screw terminal blocks. I see “VS” pins but I don’t think that is what you are referring to.